Monthly Archives: October 2010

Pregnancy and Infant Loss Remembrance Day

It wasn’t until this morning that I knew it was Pregnancy and Infant Loss Remembrance Day.

A few years ago, this day wouldn’t have meant much to me.

But in the past few years, I have seen a few friends loose children unexpectedly.
I have seen children die expectedly.
(It hurts me to even write that, because no child should be expecting to die.)
And I have had countless friends who have had miscarriages.
(I’m sure that I knew people who’d miscarried before that, but I just wasn’t as aware.)

Once you have a miscarriage, you are part of a fellowship of women…
One that no one really wants to be a part of,
But from whom you can draw strength and inspiration.
And these people are the ones who understand this(which I recently wrote to a friend via email):

“After my miscarriage, with my next baby I was too scared to be excited.  Too scared to dream.  Too scared to think ahead.  Even after having a happy, healthy baby…this time was the same way.  Miscarriage steals a part of you. The part that lets you hope and dream with reckless abandon.

I was so sick this pregnancy, and although I hated being sick I welcomed it because I knew that meant something was still in there.  And a few weeks ago when I finally stopped throwing up every.single.day, instead of being happy and relieved…I panicked.”

Miscarriage is hard.
Miscarriage is different for everyone.
But here are a few things that I wrote about my miscarriage.
Reading about other people’s experiences helped me tremendously.
And I hope that these posts can help others, too.

So today I remember a host of children…some whose faces were seen, some who faces only live in our minds.
And I pray for those who are knee-deep in the fresh pain of pregnancy loss.
I am praying for you.

Painting and Pumpkins

For the past few weeks, I’ve been working on a big room re-do for the kids which has involved  A LOT of painting.

The kids wanted to help.  They really did.  And I let them paint one little section of the closet.

But then I couldn’t bear to see more paint drip drip drip onto the carpet,

So I decided to buy a white shower curtain and let them paint it.

And I sent them out in the yard with paints and brushes and a shower curtain…

And the weather was perfect

And the sun was shining in all the right places…

And I thought, “Ya know…they’re going to ruin their clothes.  Why don’t we just let them paint in their undies?”

And Marshall looked at me like I was nuts, but he obliged(because he knew the plan was brilliant).

And I took some really great pictures.  Really, really great pictures.

Pictures that I really, really love.  A lot.

And I want to share them with you, but…I just can’t.

It just doesn’t seem right to show them in their undies online.
(Well, baby in diapers isn’t quite the same…)

But they had so much fun and the pictures were so cute!

Here are a few…of, you know, happily painted hands and feet and such…

How to Cut an Apple

One thing that I have never learned to do well is cut an apple.
I assumed it would be in the handbook they gave me when I came home from the hospital with Carter, but alas it was not.
And I have been sending my kids to school with poorly cut apples since…

But then one day it dawned on me.  Why don’t I just cut an apple kind of like I cut a mango?

Sit the apple upright and cut off four sides, leaving all the seed and core in one square piece!
Then you can just slice up the pieces and wah-lah!  Pretty apple slices!
And best part?  Super easy clean-up!

You’re welcome.

12 Crafts of Christmas{Personalized Wall Clock}

**Originally posted here in November 2008.**

I originally planned on showing how to make a Photo Clock like you can order from Snapfish for almost $50, but I didn’t have a photo on hand.   So…I decided that the kids could draw a picture instead!   The whole project took about an hour from beginning to end, but that did include the 20 minutes or so my kids took coloring.

Instead of spending $50 and waiting for it to be delivered, you can spend around $5!!

So…you only need a few things: pen, scissors, a large(12×12) sheet of paper, a large photo(based on the size of your clock, you may need an 8×10 or 11×14), a tiny screw driver, and a clock.  I grabbed a cheap $4 wall clock from Walgreens today(like the one shown below), but you could use any one that has screws on the back…some of the really cheap ones are glued together.

wall-clock01

I’m going to give you a ton of pictures and a ton of directions…it’s really idiot-proof though.  I’m just trying to be really specific.

To start, unscrew all the little screws on the back in order to take the glass front off.  Be sure to set the face of the clock on something semi-soft so that it won’t get scratched.

wall-clock-02

Next is probably the hardest part:  You’ll have to take off the second, minute and hour hands.  For most clocks, you just have to pull on the second hand and pop it off.  Once you get it off, it’s really easy to get the other two.  When you’re pulling, you may think that you’re going to break it…you won’t…probably.  If you do break it, you’ve only lost four bucks!

wall-clock-03

Once you get all the hands off, it will look like this:

wall-clock-05

Next you’ll want to turn the clock over and carefully trace the edge of the clock on your 12×12 paper.  I say be careful because you’ll have the little center part sticking out.  If you break it, you’ve broken the clock.  So don’t break it!

wall-clock-06

Once you have it traced out, you will cut out the circle.  Remember that you’ll also want to trim a little bit off from what you traced because the inside of the clock is smaller than the outside.  It’s always better to make it too big than too small though…you can keep trimming it until it fits perfectly.

Once it’s all cut out and looks like it’s going to fit, you’ll turn the clock back over.  Center the circle over the clock and gently push down on the center post.  You probably won’t be able to push hard enough to puncture the paper without breaking the post.  So just make an indentation that you can punch out later.

wall-clock-08

I then used my little screwdriver I had on hand to make a hole where the indendation was, and make it all smooth.

wall-clock-10

Now you’re to the fun part!  Since I didn’t have a picture, I let the kids color on the white circle I had cut out.  If you were using a photo, you would take the circle and use it as a template for cutting your photo into a circle.  But remember to take note of where the clock hands will be once you place your picture in the clock.  You probably don’t want the hour hand sprouting out of Uncle Bob’s nose, or even worse…someone’s crotch!  (Or maybe you do…because really, that’s funny!)

wall-clock-111

You’re getting close now!  Take your photo or artwork and glue or tape it onto the clock face.  I like to use double sided tape, but you could use whatever you have available.

wall-clock-12

Then you’ll need to put the hands back on(usually in the hour, minute, second order).  Make sure that they are all flat.  If they got bent when you were trying to get them off, they won’t run smoothly.  But you can easily straighten them back out.

wall-clock-13

Now just screw the clock back together…

wall-clock-14

And you’re done!  Congrats!

wall-clock-15

************************
Want to see more of my crafty creations?

Check out the other 12 Crafts of Christmas:
Week One: Silhouettes
Week Two: Personalized Wall Clocks
Week Three: Glass Etching
Week Four: Fancy Fingerpaint Art
Week Five: Freezer Paper Stencils
Week Six:  Tie-Knot Fleece Blanket
Week Seven: Jewelry: Ribbon & Pearl Bracelet, Wool Ball Necklace, DIY Button Earrings
Week Eight: Chalkboard Paint Ideas: Glasses, Chalkboard, Candle, Love Box
Week Nine: Frugal Finds
Week Ten: Personalized Pendants
Week Eleven: Edible Edition

Baby K’Tan Sling Review

A few weeks ago, I was searching for a new sling.
(The Hotslings I’ve always used are no longer being made.)
And then a friend mentioned the Baby K’tan on Twitter.

I immediately went to the Baby K’Tan website and I knew this was a sling I would love!
On top of being able to use it like my old pocket slings(Hip Position),
I could spread the weight around even more by using the Two-Hip Position.
That has really become an issue as Asa has gotten bigger!

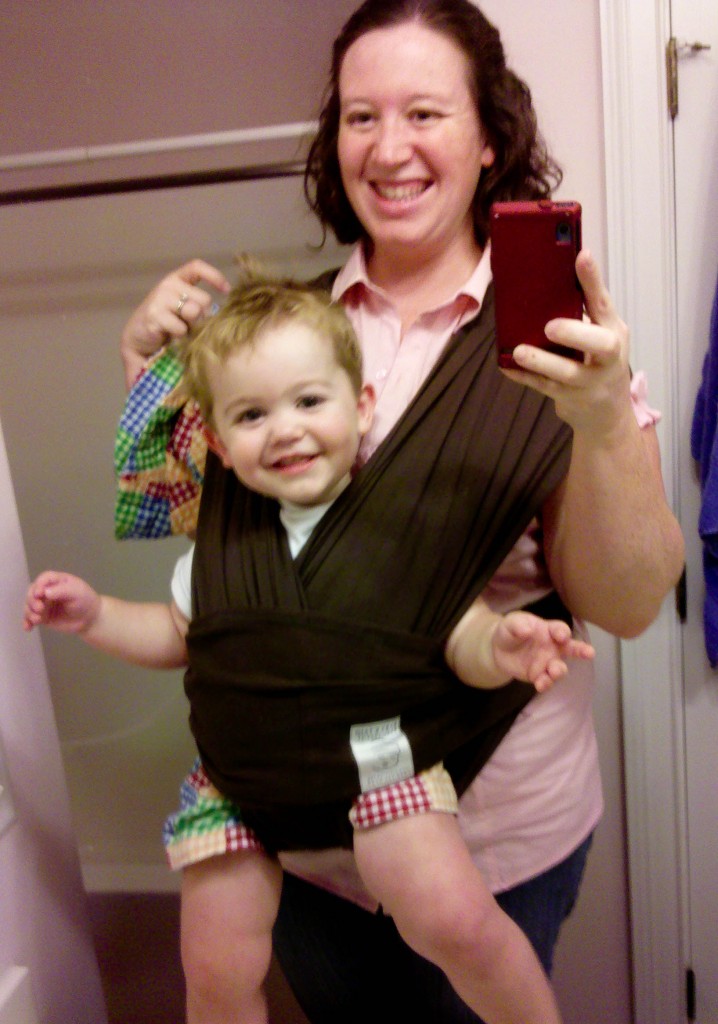
When I have to rouse Asa to go pick up the big kids from school, you are likely to find him snuggled up close in the Hug.
But usually?  Usually we’re sporting our new fave, the Adventure hold.

AND(not that I’ve tried it) but you can easily carry two babies at once!
(Hear that moms of multiples???)

Happy Baby, Happy Mama!

(Pardon the blurry Droid picture.  We’re always on the go!)

One of the other things I love about the Baby K’Tan is the fabric.
It’s made of a super, super soft cotton that breathes and is comfortable for mom and baby.
(I wish all my tee shirts were made out of this material!)

And at only $59.99, it’s not as pricey as some other carriers.
(I like that a lot!)

The only “negative” I had was with sizing.
I am short and I frequently waver between medium and large.
The sizing tips say that if you are 5’2″ or under that you should order the smaller size.
So I ordered the medium.
It fits well, but I think that maybe I should have gotten the small.

I can’t wait to get my sweet little girl in this sling!
Viva la babywearing!

(Click here to watch videos on how to wear the Baby K’Tan.)

*Dear FTC, I contacted Baby K’Tan because I was interested in their product.
They were kind enough to sell it to me for a reduced price so that I could try it out.
I chose to review this product because it is something I love and a company that impresses me.

One piece of fabric changed my life.

When I first had Carter, I’d never heard of babywearing.  But by the time Lydia came along, I was a nanny to 3 girls and I had a 19 month old.  Lydia was such a fussy baby and often the only way to even somewhat console her was to hold her.  But chasing after Carter while helping the “big girls” do homework…well, it was stressful.  Not only for me, but for all of the kids.

I quickly discovered that I had to either grow extra hands or figure out a new plan.

Enter the Hotsling.
I loved my first hotsling so much that I got another one.
And then I figured out how to make them myself…
And then I made them for me and for a few of my friends.

But I’ll admit…these pouch-style slings aren’t for everyone.
I had friends who tried it and hated it!
I had friends who tried it and said it wasn’t comfortable.
I had friends who said it just wasn’t for them.

Babywearing isn’t for everyone.
And every sling is not for every person.

I tried other types of carriers and slings and yet I always returned to my trusty hotsling.

When I found out that I was going to be having another baby girl, I immediately went to the Hotslings website to see if I could find a great deal.  Imagine my surprise when I found out the company was gone.  Closed.  What in the world?  A warning from the Consumer Product Safety Commission (see a list of sling-related CPSC announcements/recalls here) essentially said that parents/caregivers should take care when using slings.  Yes, several babies did die while being carried in slings.  Yes, this is horribly tragic.  But with proper precautions, babywearing can be safe!

I am not a crunchy-granola mom.
I am not an attachment parenting mom.
I am not an organic-buying-homemade-baby-food-making mom.
(Although there’s nothing wrong with those types of moms!)

But I am a mom who knows what worked for me.
I am a mom who knows that babywearing(when done properly) is safe and comforting for mom and baby.
I am a mom who believes (without a shadow of doubt) that without my sling, I couldn’t have done the things I did.

So now here I am, about to have my fourth baby and
if ever I needed those extra arms, it’s now!
Tomorrow I will be reviewing the newest baby carrier that I have tried.
It really is a fantastic product-one that I hope that will continue to be around for years to come.

(I didn’t want to mix my review post with this one because, for some reason, it just didn’t seem right.
But I do firmly believe in the positive effects of babywearing
and I hope that many other moms(and dads!) will be able to discover the joys of babywearing!)

Want to know more about the Baby Carrier Industry Alliance?  Click here.
Want to know more about the BCIA’s position on slings?  Click here.
Want to read more posts from other babywearing moms?  Click here to visit Stephanie’s blog.

12 Crafts of Christmas{Silhouettes}

A few years ago I wanted to make a unique keepsake gift for my mom and mother in law(and myself).
Once I settled on making hand-cut silhouettes of my kids, I did what most people do:
I googled directions!

I found a few good websites, but I decided I was too lazy to set up a projector and trace out his shadow.
And I was too much of a perfectionist to do a hand drawn version.
So I looked at all the options and decided to try it my own way.
Here’s how I make silhouettes.

**Originally posted in December 2008**

Step One: Put your subject(kid, cat, dog, whatever) against a white or light background, and get a good profile picture.

t-sil

Step Two(if you have Photoshop): Go into Photoshop and use the “Magic Wand” tool to select and delete the background.
I turned mine black and white, so the lines would be more distinct.
Then you can print(on white cardstock for best results) the back-groundless picture and cut it out.

Step Two(if you don’t have Photoshop): Print a copy of  the picture at a local store photo lab and cut out the shape.

t-sil-bw-2

Step Three:  Use the picture/shape you cut out as a template, and cut out the silhouette onto a piece of cardstock.
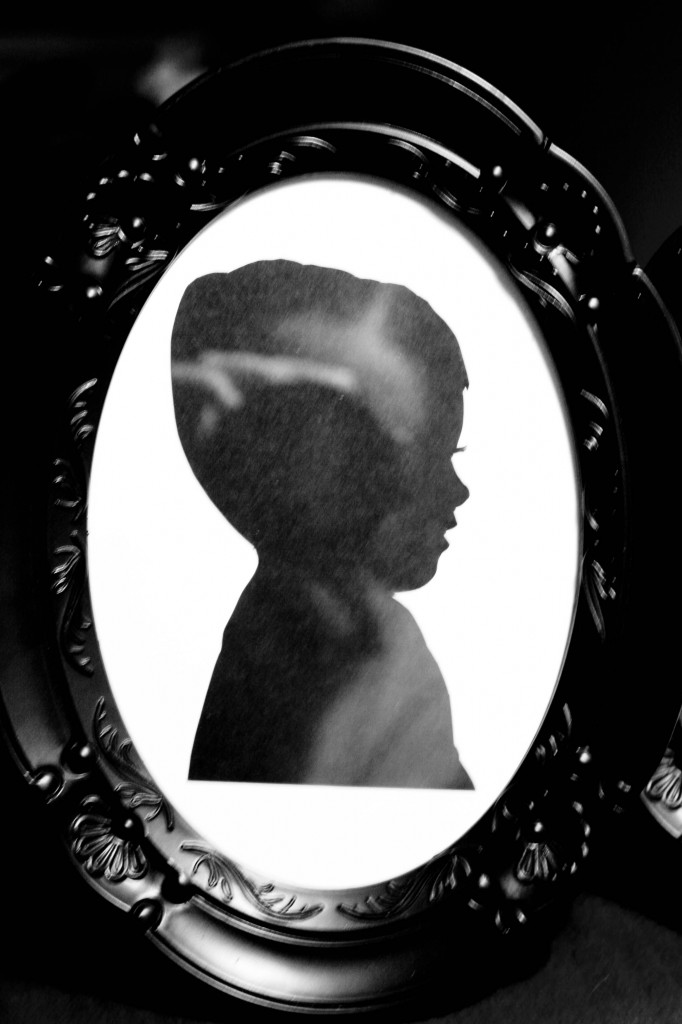
I used traditional solid black.  (Eyelashes are the hardest part…I suggest using little bitty manicure scissors.)
But you could do some really fun and funky stuff with all different kinds of crafting papers!

Step Four:  Mount it on a background(once again, I used traditional white).
Frame, and  you’re ready to give this keepsake!
(The only picture I have of this finished craft is the framed one in which you see my reflection. But you get the idea!)

******************
Want to see more of my crafty creations?

Check out the other 12 Crafts of Christmas:
Week One: Silhouettes
Week Two: Personalized Wall Clocks
Week Three: Glass Etching
Week Four: Fancy Fingerpaint Art
Week Five: Freezer Paper Stencils
Week Six:  Tie-Knot Fleece Blanket
Week Seven: Jewelry: Ribbon & Pearl Bracelet, Wool Ball Necklace, DIY Button Earrings
Week Eight: Chalkboard Paint Ideas: Glasses, Chalkboard, Candle, Love Box
Week Nine: Frugal Finds
Week Ten: Personalized Pendants
Week Eleven: Edible Edition

12 Crafts of Christmas

Did you know that Christmas is only 12 weeks away?

I really hate when stores put out Christmas stuff when it’s still hot outside.
It really, really annoys me.
But at the same time, I’m notorious for starting my Christmas shopping(or crafting) in July.

I’m a little behind this year, though.
And in an effort to keep myself on track
(and keep to my budget),
I’m trying to do/make/buy a little bit at a time.

So for the next 12 Mondays I’ll be sharing with you twelve of my favorite crafts!
Some of them are ones I’ve already made and some are new for me.
I’ll be taking pictures along the way and I hope that you’ll have fun and be inspired to craft this Christmas.

I’ve planned gifts for grandmothers, grandfathers, moms and dads, kids, teens, teachers and friends.

Coming up first tomorrow is a fun and easy keepsake that grandparents are sure to love!

Project 365 is complete!

Last October I started something called Project 365.  I’d tried to start it several times before and always made it a few days and then forgot.  But this time for an entire year I took a picture a day.  I didn’t say that I took a good picture a day, but I have to admit that as I go back and look at my pictures I can’t help but notice that my photography has gotten better.  I still have a lot to learn, but just looking at how far I’ve come in a year encourages me to try harder, learn more.

I love that some of the images I have are beautiful and unique, but I also love that some of the shots are of plain old, hum-drum pictures.  Clean bedrooms, dirty dishes, my floors, picture frames…every day ordinary stuff that will surely be forgotten with time.

Was Project 365 hard?  Sometimes.
Did it force me to think outside of the box? Sometimes.
Am I glad I did it?  For sure.
Will I do it again?  No doubt.

But I am going to take a break…and I’ll start back up on January 1, 2011.
(How did it get to be 2011 already???)

I wanted to pick my favorites to show here, but I’m having a hard time choosing.
So…I picked a few of my favorites!