
One of my favorite necklaces is one I found on Etsy last year, a custom photo pendant from Tiny Trees Boutique.
I actually have several of her pendants: a picture of my kids, an old-fashioned camera, and an floral one.
And then a few weeks ago I learned about Dimensional Magic from Infarrantly Creative,
when she vlogged about how to make paint chip necklaces.
And I decided to try my hand at making my own pendants.
We have friends who are adopting from Ethiopia (they leave TOMORROW!!!!!!!!!!!!!!!),
For the the mom, I made a pendant with the shape of Ethiopia surrounding the word “enat”, which is mom in Amheric.
For the girls, I made similar pendants that say “ehit”, which is Amheric for sister.
But I forgot to take pictures!
(Are you as shocked as I am??)
And I had great intentions of making a pendant this weekend and photographing each step.
And well, my weekend kind of didn’t go as planned and I didn’t get around to it.
So here are the hastily assembled pictures from this morning.
They aren’t the best pictures I’ve ever taken, but you get the point.
(And the pendant looks a lot better in real life than it does in these photos!)
HOW TO MAKE A PERSONALIZED PENDANT
**This project should be done on top of a piece of wax or freezer paper.**
Step One: Find pendant bases. This was the hardest part of the whole process. (Not even kidding!)
I finally found these at Hobby Lobby. The oval one is much thicker and more durable but takes a lot longer to dry.
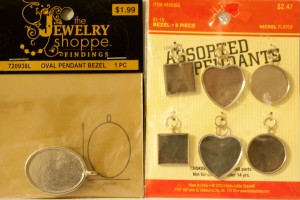
Step Two: Trace your pendant base and cut it out to make a template for what you’ll want to cut.
It doesn’t have to be perfect, but make sure it’s a teeeeeny bit bigger than the size you actually want.
Step Three: Print out your picture or use scrapbook paper and, using the template, cut out your shape.
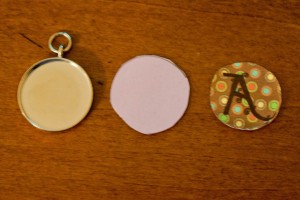
Step Four: Use plain old Mod Podge to paint the inside of the pendant.
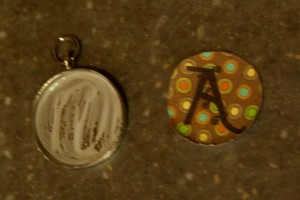
Step Five: place the paper on top of the mod podged base and smooth it out.
Then cover it with another layer of Mod Podge and let it dry for at least 20 minutes.
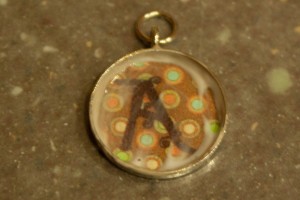
Step Six: Once it is dry, it’s time to add the Dimensional Magic.
You’ll want to start out by putting a dot of DM on the wax paper.
(You will get an air bubble every time you start using it and you don’t want that on your pendant!)
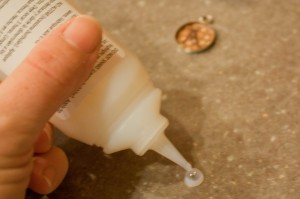
Step Seven: WITHOUT turning the bottle back over, you’ll cover the entire pendant with DM.
I like to start out edging the whole thing and then filling in to the center.
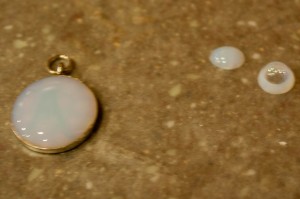
(Notice the air bubble off to the side…you wouldn’t want that on your pendant.)
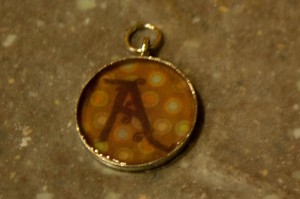
Step Eight: Wait for the DM to dry. The bottle says that it takes about 3 hours to dry,
but I’ve been doing them at night and letting them dry while I sleep.
That way I’m not tempted to touch it and get my grimy little finger prints on there!
*******************
Want to see more of my crafty creations?
Check out the other 12 Crafts of Christmas:
Week One: Silhouettes
Week Two: Personalized Wall Clocks
Week Three: Glass Etching
Week Four: Fancy Fingerpaint Art
Week Five: Freezer Paper Stencils
Week Six: Tie-Knot Fleece Blanket
Week Seven: Jewelry: Ribbon & Pearl Bracelet, Wool Ball Necklace, DIY Button Earrings
Week Eight: Chalkboard Paint Ideas: Glasses, Chalkboard, Candle, Love Box
Week Nine: Frugal Finds
Week Ten: Personalized Pendants
Week Eleven: Edible Edition

