In October of last year, I started a little series here called “12 Crafts of Christmas” where I showcased a idea or two each of the 12 weeks prior to Christmas. I knew I wanted to do it again this year, but when October came I wasn’t anywhere near having my act together. I was just trying to make it to Halloween with all 4 children healthy. (We made it!) But I still wanted to do 12 crafts, so I have decided to do two crafts a week for the next six weeks.
Today’s craft is a little jewelry tutorial. I did originally see this idea on Pinterest and it was linked to a tutorial.
But sometimes I see people post things that they’ve made and I think, “It can’t really be that easy, can it?”
This was one of those times, and I’m here to tell you: This is seriously easy, but it does take a little patience.
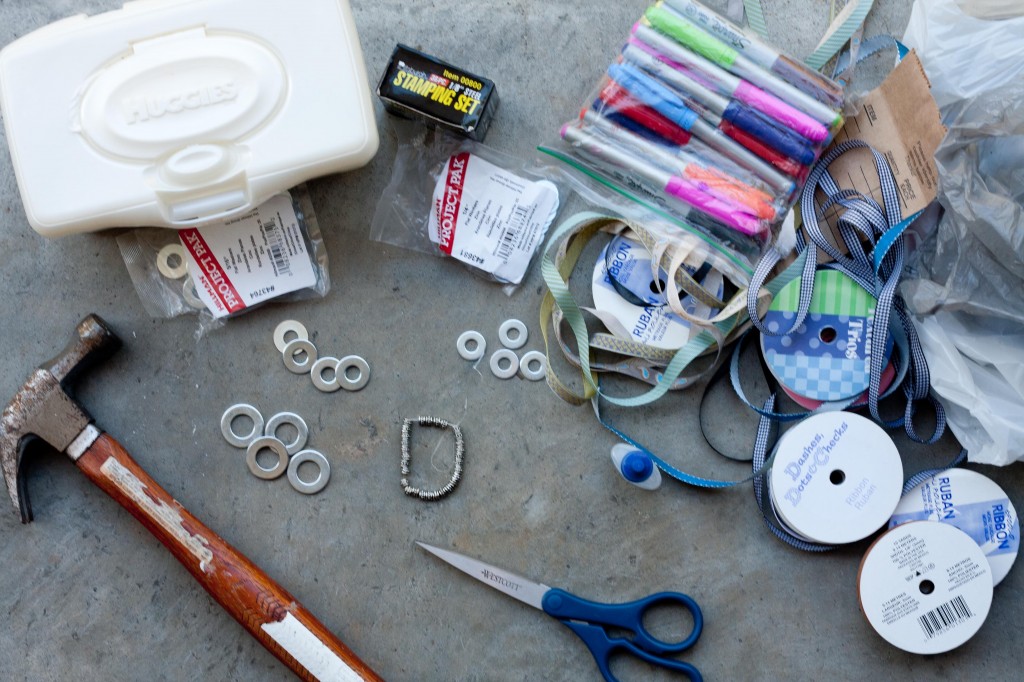
For this project you will need:
A hammer

Ribbon
Jewelry bead
Sharpie
Wet wipes
Scissors
A steel stamp set like this one from Harbor Freight.
Metal Washers (I bought three sizes starting with 1/4″ and going up)
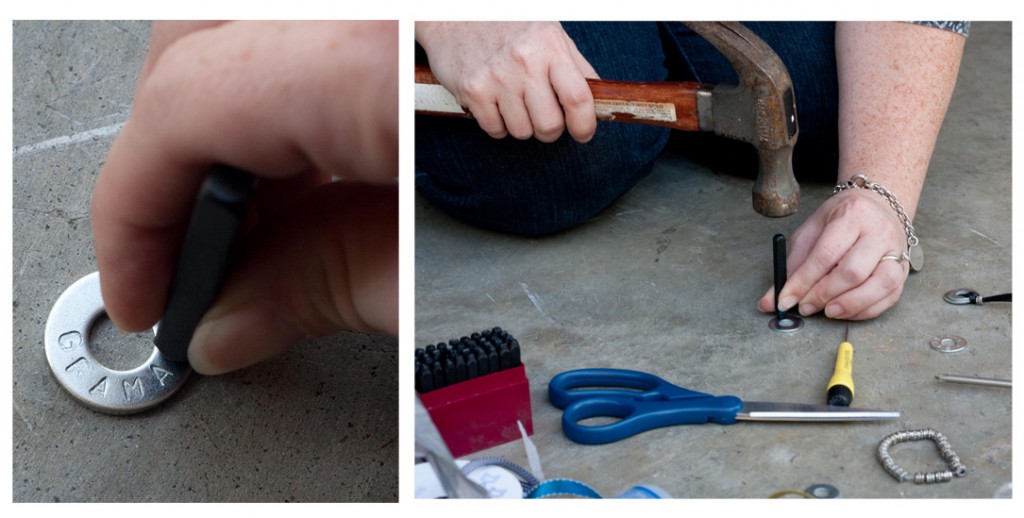
Start by placing the washer on a flat and sturdy surface.
(I would not recommend doing this on your kitchen table!)
Using the letters of the stamp set, carefully hammer in the letters you want to use.
(Be sure that the letters aren’t facing backwards before you hammer!)
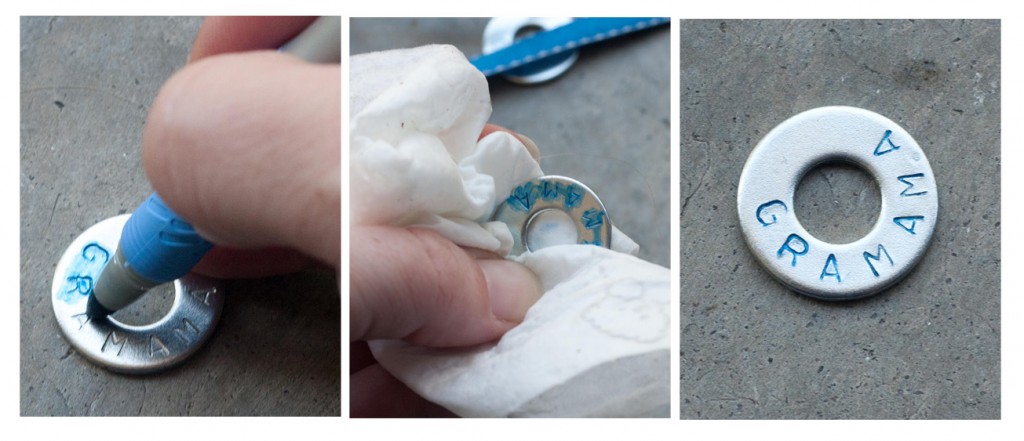
Once you are finished hammering, use a Sharpie to color over the letters.
Make sure the ink gets down into the grooves.
Before it gets too dry, gently wipe off the excess with a wet wipe.
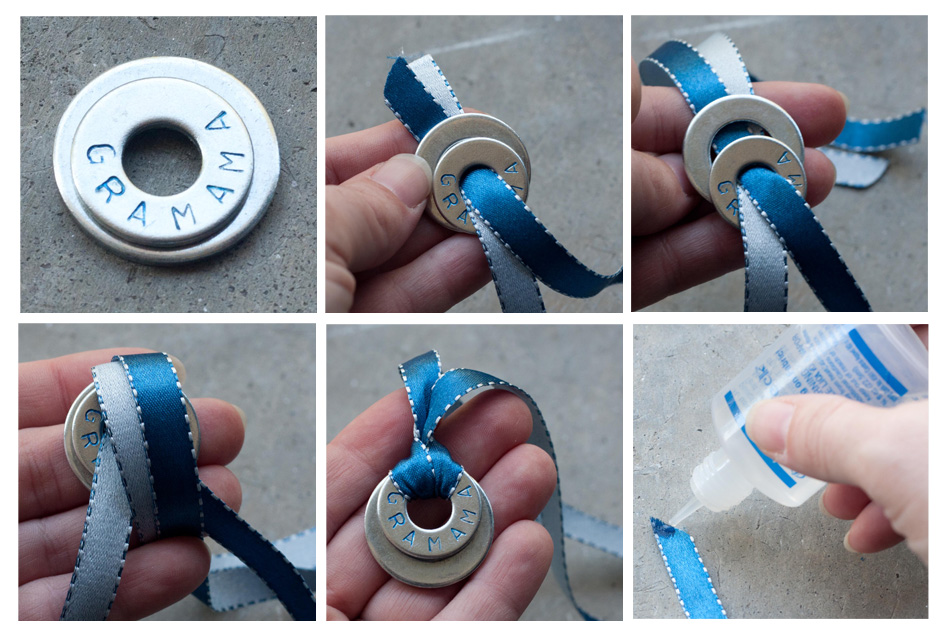
Thread the ribbon through the washer(s) from front to back (as shown).
Push the ribbon through the hole created and tighten.
Add jewelry bead to secure the spot of the knot.
Trim the ends of the ribbon and then use FrayCheck to keep it from unraveling.
For these necklaces, I simply tie a bow in the back.
But if you really wanted to, you could easily add a clasp.
See, wasn’t that easy? I will admit that I threw away several washers that I ruined at first.
It takes a little practice to get used to lining up the letters and hitting it just hard enough.
Over all, it took me about 10 minutes to make one necklace.
***
Want a fancier version of this necklace? Click here to see how to add a pearl.
Want to make a bird nest necklace? Click here to find out how.
Want something with a little less sparkle? How about these tee shirt bracelets?
*******
12 Crafts of Christmas 2011
1. Personalized Necklaces
2. Button and Lego Wall Art
3. Personalized ClipBoards
4. Fabric Covered Wire(Wall Art)
5. Stationary
6. You & Me Books
7. Personalized Welcome Mat
8. Personalized Dessert Carrier
9. Kid’s Artwork Cup
10. Ornaments
11. Sewing Tutorials
12. Photo Display Block


