Ok, so I’ll admit something to you. This craft wasn’t nearly as easy as I thought it would be.
So I’ll show you what I did and then I’ll tell you how you should do it if you want to save a lot of time.
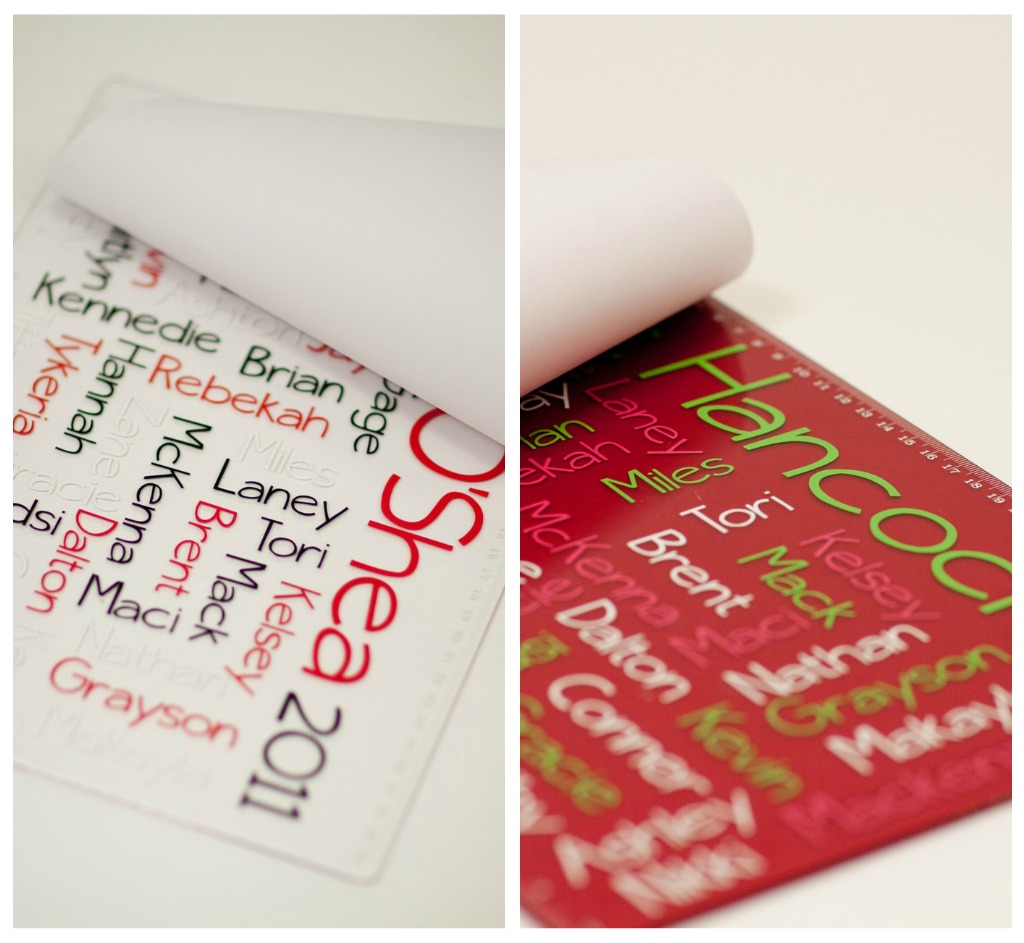
Carter had two student teachers who finished working with the kids last Friday, so I made personalized clipboards for them.

Each teacher’s name and the date are written long-ways down the side followed by the year.
And then the names of all the students they teach are listed in a ‘word cloud’.
First I went to wordle.net and used it to help me create a template for all the names.
(Click ‘Create’ at the top of that page to make one of your own.)
Once I did that I figured out which names I wanted to be which color.
For the clear clipboard, I used white, black, and red.
For the pink (which looks red in pictures), I used hot pink, lime green and white.
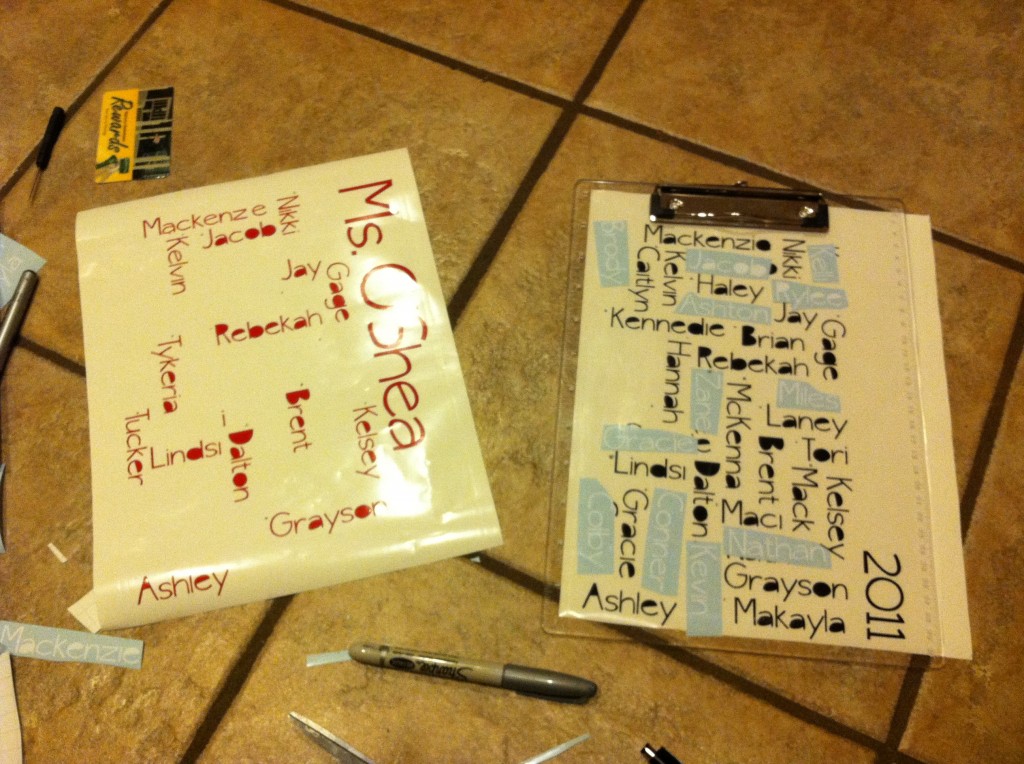
Using my Silhouette HD, I designed a wordle of my own (based on what I created on wordle.net)
And cut out three different sheets (one of each color) with all the names on them.
Then I removed and discarded the names I did not want in that color.
(This wasted a good bit of vinyl, but was a pretty big time saver when I was trying to put all the names on.
And it made it much easier to keep everything straight.

I put the names on one layer at a time: all the red names, all the black names, all the white names.
And ta-da! I was done!
(It doesn’t sound like it took me long, but ask Marshall.
He was dealing with 4 screaming children while I was working on it.)
Soooooo….you could make one of these with the vinyl –
I really, really love how it turned out and I will probably make more of them –
BUT I know that not everyone has access to a Silhouette machine and not everyone wants to spend forever on one project.
So here’s a faster, cheaper easier way:
You’ll need a wooden clipboard, some pretty paper, some plain coordinating paper, Mod Podge and a brush(I like foam brushes).
First you’ll start by mod podging the pretty paper onto the top of the clipboard.
While that is drying, go to wordle.net and create a word cloud.
They do offer an advanced option if you want to weight certain words.
For example, I wanted the teacher’s name to be bigger than all of the children’s names…
so under ‘Advanced’ I typed:
Ms. Hancock: 400
2011:300
McKenna:120
Brent:120
Miles:120
etc.: 120
(The bigger the number, the bigger the word.)
Once you get the sizes right, you can play with color and layout and font.
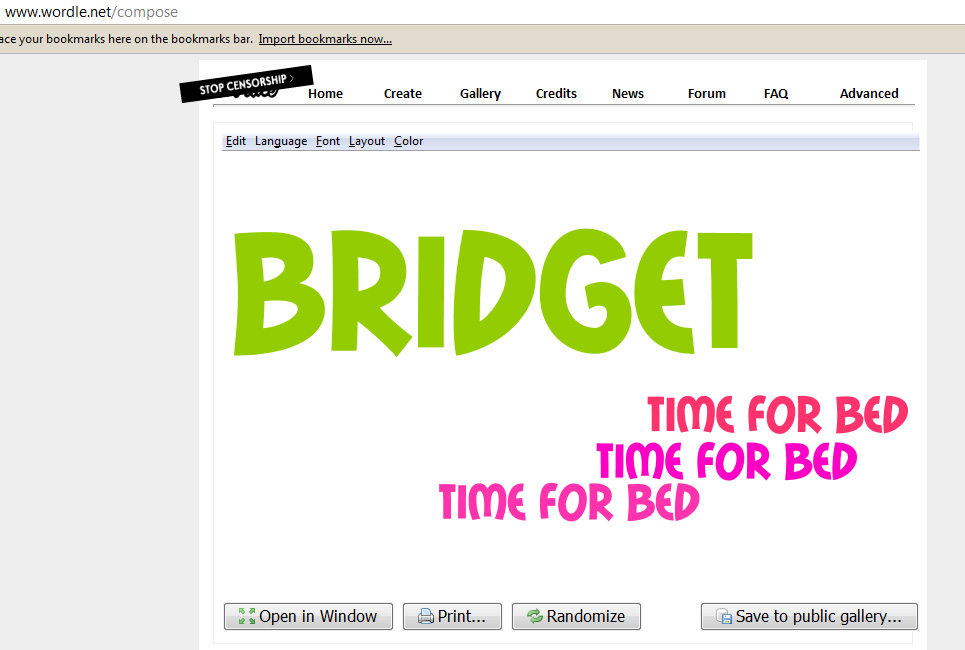
Here’s a super quick one that I just made:
 (I’m a little tired, can ya tell? 🙂 )
And when it is perfect (or at least good enough), simply print it out.
(If I were doing it, I would print it on a light colored paper that coordinates with your decorative paper.)
Then mod podge that paper on top of the decorative paper and wait for it to dry.
I hate that I don’t have a picture to go with this, but I simply ran out of time.
If any of you make a mod podge one, send me the pic and I’ll post it!
*******
12 Crafts of Christmas 2011
1. Personalized Necklaces
2. Button and Lego Wall Art
3. Personalized ClipBoards
4. Fabric Covered Wire(Wall Art)
5. Stationary
6. You & Me Books
7. Personalized Welcome Mat
8. Personalized Dessert Carrier
9. Kid’s Artwork Cup
10. Ornaments
11. Sewing Tutorials
12. Photo Display Block


Girl, you are so creative and talented!!! Wish I was when my kids were babies!!::'(