Category Archives: Crafts for Kids(and mom, too!)

We know subtle.

Last year Carter was in Kindergarten.
This year Lydia has the same teacher.

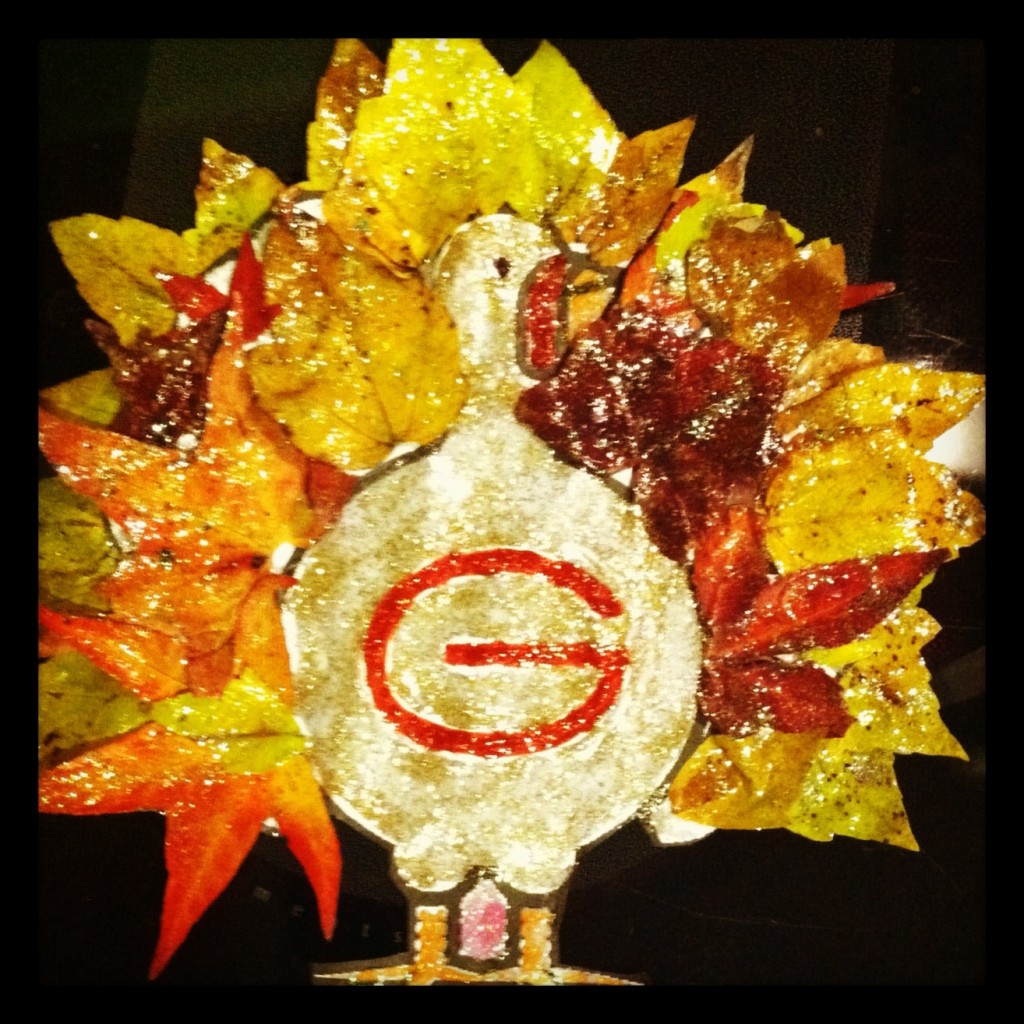
Around this time of year, they send home a paper turkey and ask you to decorate it as a family.
In the directions it says:
“As a family, disguise Tom or Tracy Turkey so that he won’t be eaten for Thanksgiving.”

If you’ve been around these parts much, you may remember Carter’s ‘well-disguised’ turkey.

And here is Lydia’s that we finished today.

Obviously, we know subtle.

Lazy Girl’s Guide to a Painting Party

I guess you could actually call this a “Pregnant Girl’s Guide to a Painting Party”,
Because I probably would have done more if I weren’t so enormous and exhausted.

We’ve never done a “friend” party because we’ve always(up to this point) just done a family thing.
But Carter has begged and begged for a “real” birthday party…a painting birthday party, to be exact.
He has been asking for months and I kept putting him off because I knew that the new baby might interfere with any plans.
But he is one insistent little sucker, and I finally gave in.

He was allowed to pick 10 friends.
(The first one his list?  His “girlfriend”, who is actually in 5th grade!)

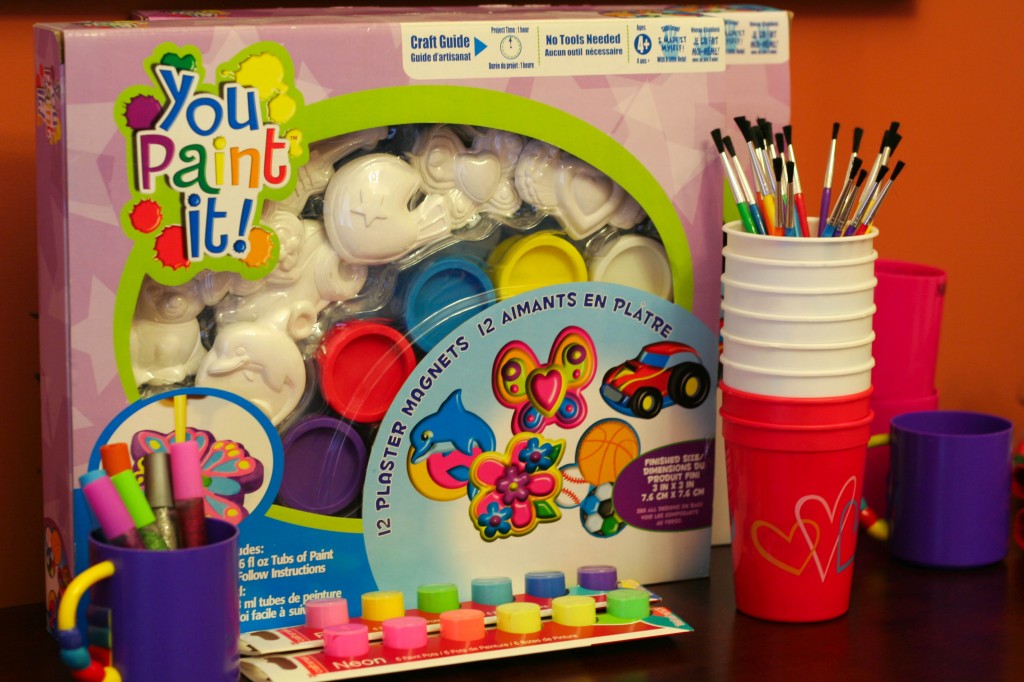
I bought a magnet painting kit along with some extra paint brushes and some glitter glue.
(Everything looks better under a layer of glitter glue, right?)
I also pulled out all my plastic cups to use for rinsing water.

Instead of making or buying a cake, I decided to follow through with the painting theme.
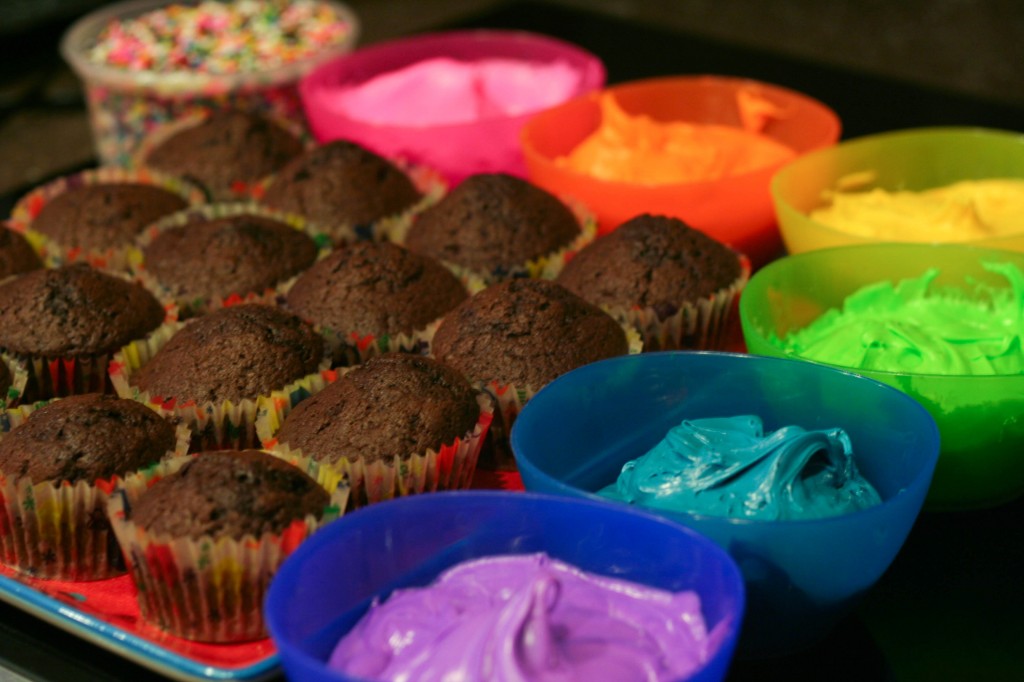
Each kid will get a chocolate cupcake and will be able to DIY(Decorate It Yourself) with icing and sprinkles.

Don’t be too impressed!
Those cupcakes are made from a box mix and the icing and sprinkles are store bought.
I used food coloring and 3 cans of frosting to make the rainbow icing options.
(1/2 can of icing plus an insane amount of food coloring per color.
I used Gel Food Colors -for all but the blue and yellow- because they are so bright.)

And, of course, no party for my kid is complete without Sprite.
(The kid really loves Sprite.)

Here’s hoping my doctor’s appointment goes well and I actually make it to the party!

12 Crafts of Christmas{Homemade in a Hurry}

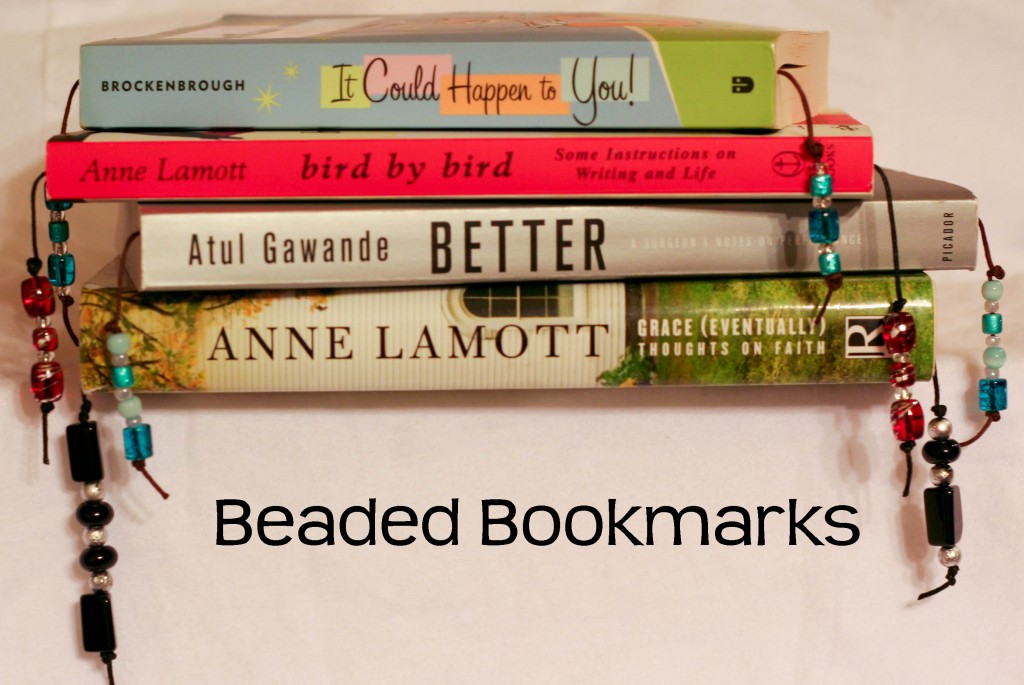
I cannot believe that this the final Craft of Christmas!  It seems like just yesterday that I was typing up the first post in this series!  And because I imagine that most of you are like me and need a few little last minute gifts, here are a few of my favorite quick gifts:  Beaded Bookmarks, Holiday Scented Ornaments and Chunky Crayons…as well as a few links to other fun and fast ideas.

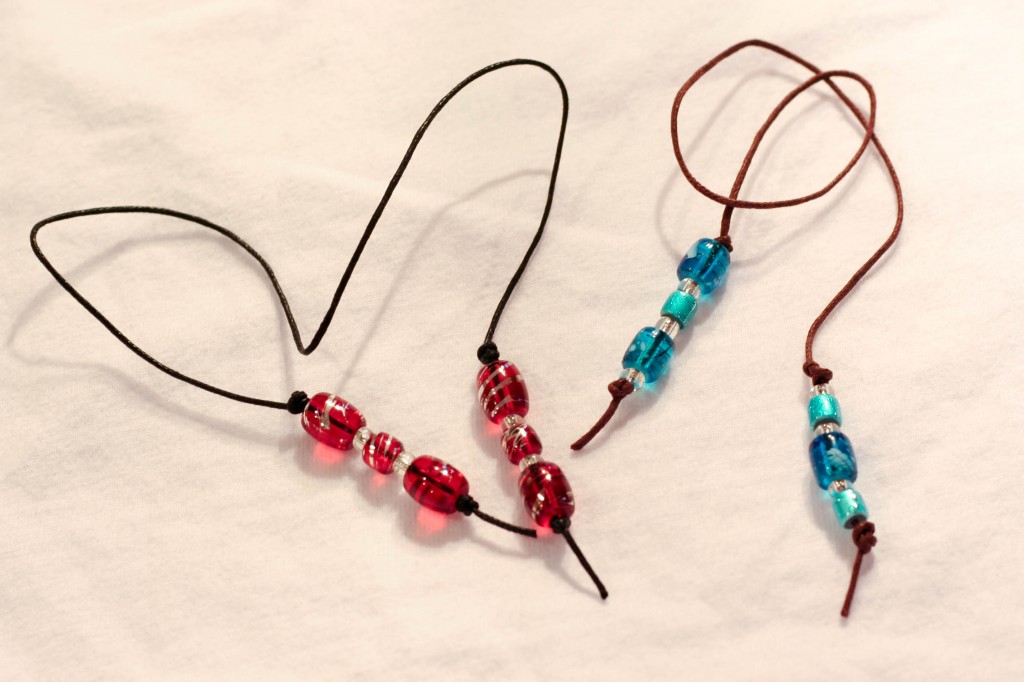
Beaded Bookmarks

You will need: beads(I used glass) and string (I used hemp cording)
The only thing you need to be careful about is making sure that the holes in the beads are big enough for the cording/string to be threaded through easily!
Grab a large book and use it to measure out how much string you will need.  When you place the string in the book to measure, you’ll want to make sure that you have at least 2-3 inches of string extending beyond the end of the book.  (My typical length was about 15″-16″.)
Tie a knot close to one end and thread a few beads onto the cording.  Then tie a knot to secure those beads in place.
Go to the other end and tie a knot in about 3″ from the end.  Add beads and tie the final knot to secure the beads in place.
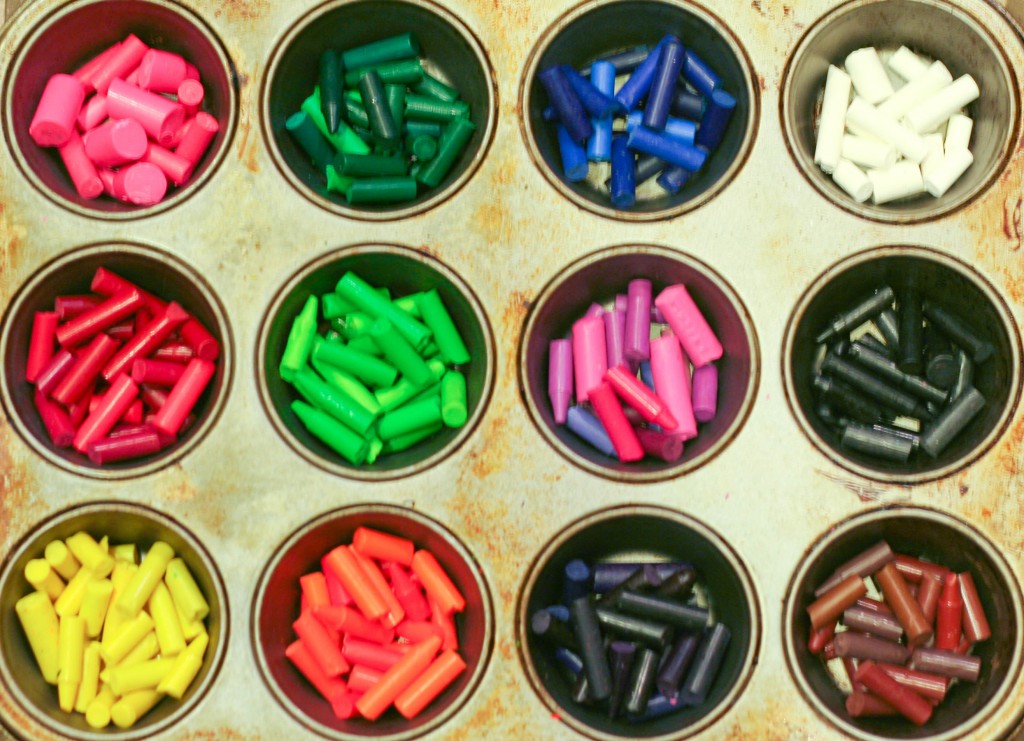
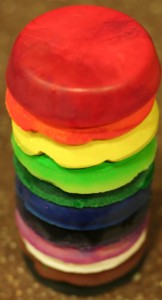
Chunky Crayons
These are perfect for the under 3 crowd!
What you’ll need:  old crayons, muffin tin, oven
Grab all the half-used crayons you can find and peel off the paper.
Go ahead and preheat the oven to 250°-300º.
Break them up into small pieces(an inch or less) and fill each muffin cup with broken pieces.
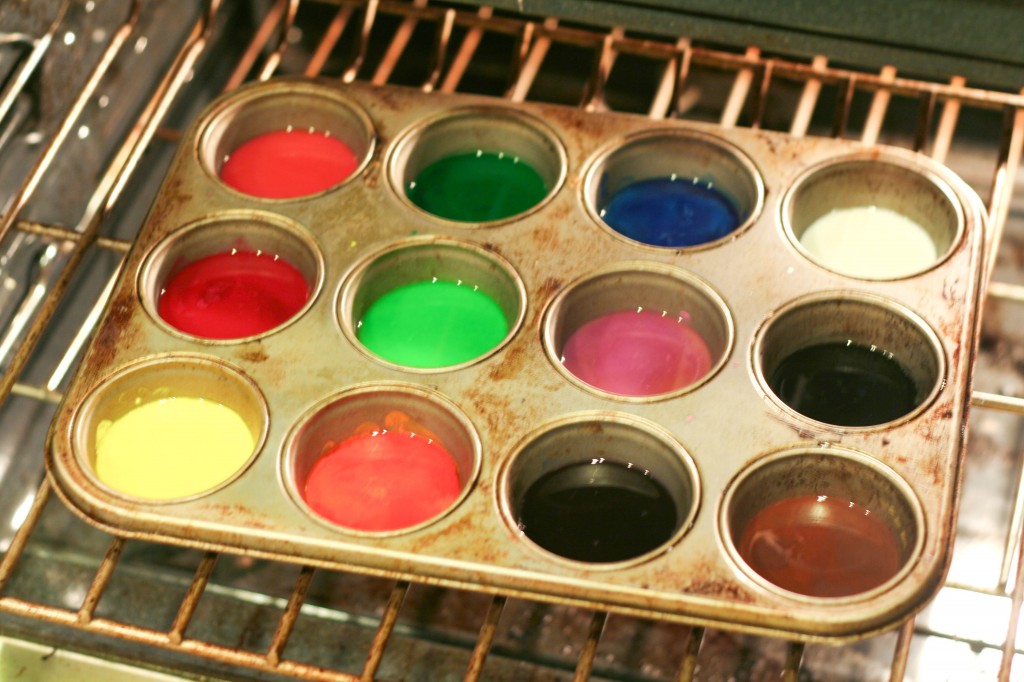
Then place it in the oven and wait for them to melt, somewhere around 15-20 minutes for my oven.
Once the wax is completely melted, remove from oven and let cool significantly.
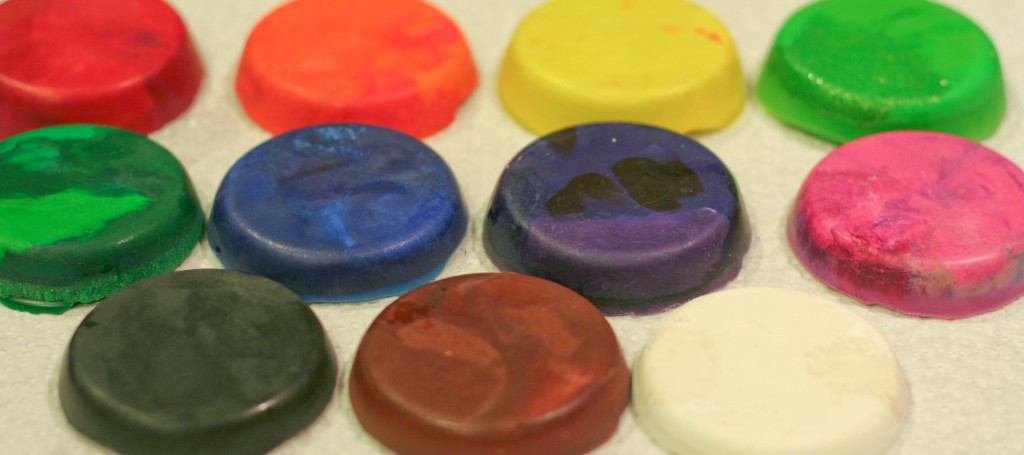
When the pan is cool enough to touch, place in freezer.  This will make the wax shrink enough to pop them out easily.
But don’t put them in the freezer and forget about them!  Because *ahem* they’ll crack.
If that happens, just  pop them back in the oven and re-melt them and then re-cool them.
When they’re cool, pop them out and enjoy:
To wrap, try stacking them like this and tying them up with ribbon or string.
Grab a coloring book from the Dollar store and you’re golden!
Holiday Scented Ornaments
(No picture because my camera apparently got the plague I had last week.
I’m hoping she recovers quickly…seeing as how Christmas is FRIDAY!
And we have two more birthdays and a birth day coming up soon.)

You will need: 1 cup of applesauce, 1 cup of ground cinnamon(that’s roughly one regular size spice container full), plain white glue, cookie cutters, straw, ribbon

Mix all ingredients well until it forms a nice semi-firm dough.
(I had to add cinnamon because it was a little runny, so make sure you have extra cinnamon on hand.)
Roll out your dough and use cookie cutters to cut out shapes.
Then use the straw to punch out holes at the top so you can later add a ribbon.
I found that it was easiest to cut them out on paper plates and leave them there to air dry.
(Trying to move them while still “wet” was really hard to do.)
You can either let them air dry on the plates, OR you could transfer them to a baking sheet and bake them until they’re hard.
We made some of these 3 years ago and they still smell yummy.
So yummy, actually, that the dog ate one!  So make sure to put them high up on the tree.

Other fun, fast ideas:
Easy Tank Top Tote from Dollar Store Crafts
Custom iPod Cover also from Dollar Store Crafts
Decorative Soap Dispenser from Just A Girl
Homemade Lacing Cards for the little kids from Thru My Peepers (You could also do ABC ones!)
Cardboard Shoes for the bigger kids from ikatbag

********
Want to see more of my crafty creations?

12 Crafts of Christmas {Edible Edition}

For some folks (myself included), there is no better gift than the gift of food.
I love me some homemade goodies!

So today I’m sharing some of my favorite recipes that I’ve found here and there over the years:

Easy Oreo Truffles by the lovely Rachel (Marshall’s favorite)

Butterfinger Cookies from Taste of Home (My BIL’s favorite)

Saltine Toffee from Taste of Home (Marshall’s other favorite) (aka Candy Crack)

Cream Cheese Finger Cookies from Taste of Home (Best all-around!)

Reindeer Cookies from Me(circa 2007)  (Kidlet favorite)

And three of my favorite recipes: two of my own and one from my friend Noelle.
(No pictures this time though because I didn’t think it was wise to try to bake while struggling to breathe.)
(Dear cold, you’re killin’ me.  Please go away!)

************

Shortbread Cookies by Noelle

1 1/3 cup unsalted butter
2/3 cup sugar
3/4 tsp salt
3/4 tsp vanilla extract
3 1/3 cups flour

Heat oven to 275º.
Butter a 9×13 pan and line with parchment paper.
Cream butter and sugar until light and fluffy.
Add salt & vanilla, and beat to combine.
Add flour one cup at a time on low speed until just combined.
Press dough into pan and use a butter knife to cut the dough length-wise into 9 strips.
Cut cross-wise into bars and use tines of a fork to make indentions in each cookie.
Bake for 70-85 minutes, or until a pale gold (not brown).
Cool in pan and cut along lines to break into individual cookies.

These cookies get better with age…if they last that long!

*********

Crunchy Nut Clusters

2 cups(12 oz) baking chips – you choose what kind: milk chocolate, white chocolate, dark chocolate, peanut butter, peppermint, butterscotch, toffee…
2 cups nuts – you choose all of one kind of nut or an assortment of several types
Rice Krispies(optional)

Melt baking chips in the microwave according to package directions.
Once melted, add nuts (and Rice Krispies if you want).
Mix well.
Spoon out into either mini-muffin tins or small paper candy cups and freeze until set.

*********

Lace Cookies
(We used to make these and gingersnaps with my grandmother-Mama Jo-every Christmas,
so these are the definition of “Christmas Cookie” to me.)

1 egg
1 cup sugar
1 cup oatmeal
3 heaping TBsp self-rising flour
1 stick butter, melted
1 tsp vanilla

Mix egg, sugar, oatmeal and flour.
Pour in butter and vanilla and mix well.
Cover baking sheet with tin foil and butter well.
Drop small spoonfuls of dough onto buttered surface.
(These will expand significantly!)
Bake at 400º just until cookies begin to brown.
Turn off oven and leave cookies in until they are a nice brown.
Cool completely and then slowly and gently remove from foil.

*********

And if you still haven’t found a recipe that just hits the spot,
check out the Christmas cookies that my friend Mary has been showcasing on her blog!  YUM!

*********

Want to see more of my crafty creations?
Check out the other 12 Crafts of Christmas:
Week One: Silhouettes
Week Two: Personalized Wall Clocks
Week Three: Glass Etching
Week Four: Fancy Fingerpaint Art
Week Five: Freezer Paper Stencils
Week Six:  Tie-Knot Fleece Blanket
Week Seven: Ribbon & Pearl Bracelet, Wool Ball Necklace, DIY Button Earrings
Week Eight: Chalkboard Paint Ideas: Glasses, Chalkboard, Candle, Love Box
Week Nine: Frugal Finds
Week Ten: Personalized Pendants
Week Eleven: Edible Edition

Snowman Gift Bags

Originally published in December 2008, but I’m making more of them and thought it’d be fun to bring out of the archives.
A few edits are in italics.  And I’ll probably also add a little snowman outline this time, too.

*****************

With Christmas and a baby due at the same time, I’m trying to be as pre-prepared as possible.  I’ve purchased all my gifts, and wrapped about half of them.  I’m a big fan of the gift bag.  I like to wrap, but if I can put something in a bag with some tissue…why not?  But when I went to the store, I had a specific snowman gift bag in my mind(to match the little teacher gifts I’d already bought).  Oh, I could find a plethora of snowman gift bags…but nothing was just right.  Too big, too little, too lime green, too this, too that…and pink and blue for Christmas?

So I decided that it’d be fun to let the kids make gift bags for their teachers(and once I saw how cute and easy it was, we made a whole pack of 10!)  This is what the finished project looks like:

snowmanbag09

If you’d like to make some, here are the directions.

Step One
For starters you’ll need to gather your supplies:

snowmanbag01

-White gift bags(can be purchased in packs of 10 in most craft stores)
**Edited to add: It has taken me a lot longer to find these bags this year.  I’ve been told they have them at Michael’s.
-Some type of black fabric for the hat, 1 per bag(I had plain cotton fabric in my “scraps” box, but you could easily use felt)
-Black circles for the eyes, 2 per bag(I used “Foamies“, since my kids love them and they already have a sticky back, but you could also use felt or just paper)
**Edited to add:  I have also used buttons, but I’m pretty sure they’re more of a choking hazard if you have little people.
-Orange “Foamies” paper(or regular paper or felt) cut into the shape of carrot noses, 1 per bag
-Buttons, 2 per bag(I used actual red buttons for most of them, but Lydia wanted some pink ones so we cut those out of “Foamies” paper, too)
-Strips of fleece in three different lengths, 1 of each length per bag
-Black paint or black pen
-Glue (and/or “glue dots” for putting on the buttons, if you’d prefer)

Step Two
Cut out the hat shapes from black felt or fabric.  The size will depend on the size of your bag, so that part is up to you!

snowmanbag02

Step Three
Cut out the strips of fleece.  The shortest will need to be the same width as the small part of the hat.  The longest strips will need to be about 10-12 inches long.  The medium strips can be made by cutting the long strips in half(5-6 inches long).

snowmanbag03

Step Four
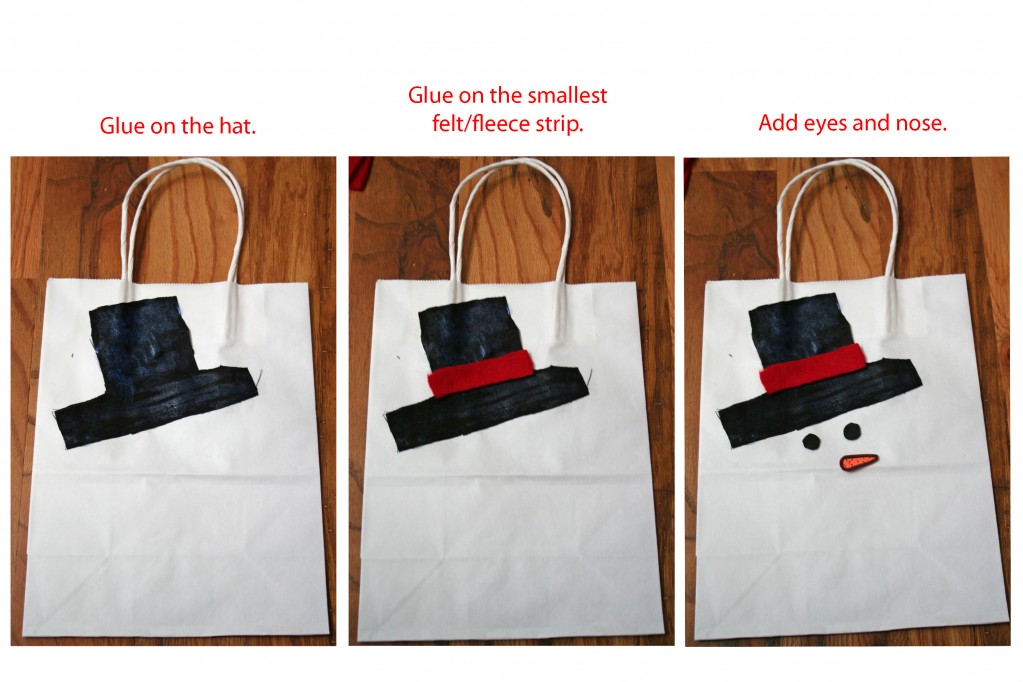
Let the gluing begin! Glue on the hat.  Glue on the smallest felt/fleece strip.  Add eyes and a nose.

Step Five
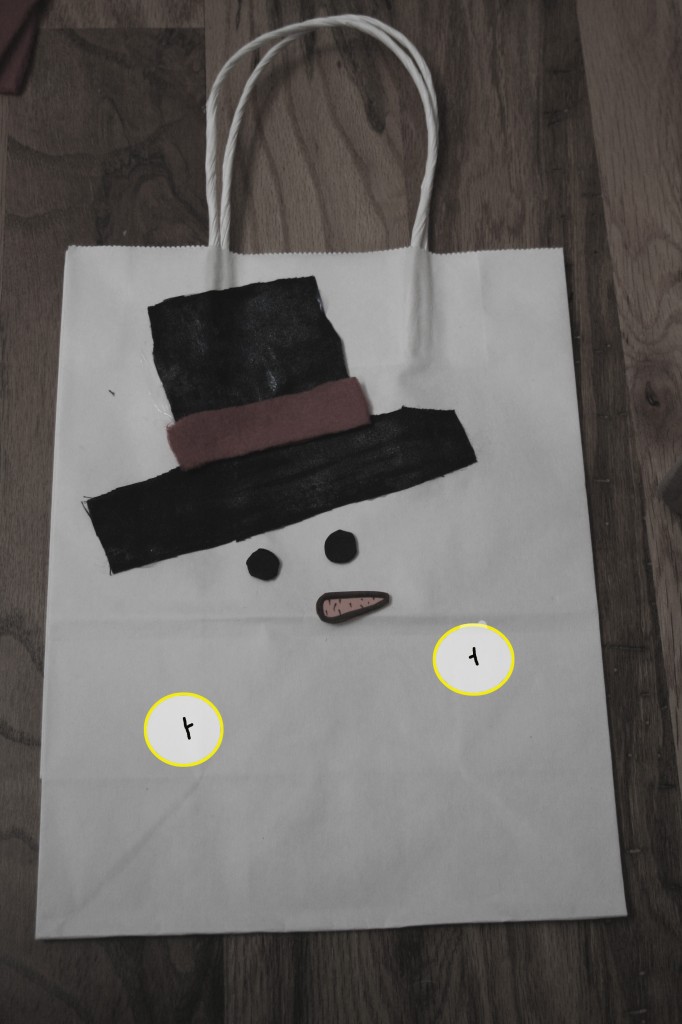
Mark the bag with little lines(one on each side, as seen below in the yellow circles), and cut the bag on those lines.

Step Six
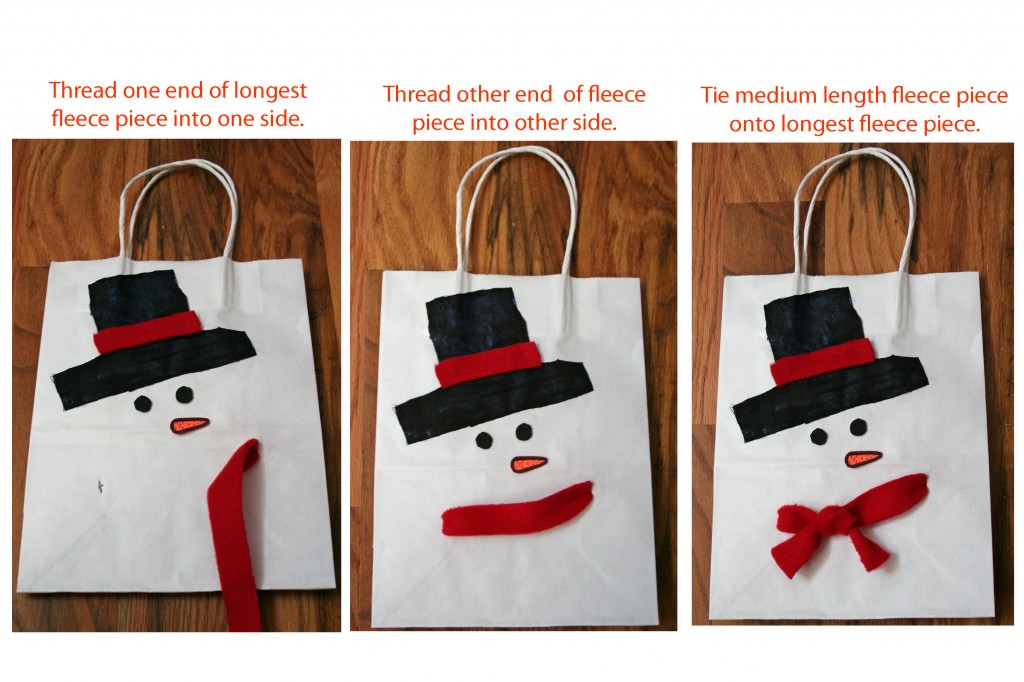
Thread the longest piece of fleece through the holes in the bag, and then tie the medium piece on to the longest piece to make a cute knot in the scarf.

Step Seven
Add the buttons(with glue or craft dots if you’re using real buttons, or with foamie paper made to look like buttons).  Draw in the smile.  I used black puff paint dots to make it “pop” a little, but you could easily use a sharpie.

snowmanbag08

Add a little tissue paper, fluff it up, and you’ve got something you(and your kids) can enjoy and share with others!

12 Crafts of Christmas {Personalized Pendant}

One of my favorite necklaces is one I found on Etsy last year, a custom photo pendant from Tiny Trees Boutique.

I actually have several of her pendants: a picture of my kids, an old-fashioned camera, and an floral one.

And then a few weeks ago I learned about Dimensional Magic from Infarrantly Creative,
when she vlogged about how to make paint chip necklaces.

And I decided to try my hand at making my own pendants.

We have friends who are adopting from Ethiopia (they leave TOMORROW!!!!!!!!!!!!!!!),
For the the mom, I made a pendant with the shape of Ethiopia surrounding the word “enat”, which is mom in Amheric.
For the girls, I made similar pendants that say “ehit”, which is Amheric for sister.
But I forgot to take pictures!
(Are you as shocked as I am??)

And I had great intentions of making a pendant this weekend and photographing each step.
And well, my weekend kind of didn’t go as planned and I didn’t get around to it.

So here are the hastily assembled pictures from this morning.
They aren’t the best pictures I’ve ever taken, but you get the point.
(And the pendant looks a lot better in real life than it does in these photos!)

HOW TO MAKE A PERSONALIZED PENDANT

**This project should be done on top of a piece of wax or freezer paper.**

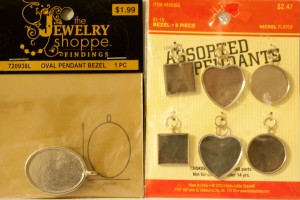
Step One: Find pendant bases.  This was the hardest part of the whole process.  (Not even kidding!)
I finally found these at Hobby Lobby.  The oval one is much thicker and more durable but takes a lot longer to dry.

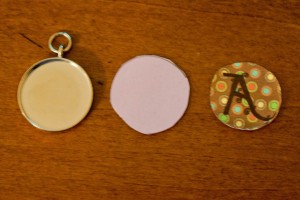
Step Two: Trace your pendant base and cut it out to make a template for what you’ll want to cut.
It doesn’t have to be perfect, but make sure it’s a teeeeeny bit bigger than the size you actually want.

Step Three: Print out your picture or use scrapbook paper and, using the template, cut out your shape.

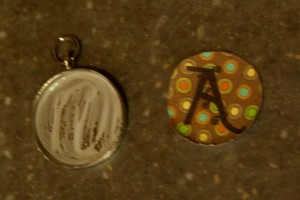
Step Four: Use plain old Mod Podge to paint the inside of the pendant.

Step Five: place the paper on top of the mod podged base and smooth it out.
Then cover it with another layer of Mod Podge and let it dry for at least 20 minutes.

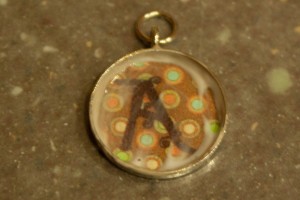
Step Six: Once it is dry, it’s time to add the Dimensional Magic.
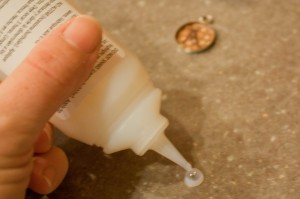
You’ll want to start out by putting a dot of DM on the wax paper.
(You will get an air bubble every time you start using it and you don’t want that on your pendant!)

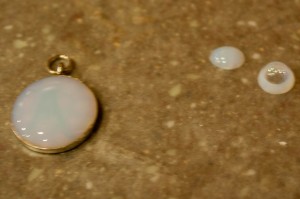
Step Seven: WITHOUT turning the bottle back over, you’ll cover the entire pendant with DM.
I like to start out edging the whole thing and then filling in to the center.

(Notice the air bubble off to the side…you wouldn’t want that on your pendant.)

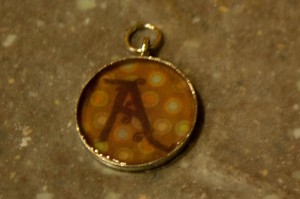
Step Eight: Wait for the DM to dry.  The bottle says that it takes about 3 hours to dry,
but I’ve been doing them at night and letting them dry while I sleep.
That way I’m not tempted to touch it and get my grimy little finger prints on there!

*******************
Want to see more of my crafty creations?

Check out the other 12 Crafts of Christmas:
Week One: Silhouettes
Week Two: Personalized Wall Clocks
Week Three: Glass Etching
Week Four: Fancy Fingerpaint Art
Week Five: Freezer Paper Stencils
Week Six:  Tie-Knot Fleece Blanket
Week Seven: Jewelry: Ribbon & Pearl Bracelet, Wool Ball Necklace, DIY Button Earrings
Week Eight: Chalkboard Paint Ideas: Glasses, Chalkboard, Candle, Love Box
Week Nine: Frugal Finds
Week Ten: Personalized Pendants
Week Eleven: Edible Edition

12 Crafts of Christmas {Frugal Finds}

Occasionally I have this problem:  I want to give a good gift, but I’m low on funds.
I want to find something inexpensive, but not cheap-looking.
And so a lot of times I end up making gifts…because I like to craft and because I’m cheap frugal.

There are tons of great, inexpensive craft ideas if you have enough time to search the web.
But, lucky for you, I have a whole list of these types of crafts that I’ve either already done or want to do.
So for this week’s 12 Crafts of Christmas, I’m cheating a litte.
Instead of actually doing a tutorial, I’m listing some of my favorite craft ideas.
(A lot of these links take you to Dollar Store Crafts, one of my new favorite websites!)

Great for her:
Bud vase
Decorative Wooden Tray
Raffia Bowl

Great for him:
Bungee-Cord Memo Board
Mustache Mug
LEGO Keychain
(You could even make a match key rack by screwing a simple LEGO baseplate into the wall.)

Great for kiddos:
No-Sew Felt Playhouse
Placemat Crayon Roll
Dry Erase Activity Book

Great for teens…well, teen girls:
Tank Top Tote
Ruffled T-shirt Scarf
Braided Headband

Great for teachers:
Magnetic Board
Crayon Monograms
Doily Monogram Tote Bag

Great for the Holidays:
Microfiber Mitt Stockings
Salt Dough Ornaments and Stamp Embossed Ornaments
Holiday Embellished Tea Towel (two links)

*******************
Want to see more of my crafty creations?

Check out the other 12 Crafts of Christmas:
Week One: Silhouettes
Week Two: Personalized Wall Clocks
Week Three: Glass Etching
Week Four: Fancy Fingerpaint Art
Week Five: Freezer Paper Stencils
Week Six:  Tie-Knot Fleece Blanket
Week Seven: Jewelry: Ribbon & Pearl Bracelet, Wool Ball Necklace, DIY Button Earrings
Week Eight: Chalkboard Paint Ideas: Glasses, Chalkboard, Candle, Love Box
Week Nine: Frugal Finds
Week Ten: Personalized Pendants
Week Eleven: Edible Edition

Thankful Fun

Waaaaaaay back in 2007, I posted about Turkey Art that the kids and I made.

An old friend of mine recently read through my entire archives,
And she reminded me of things that even I’d forgotten that I’d written!

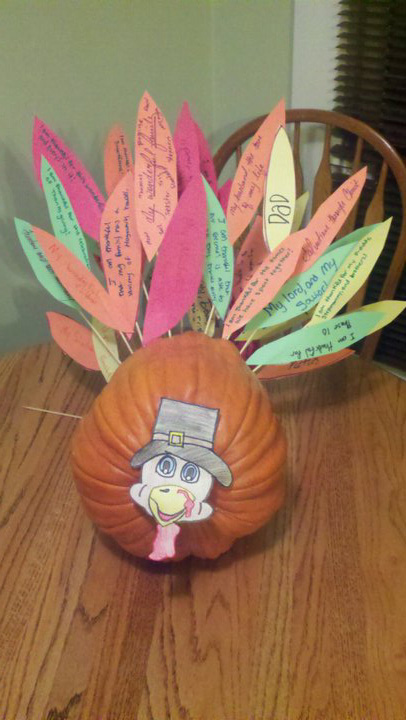
When I saw this picture on her facebook page, it looked familiar.

I love that Christy and her family wrote different things they were thankful for on the feathers.
(And their turkey face is much more appealing than ours!)

I decided that it’d be a fun thing to do again,
since I’m sure the kids don’t remember doing it!
(Lydia was only 15 months old when we made the first one! )

I already have the bamboo skewers and paper!
Now if I can just find a pumpkin…

12 Crafts of Christmas {Chalkboard Paint}

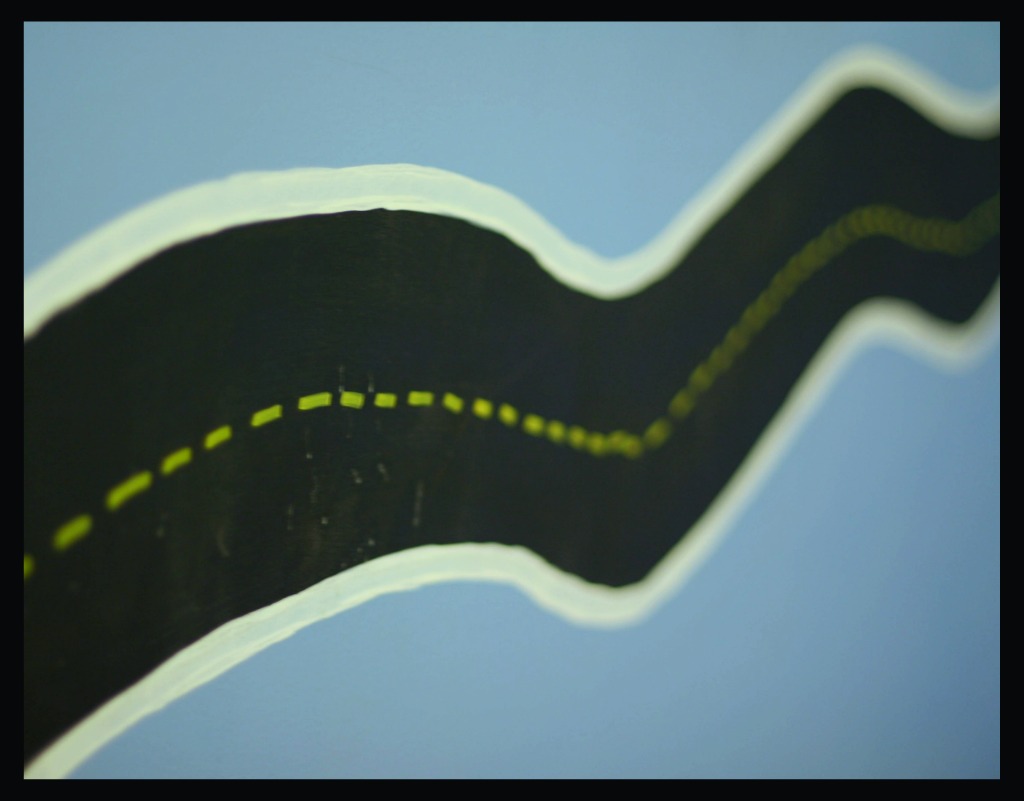
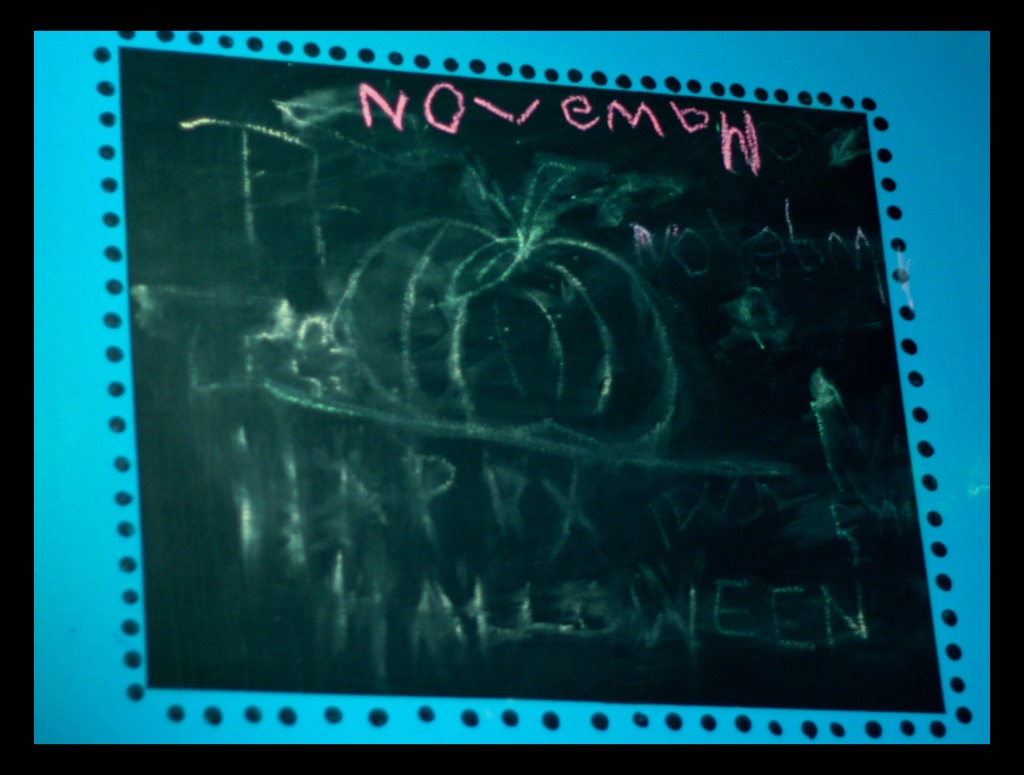
I painted a chalkboard racetrack as a chair-rail in one bedroom.
I painted a plain old chalkboard on the wall of the art loft.

For a gift one time, I painted flower pots and labeled them with names of different herbs.
And I even started growing those herbs from seeds.
(In case you don’t know me well, that’s a BIG deal.  A green thumb have not I.)

So when I was thinking of my favorite crafts, I thought of a few things that I could do with chalkboard paint.
I still have a fairly large can of it left over from the times I’ve painted the wall,
but I know that you can buy it in small 2oz. bottles and as spray paint as well.

Also, you can go the plain old chalk route if you want, but also available are chalk pens
that are less messy and less likely to smudge and smear.

***********

PARTY GLASSES

My first (and maybe my favorite) of the chalkboard crafts: party glasses!
(Inspired by these items found at Pier 1.)

With a little chalkboard paint you can:
a) go green by not using disposable cups
b) always know which cup is yours!

And it is E-A-S-Y!

(It would probably be easier to use the spray chalkboard paint for this project,
but I only had the regular can of paint on hand.)

Use painter’s tape to mark off a rectangle on the glass.
Use a small piece of coarse sandpaper to roughen up the part you are going to paint.
Paint it with chalkboard paint and let it dry.

Repeat.  Repeat again.  Repeat again and again until it’s dark enough.
**Don’t try to do one or two thick coats; it will peel right off
Make sure you do several light coats and let each coat dry thoroughly before adding another.**

Carefully remove the tape.

Now is the optional step:  I decided to bake my glass pieces at 350º for about 10 minutes.
I can’t prove that it makes it set, but it surely does seem like it helps.
Just don’t over-cook them because the glass can break if it gets too hot!

Now just don’t forget to keep pieces of chalk on hand for parties!

I’ve also found that my kids love using these glasses.
Some days, I’ll write  a little note to them:

Happy Birthday!
I love you!

Or a little reminder:

Have a great GREEN day!  (which is our code for reminding Carter to behave at school)
P.E. Today!  Wear sneakers!

Other times they just like having their name on their cup!

***********

OLD FASHIONED CHALKBOARD

I found a simple frame I had in my junk pile.
At some point I’d put corkboard on it and used it with thumbtacks.
So I took that out and painted the back surface to make a new chalkboard.
Lately we’ve started memorizing a weekly bible verse as a family
and I wanted somewhere to put it so that it would be easily changed each week.

If I didn’t already have a place to put my weekly menu, I’d probably make another one for that, too!

**************
MESSAGE CANDLE

Trying to use what I already had at home, I also decided it would be fun to do a candle.
I had a store-bought pumpkin candle and decided that for Thanksgiving I wanted it to say “Give Thanks”.
So I used painters tape to make straight lines all the way around the candle holder and painted a thick chalkboard line.
Then I took some cheap twine and wrapped it around the top of the candle holder
And finished it off by adding a few leaves and sticks for fun!
(You’ll want to make sure that none of those things can get close to the flame!!)
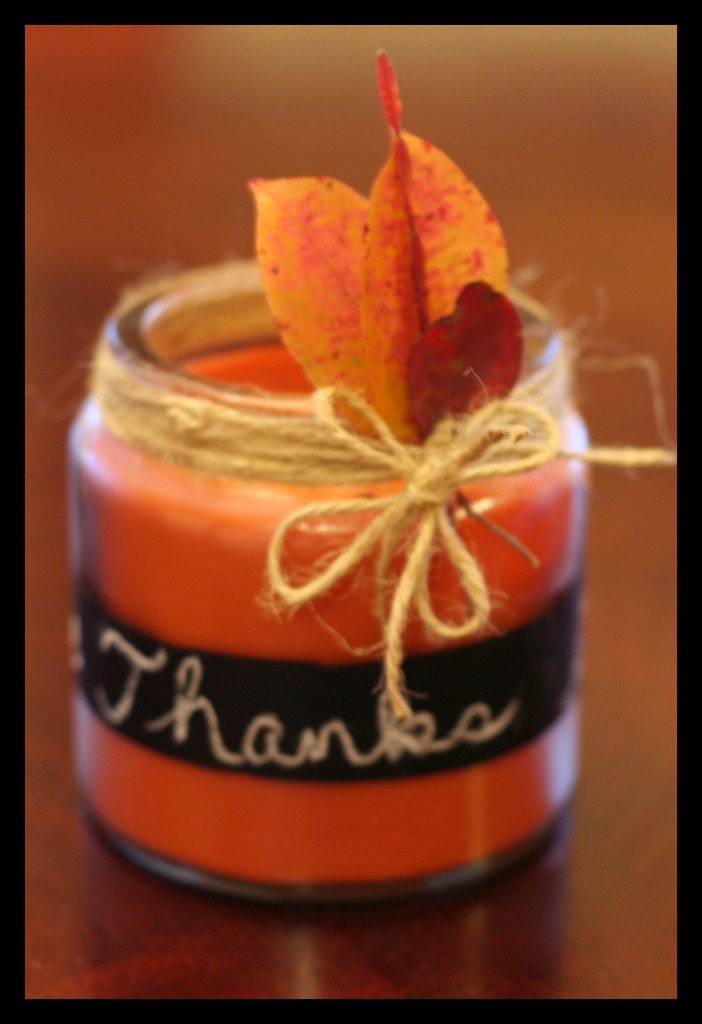
I know this one is kind of Thanksgiving-ish instead of Christmas-y,
but you can go here and find more really great Christmas candle ideas.

*************
LOVE NOTE BOX

And, finally, I don’t know if your children are as in love with their teachers as mine are…
But I never stop hearing about how great Mrs. S, Mrs. F, Mrs. H and Mrs. R are!
My kids are constantly making little creations and cards and “love notes” for them.

And since we’re going to be home for 9 days straight this Thanksgiving break,
I imagine I’m going to be collecting a lot of these straight-from-the-heart pieces of art.

I took small tin cans that I had left over from last Christmas and painted the entire surface with chalkboard paint.
(I did like the striped trim on this one, so I left that unpainted.)

**You could also use a recipe box or cheap wooden box from any craft store.**

After painting it, I used my hot glue gun to adhere a ribbon around the base of the box.
Then I let the kiddos write on the top and that’s it!  All done!

Wouldn’t it be fun to do one of these for family members?
You could fill it with little pick-me-up notes: things you love about them, short memories that make you smile…
And whenever (s)he has a bad day, just one peek into the love note box will make him/her feel better-even if just a little bit.

Don’t forget that with the chalkboard top, you can even change the “note” on top to fit any occasion!

**********

Chalkboard paint ideas are all over the internet, but here are a few things that I really loved:

Inside cabinet doors

Days Until … sign

Fireplace fix

Front door sign

Decorative doors

Labelled jars

Silhouette mug

AND MORE!

*******************
Want to see more of my crafty creations?

Check out the other 12 Crafts of Christmas:
Week One: Silhouettes
Week Two: Personalized Wall Clocks
Week Three: Glass Etching
Week Four: Fancy Fingerpaint Art
Week Five: Freezer Paper Stencils
Week Six:  Tie-Knot Fleece Blanket
Week Seven: Jewelry: Ribbon & Pearl Bracelet, Wool Ball Necklace, DIY Button Earrings
Week Eight: Chalkboard Paint Ideas: Glasses, Chalkboard, Candle, Love Box
Week Nine: Frugal Finds
Week Ten: Personalized Pendants
Week Eleven: Edible Edition

12 Crafts of Christmas {Jewelry}

Today is a 3-for-1 special!  And I am so excited about it.
Today is also the day that I’m debuting my wicked awesome vlogging skillz. (heh.)

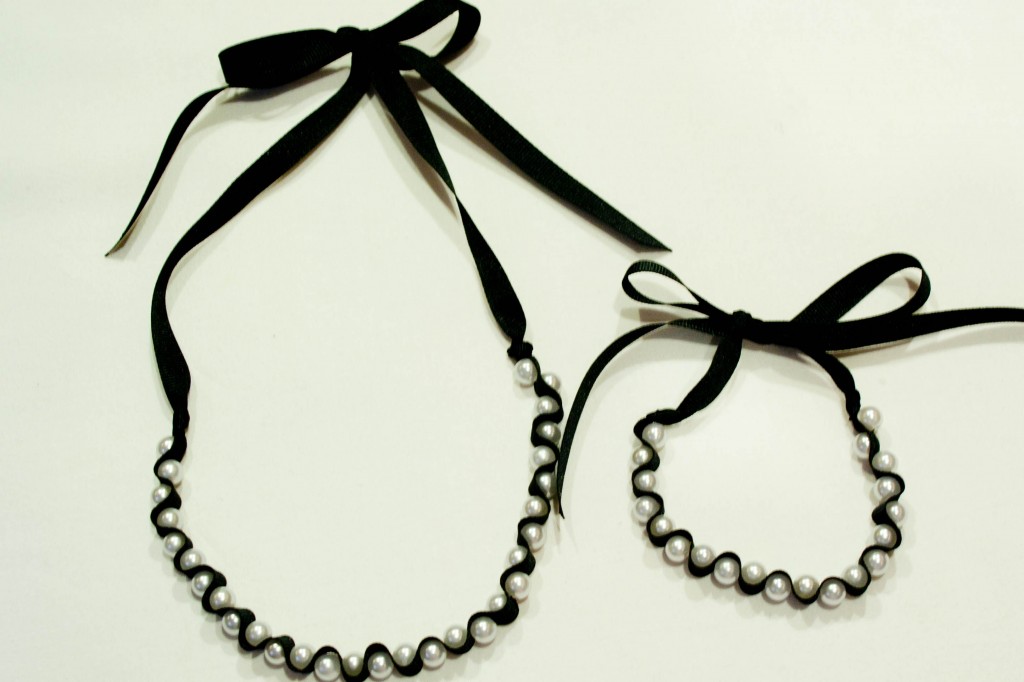
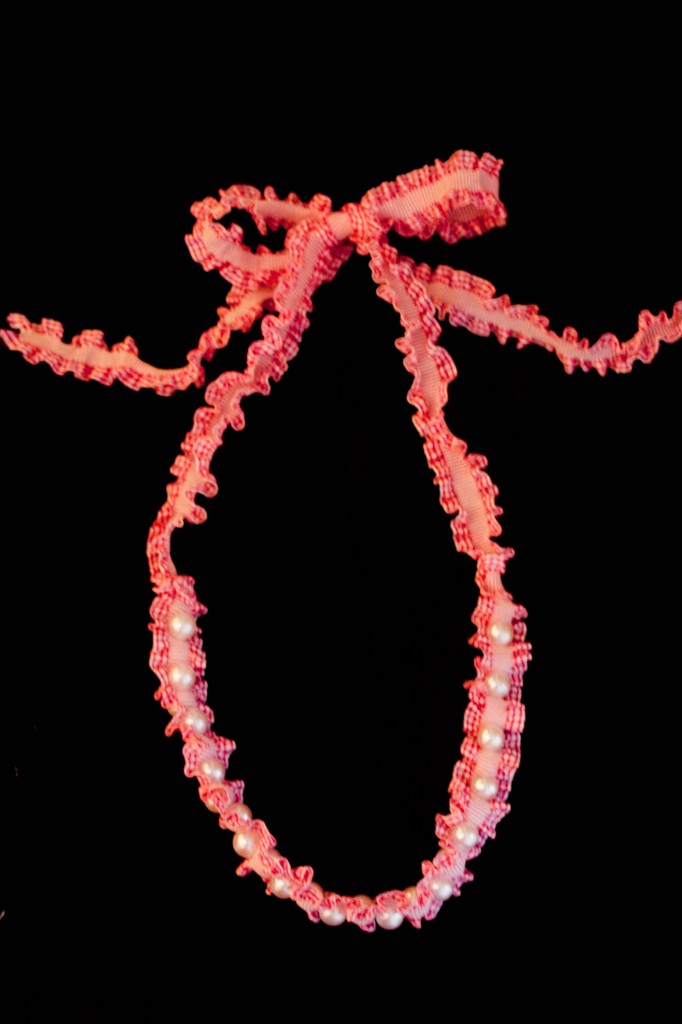
First up is my favorite: Ribbon & Pearl Necklace & Bracelet

Black grosgrain ribbon

Pink Double Ruffle Gingham Ribbon

I’d seen a ribbon and pearl bracelet in an local up-scale boutique, but kind of choked when I saw the price tag.

And so I sat down and did what I always do: scoured google for directions.
I tried several different tutorials before settling on what I think was the easiest and most descriptive.
(If you have a few moments, you should really check out her tutorial archives.  Great stuff!
She also has an etsy store with some fabulous vintages finds!)

These necklaces may look super-fancy, but you only need five things: pearl beads, ribbon, needle & thread and scissors.
Having a measuring tape or ruler helps, but isn’t completely necessary.
I’m willing to bet that most of you have at least 3 of those things in your house right now.

Even though Transient Expression had a great tutorial, I decided to do a play-by-play video.
I always learn faster when I see and hear rather than when I’m just reading.

(Side note:  I obviously didn’t learn much in high school math.  Ignore the sine/co-sine rambling
and really ignore me when I say to cut it at a right angle.  Do not cut it at a right angle.  Just cut it diagonally.)

******

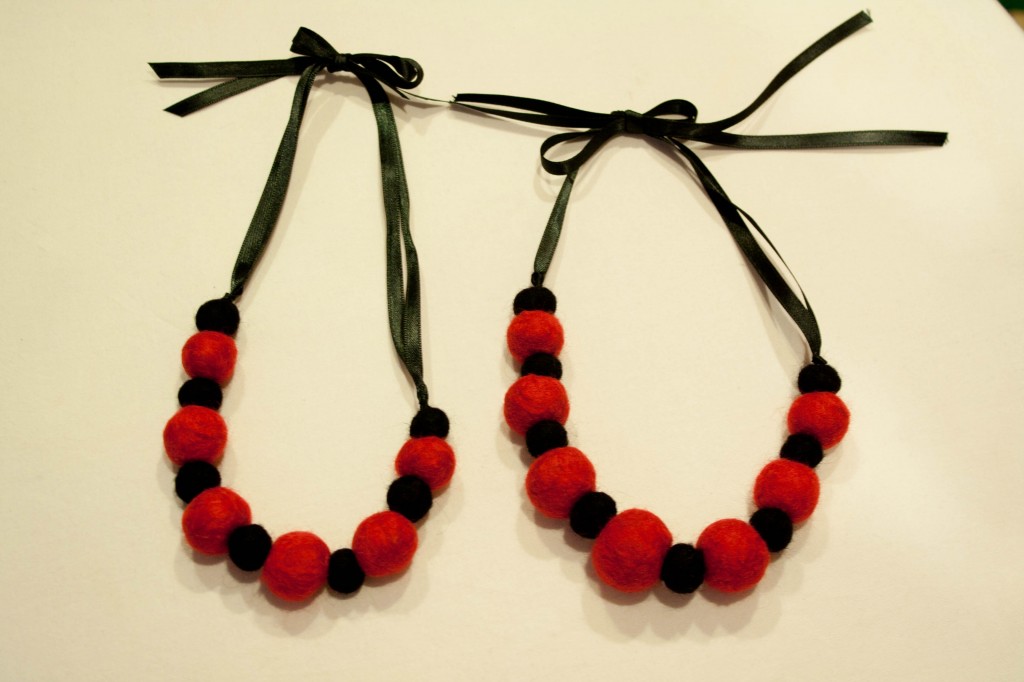
The second jewelry craft: Felted Wool Ball Necklaces

Handmade Wool Balls & Shiny Ribbon

I love the big, chunky jewelry look and the textures you get with this!

First you’ll need to make your felted wool balls, which takes a little time, but it’s fun and easy to do.
(This would be a great fun thing for pre-teen girls to do!  You could even make a whole party out of it!)

For this project you will need:  warm/hot water, dish soap, and felting wool(or wool roving)

You’ll have to watch the first video to learn how to make the wool balls.
The second video gives details on how to make the necklace with the wool balls you made.

For the necklace, you’ll need: the wool balls you made, embroidery thread, a large bore needle,
crimp beads, needle nose pliers, ribbon and scissors

******
And finally: Decorative Button Clip-On Earrings

This one doesn’t have a video to go with it.  Sorry.  I’m lame.
(I’m actually probably more lame for making the videos than for not having one for this.)
(But let’s pretend that you loved the vlogging, ok?)

My Nana doesn’t have pierced ears, but loves earrings.
Do you know how hard it is to find small, delicate clip-on earrings???

So a while back when I was searching for fun crafts to make with my kids,
I came across a blog that made rings out of buttons.
(Unfortunately, I seem to have lost the link to that.)
And when I started coming up with my Christmas gift list,
I thought “I could make earrings like those rings I saw!”

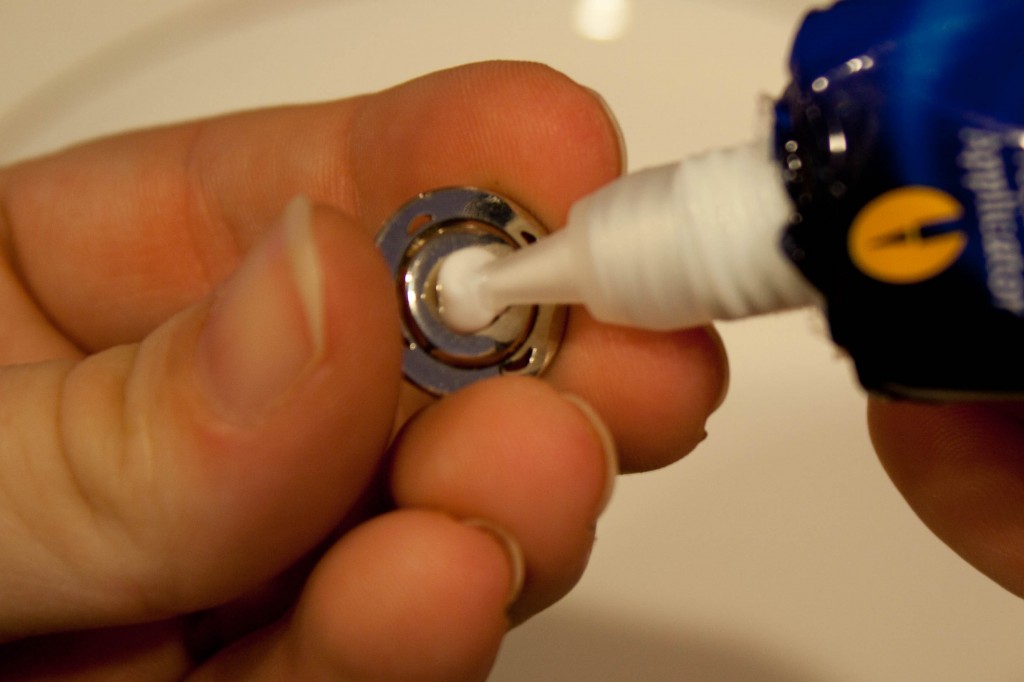
All you need is a package of clip-on earring bases like these(I used silver), 2 decorative buttons, wire cutters and glue.
(I used Simple Fix-It, which is my new favorite go-to glue,
but you could probably use any adhesive like Gorilla Glue or even hot glue.)

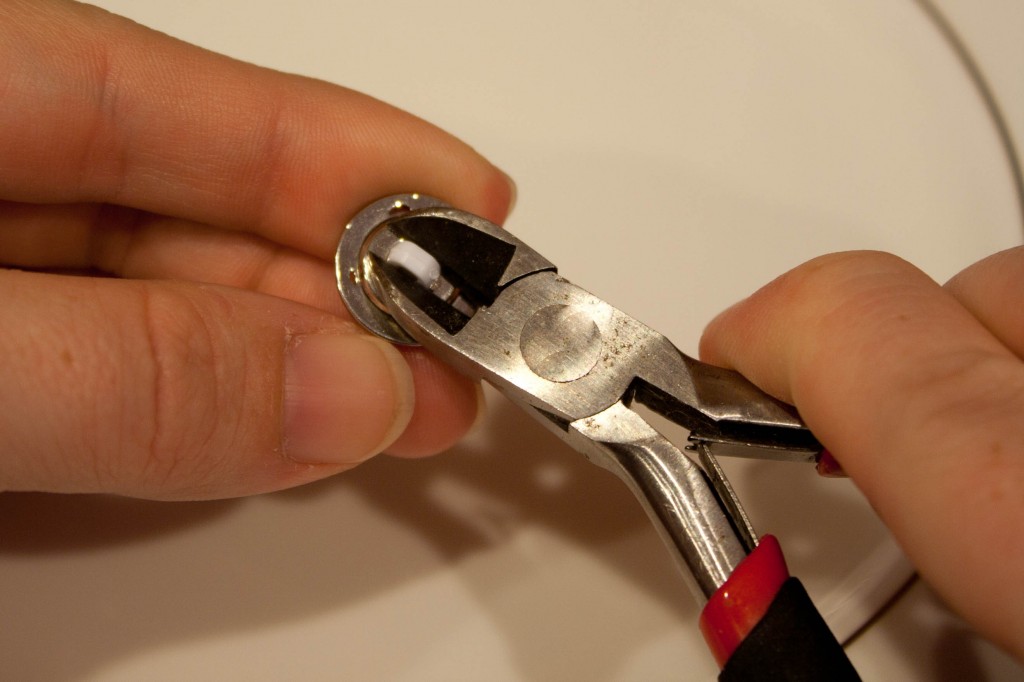
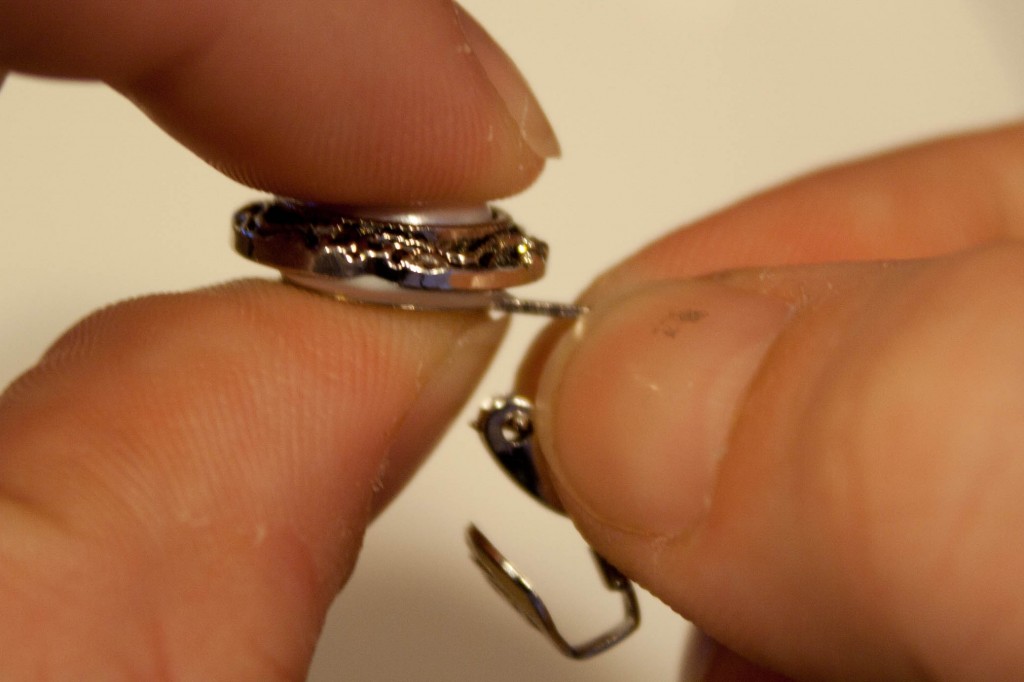
Turn the buttons over and, using the wire cutters, clip off the little piece that you’d normally use to sew it on.
Make sure that the back is fairly flat.  You may need to file it down juuuuust a little.
You can use sand paper or a nail file to do that.

Next you’ll use your glue to attach the button to the flat surface of the clip.

And you’ll want to hold pressure for a little while until the two are firmly attached.

The glue should be completely dry and immovable after a few hours.
(I waited overnight before touching them.)
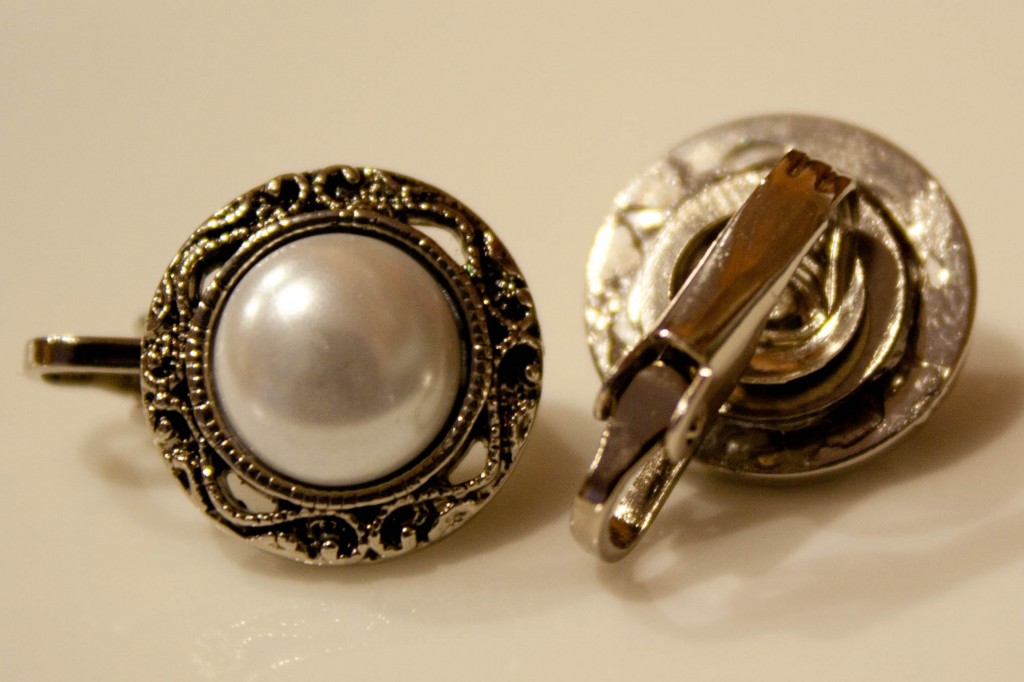
And you end up with this:

*******************
Want to see more of my crafty creations?

Check out the other 12 Crafts of Christmas:
Week One: Silhouettes
Week Two: Personalized Wall Clocks
Week Three: Glass Etching
Week Four: Fancy Fingerpaint Art
Week Five: Freezer Paper Stencils
Week Six:  Tie-Knot Fleece Blanket
Week Seven: Jewelry: Ribbon & Pearl Bracelet, Wool Ball Necklace, DIY Button Earrings
Week Eight: Chalkboard Paint Ideas: Glasses, Chalkboard, Candle, Love Box
Week Nine: Frugal Finds
Week Ten: Personalized Pendants
Week Eleven: Edible Edition

None of the links listed above are affiliate links.  I don’t make a dime off of any of it.
I simply linked to each of the products that I used when making my crafts.