Category Archives: Crafts for Kids(and mom, too!)

12 Crafts of Christmas{Fleece Tie-Knot Blanket}

This is possibly the easiest homemade gift ever!

I have made several of them for baby gifts, birthday gifts and holiday gifts,
but my brother (who works at a monogram store) says that they are super-popular with the sorority girls.

There are a lot of ways you can do a fleece tie-knot blanket.
You can use a single piece of fabric and tie just the top and the bottom.
You can use a single piece of fabric and knot all sides.
You can use a collection of fleece squares to make a super knot blanket
(similar to this one-which we bought, but hated the cheap-o fabric).
You can even add a back to that, if you want.
Or you can use 2 pieces of high-quality fleece like I’ll be showing here.

Fleece is almost always on sale these days, and I actually found nice, thick fleece at Hancock’s for $4/yard!

The blanket that you see here is a 36″x58″ blanket, which is the size I typically do for toddlers.
For babies, I usually do anywhere from 36″x36″ to 40″x40″ because I like them to be square.
But you can really do any size you want.
(I like to buy more fabric than I need, so I usually buy 2 yards.)

So what do you need and how to do you make it?
All you need is 2 yards each of 2 coordinating fabrics and a pair of scissors!

STEP ONE:  Lay out your fabric and measure how big you’d like it to be.
For a typical baby blanket, I do either 36″x36″ or 40″x40″.
Because I am making this for a “big sister” I wanted it a little bigger than the blankets the babies would get.
(And with some extra length, the new mom can snuggle with her “big girl”.)
The length here is about 58″ and I measured the height up to about 36″.

(For an average throw-size blanket, what I usually do is lay out my fabric and cut off the selveges.
In order to make it as big as possible, I fold it over triangularly so that I can cut out a perfect 58″ish square and go from there.)
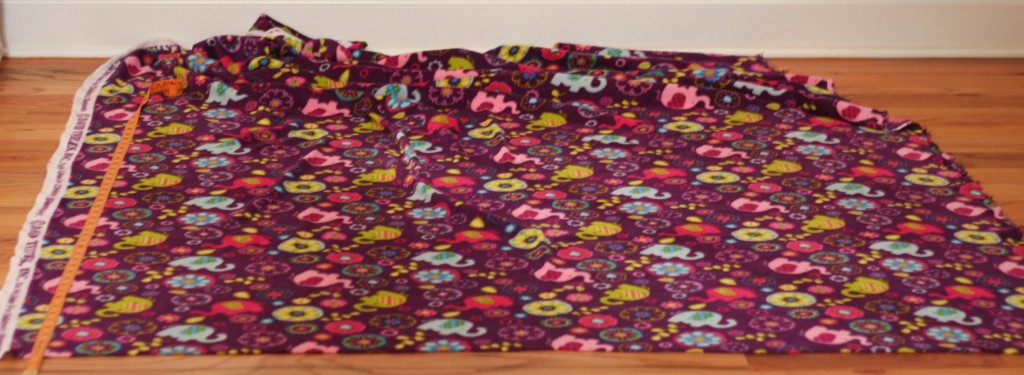
STEP TWO:  Trim off the selvage(like the white part shown here) on two edges of the fabric.
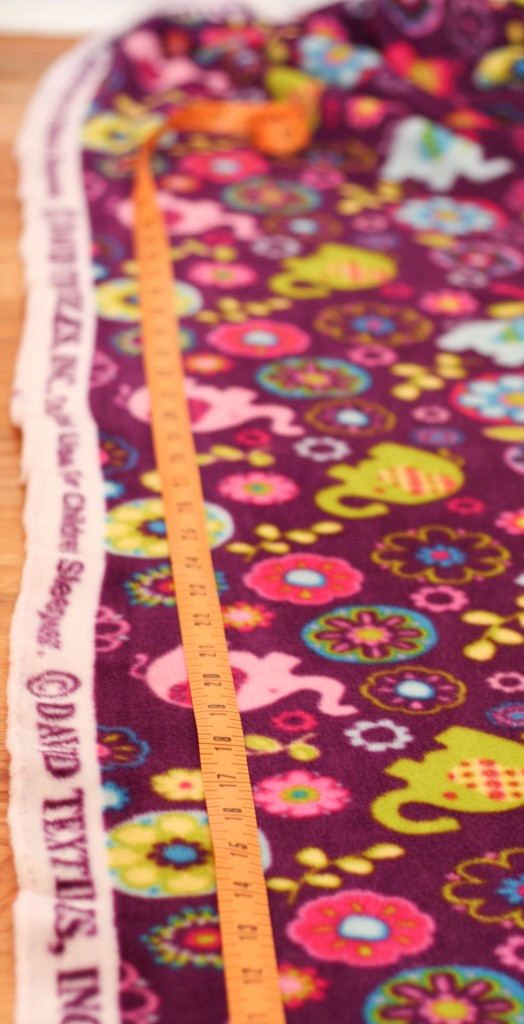
STEP THREE: Put the wrong sides together.  so that when you tie it together the “good” sides are out.
(Here you can see that the “wrong” side is on the left.  The “right” side is what you see on the right.)
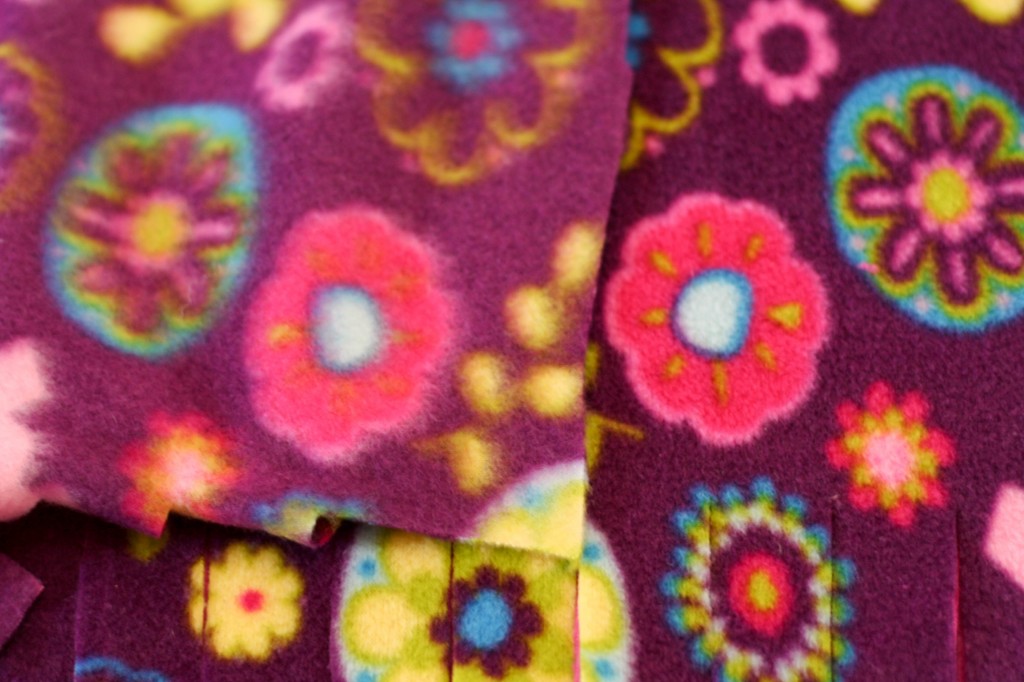
STEP FOUR: Because I’m lazy and don’t want to re-measure,
I used the first piece of fabric I cut as a template to cut out the second piece.
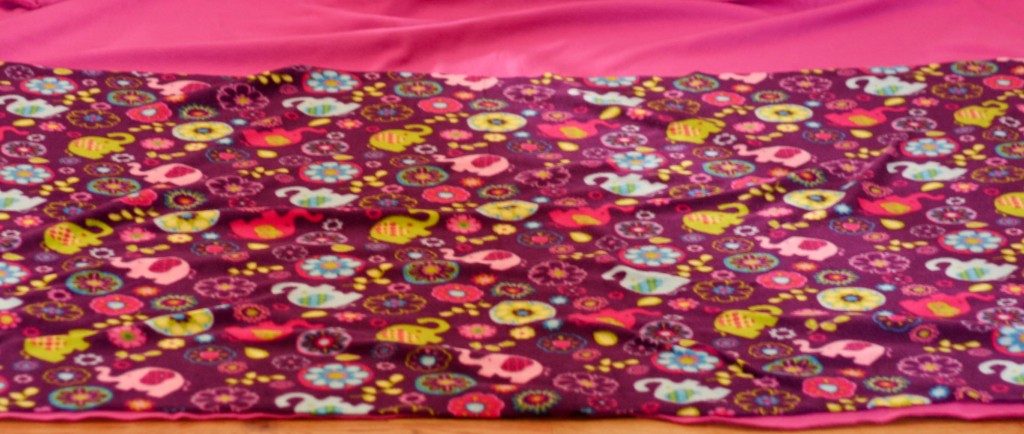
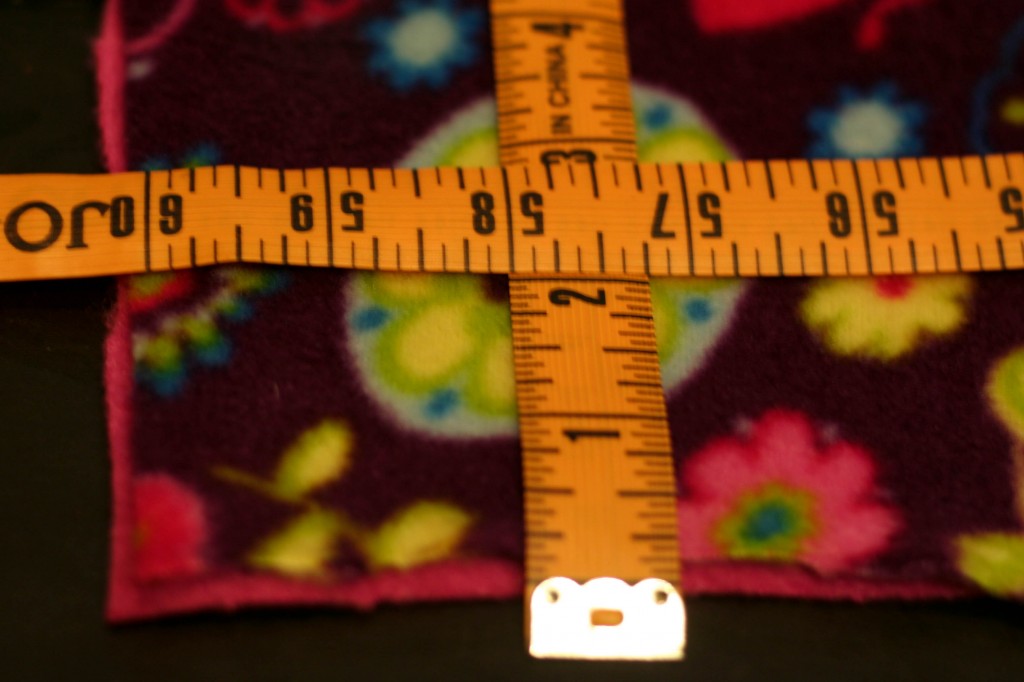
STEP FIVE: Cut out a 2″ square from each corner.
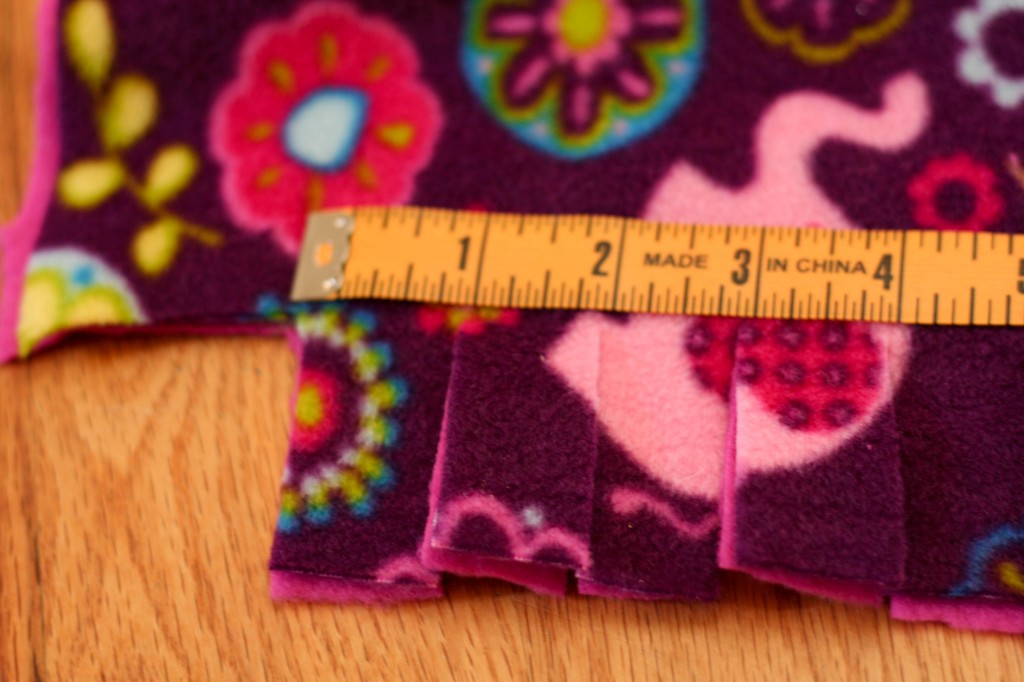
STEP SIX: Going from one end to the other, cut through both pieces of fabric about 2″ high in 1″ intervals.
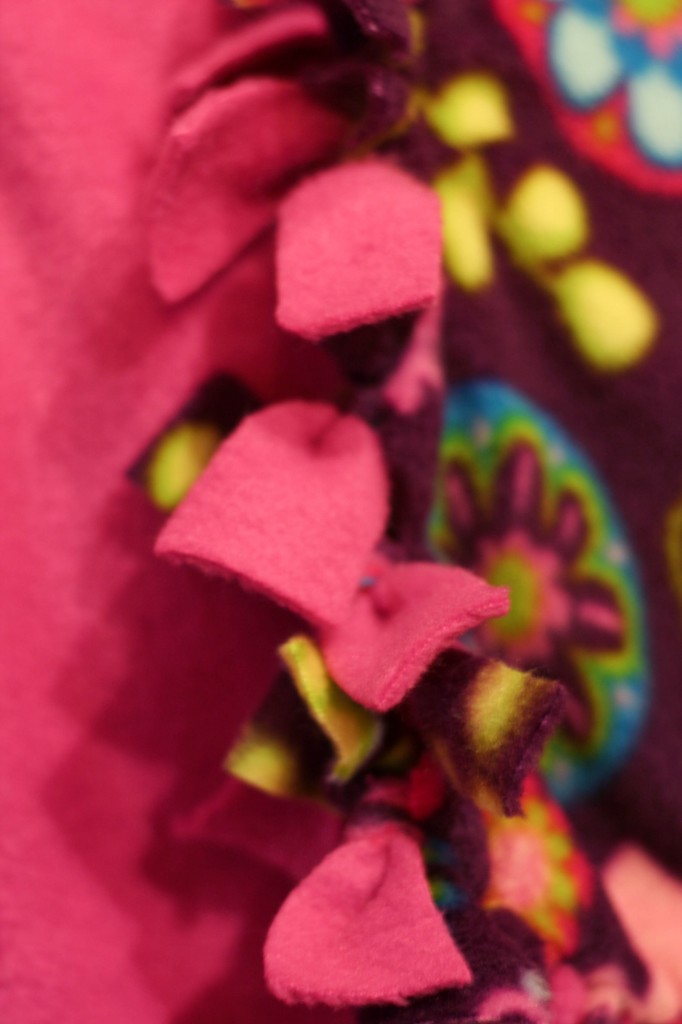
STEP SEVEN: Now tie ’em up.
Just knot one purple with one pink
and then the next purple with the next pink
and the next purple with the next pink
and so on and so on and so on.
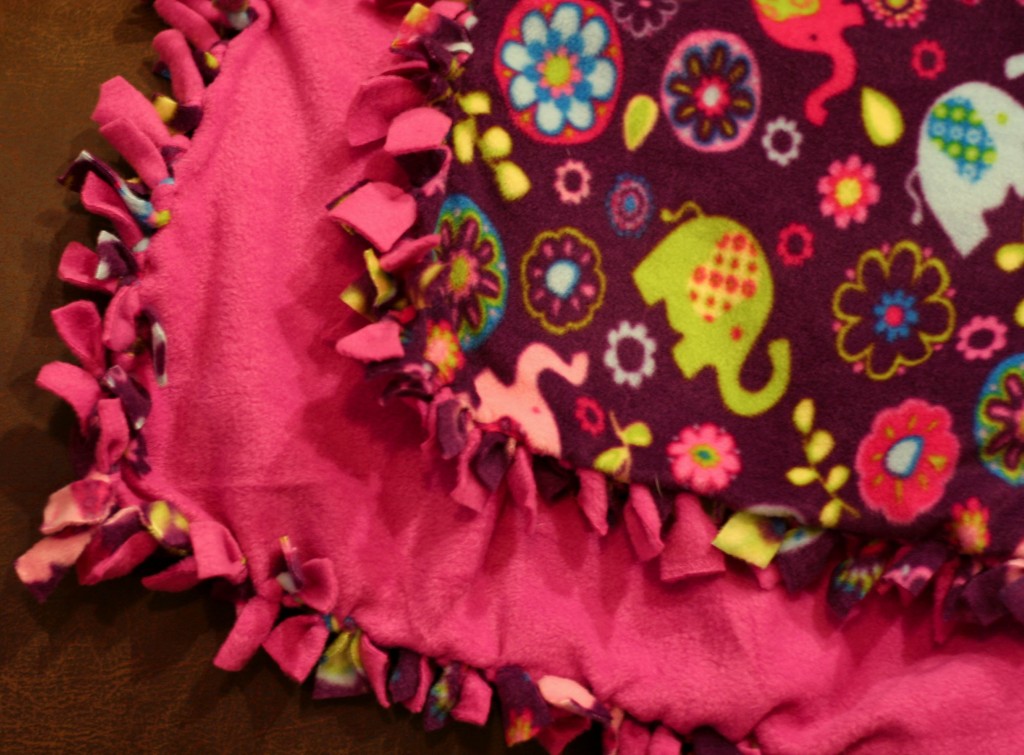
The end:
*******************
Want to see more of my crafty creations?

Check out the other 12 Crafts of Christmas:
Week One: Silhouettes
Week Two: Personalized Wall Clocks
Week Three: Glass Etching
Week Four: Fancy Fingerpaint Art
Week Five: Freezer Paper Stencils
Week Six:  Tie-Knot Fleece Blanket
Week Seven: Jewelry: Ribbon & Pearl Bracelet, Wool Ball Necklace, DIY Button Earrings
Week Eight: Chalkboard Paint Ideas: Glasses, Chalkboard, Candle, Love Box
Week Nine: Frugal Finds
Week Ten: Personalized Pendants
Week Eleven: Edible Edition

12 Crafts of Christmas {Freezer Paper Stencils}

Blog, meet my newest addiction:  Freezer Paper Stencils.

I originally saw this post and knew for sure that I wanted to make this shirt for both Lydia and the little Diva.
And after reading the update at the end, I did a little googling about freezer paper stencils.

Guess what?  There are tons of tutorials and about 100 different ways to explain how to.
But it is really really easy, and doesn’t take too long!

For the example shown here, I hand-drew the stencil BUT you can easily run the freezer paper through any ink jet printer,
which is what I did for all of the ones in the last picture on this post.
And although it would be much easier to do with a Silhouette,
it is definitely somewhat cathartic to sit down and cut out all the little pieces by hand.

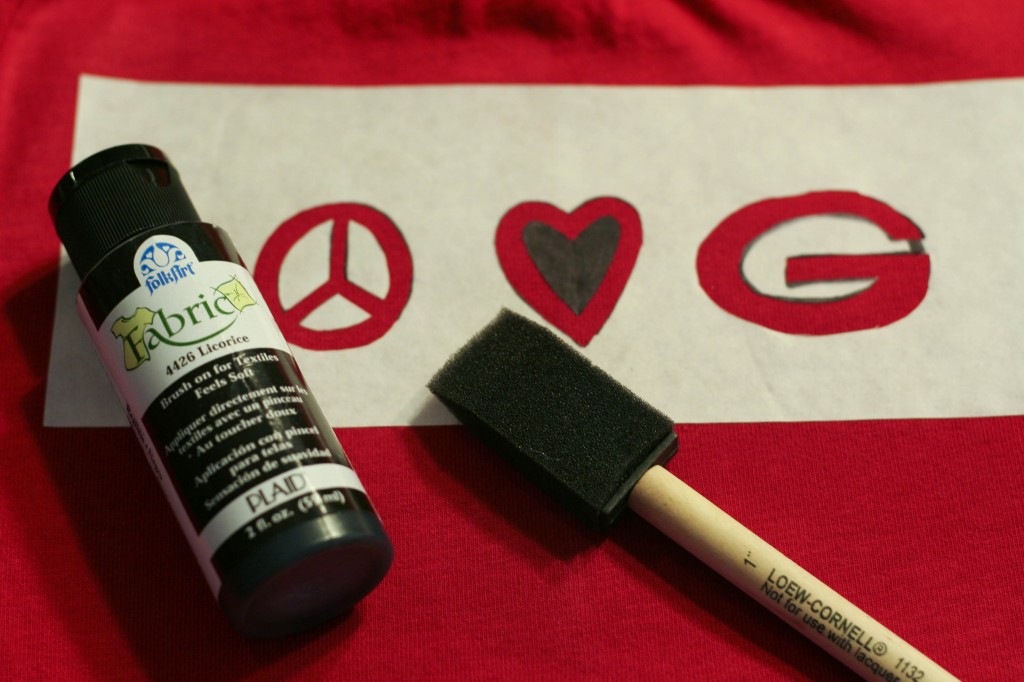
So…you only need a few things for this craft: an item you want to personalize(all shirts shown here, but you could do any fabric item), freezer paper(usually found in the grocery section near the wax paper), scissors, non-dimensional fabric paint(I used Folk Art Fabric paint from Joann’s), paint brush(I like to use the cheap foam ones) and an iron.

STEP ONE:
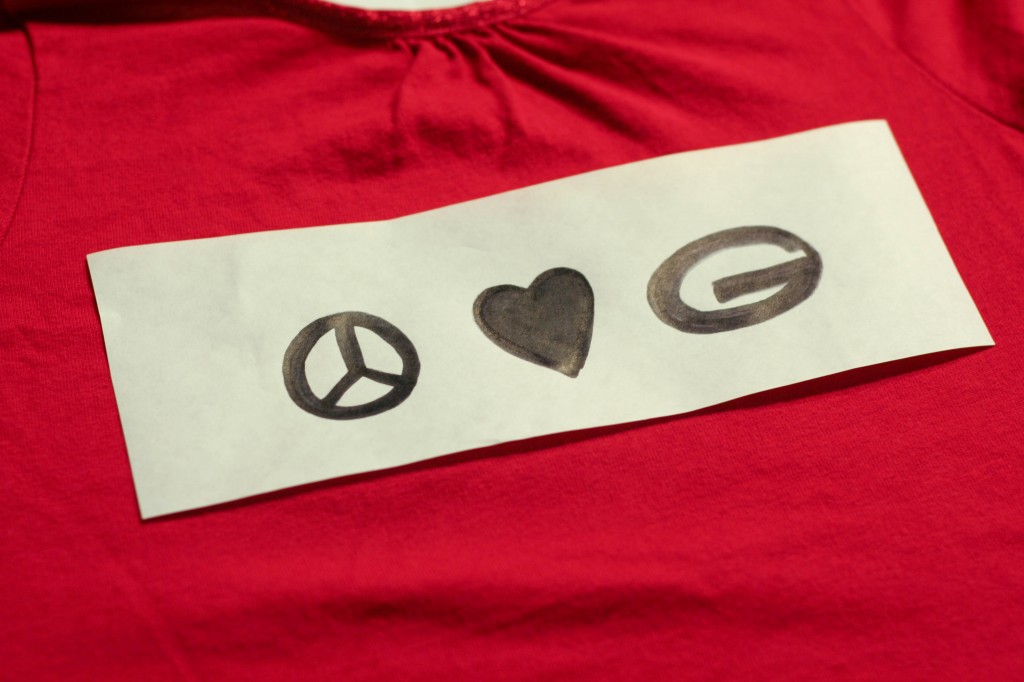
Draw or print out whatever image or words you want to stencil on the matte(not shiny) side of the paper.
You can get some really great ideas by going to google images and searching for “line art” of whatever you’re interested in.
For example, the guitar at the bottom of this post was found by googling “guitar line art”.
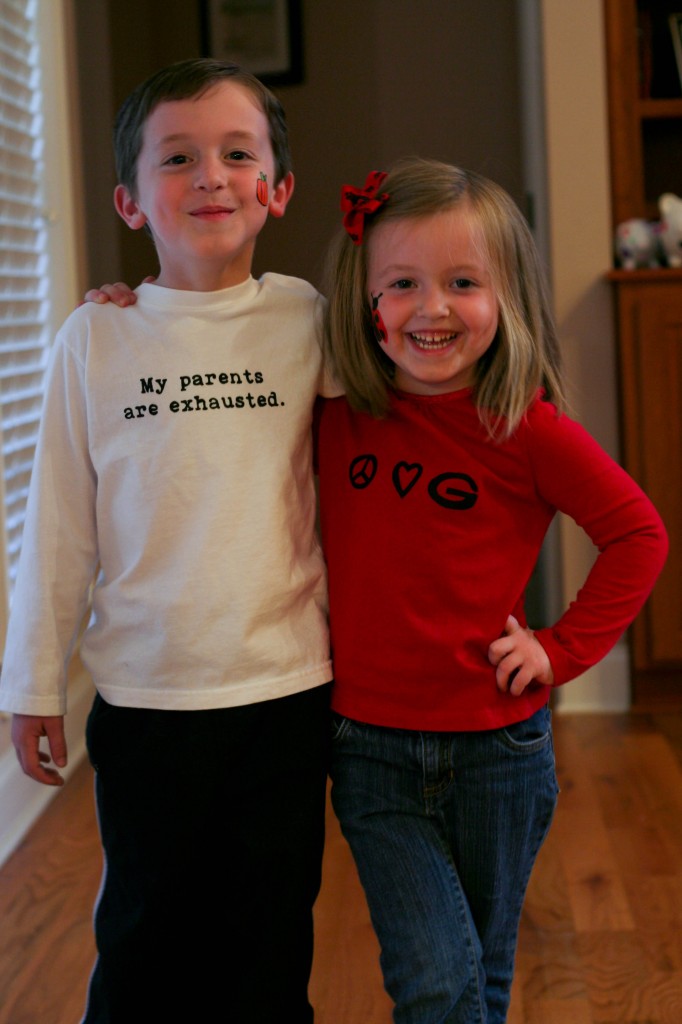
Here I drew Peace*Love*Georgia…’cause even when we lose to Florida, we’re still Dawg fans around here.

STEP TWO:
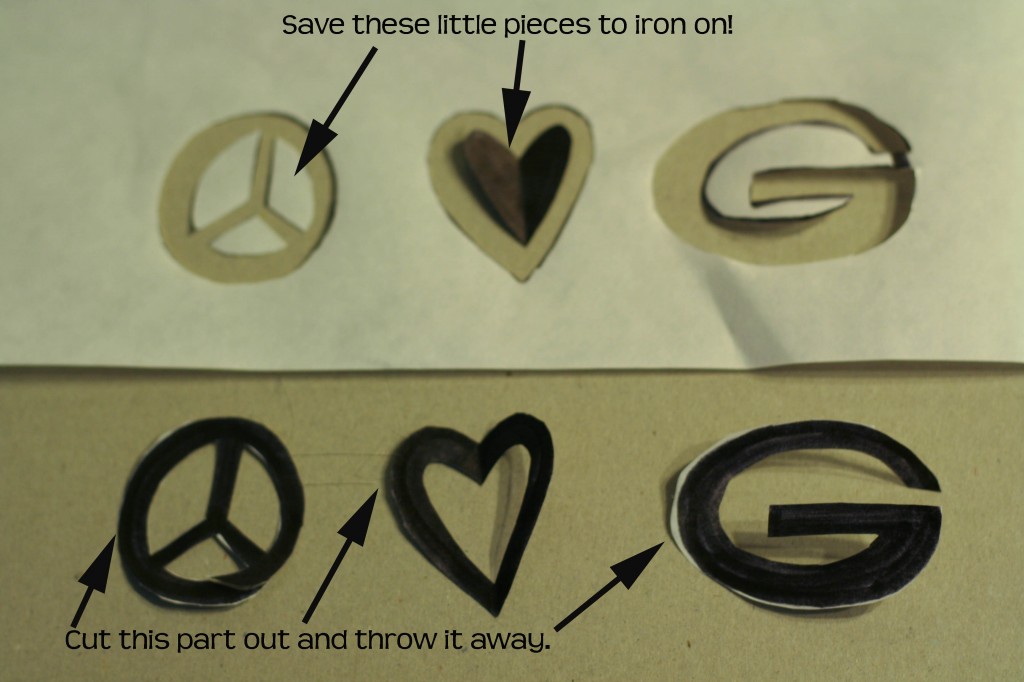
Cut out your stencil.  You will be cutting out the black parts(the lines) and throwing them away.
(I accidentally colored in a full heart, which is why I did save that one black piece.)

STEP THREE:
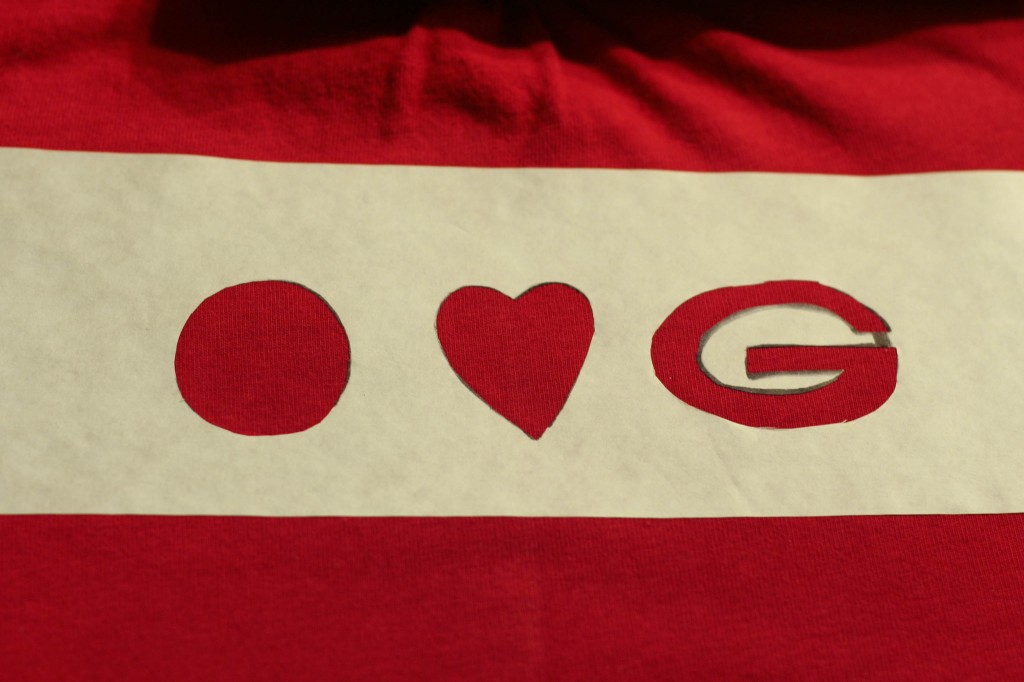
With the shiny part DOWN, iron on the big part of your stencil.
Don’t worry about the little pieces right now.
But don’t loose them!  They go on next.

STEP FOUR:
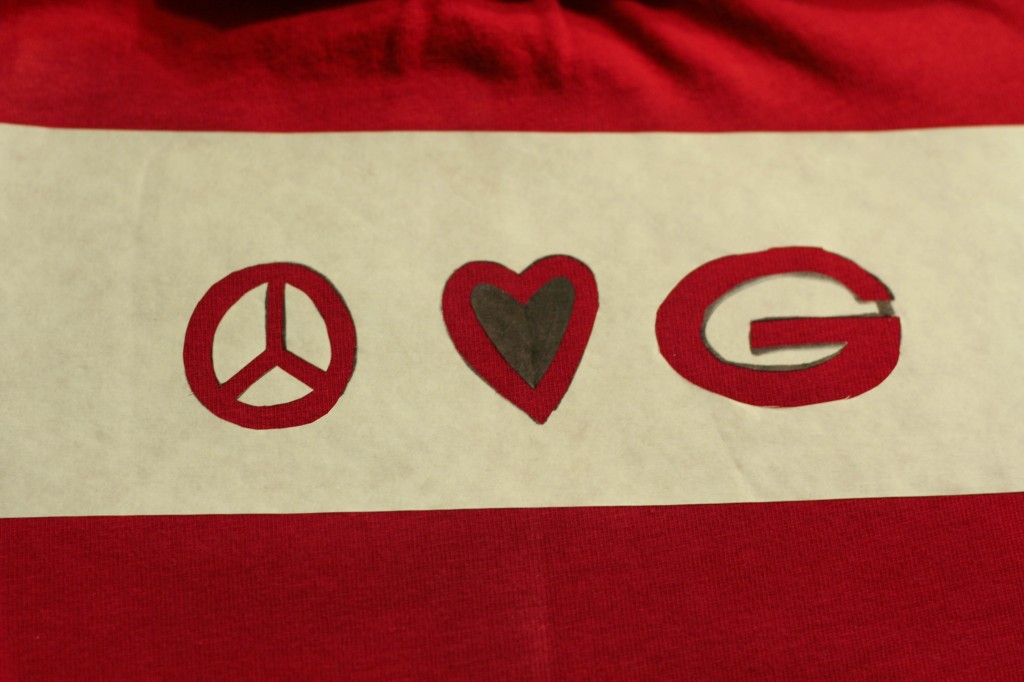
Iron on “the insides”, also shiny side down.

STEP FIVE:
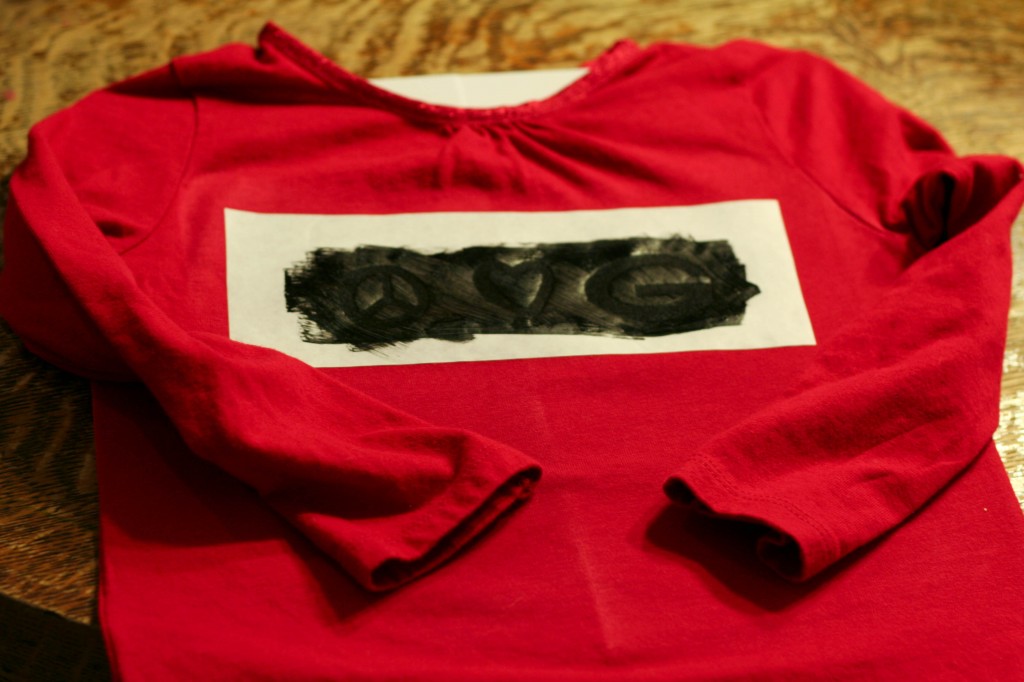
Get out your fabric paint and paint brush.
This is when you need to MAKE SURE that you have something inside the shirt(like cardboard or a magazine)
to keep the paint from bleeding through to the other side of the shirt/item.
Um…that’s the voice of experience speaking there!

(Also, you can do multiple colors and multiple layers, but it’s a little more time-consuming and difficult.
Email me if you want more directions on that!)

STEP SIX:
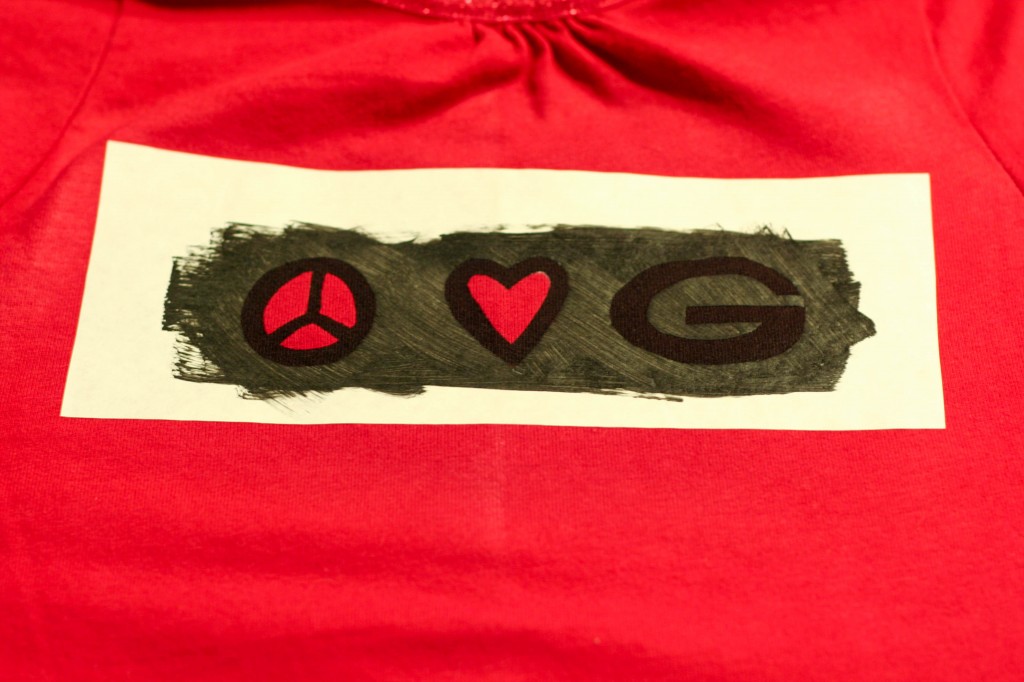
Paint on the freezer paper stencil, fully coating the fabric but careful not to paint off the edges of your paper.
I usually do one well-saturated layer of paint.
However, if you are doing a light color on a dark shirt, you may want to let it dry and paint another layer.

STEP SEVEN:
Once the paint is dry, peel off the little pieces first.
(I honestly don’t know how long it takes the paint to dry.
But with my first few attempts I took the stencil off too early and smudged it.
Now-because I’m so impatient-I paint it and then go to bed.
If I’m asleep, I’m not tempted to pull them off too soon!)

STEP EIGHT:
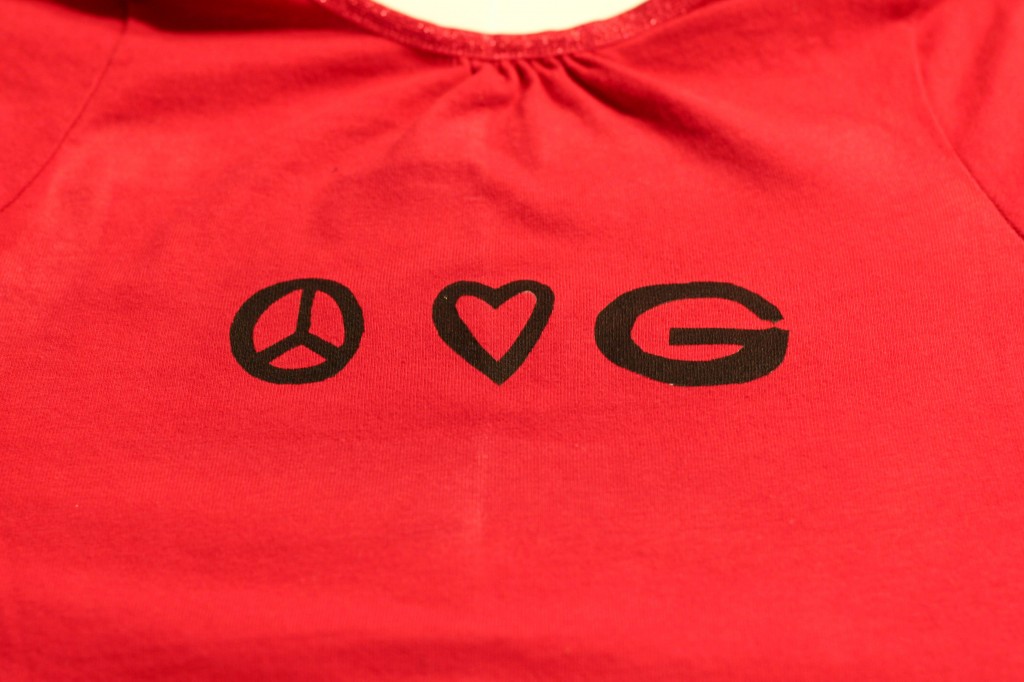
Now slowly peel off the big part of the stencil and YOU’RE DONE!

See some of the fun shirts I’ve made so far?

*******************
Want to see more of my crafty creations?

Check out the other 12 Crafts of Christmas:
Week One: Silhouettes
Week Two: Personalized Wall Clocks
Week Three: Glass Etching
Week Four: Fancy Fingerpaint Art
Week Five: Freezer Paper Stencils
Week Six:  Tie-Knot Fleece Blanket
Week Seven: Jewelry: Ribbon & Pearl Bracelet, Wool Ball Necklace, DIY Button Earrings
Week Eight: Chalkboard Paint Ideas: Glasses, Chalkboard, Candle, Love Box
Week Nine: Frugal Finds
Week Ten: Personalized Pendants
Week Eleven: Edible Edition

Homemade Buzz Lightyear and Tinkerbell

For Halloween my kids wanted to be Buzz Lightyear and Tinkerbell.

Because I am cheap frugal, I cannot force myself to pay full price for costumes/dress-up.

I usually score a few dress-up items after Halloween that my kids destroy enjoy from one year to the next,
but those store-bought costumes aren’t the highest of quality and rarely make it to the next year.

So when Carter said he wanted to be Buzz, I thought, “I can do this!”
Then Lydia decided that she wanted to be Tink.

(Sorry I didn’t take pictures as I was making these.  I hadn’t initially planned on blogging it!)

Off to the dollar store.
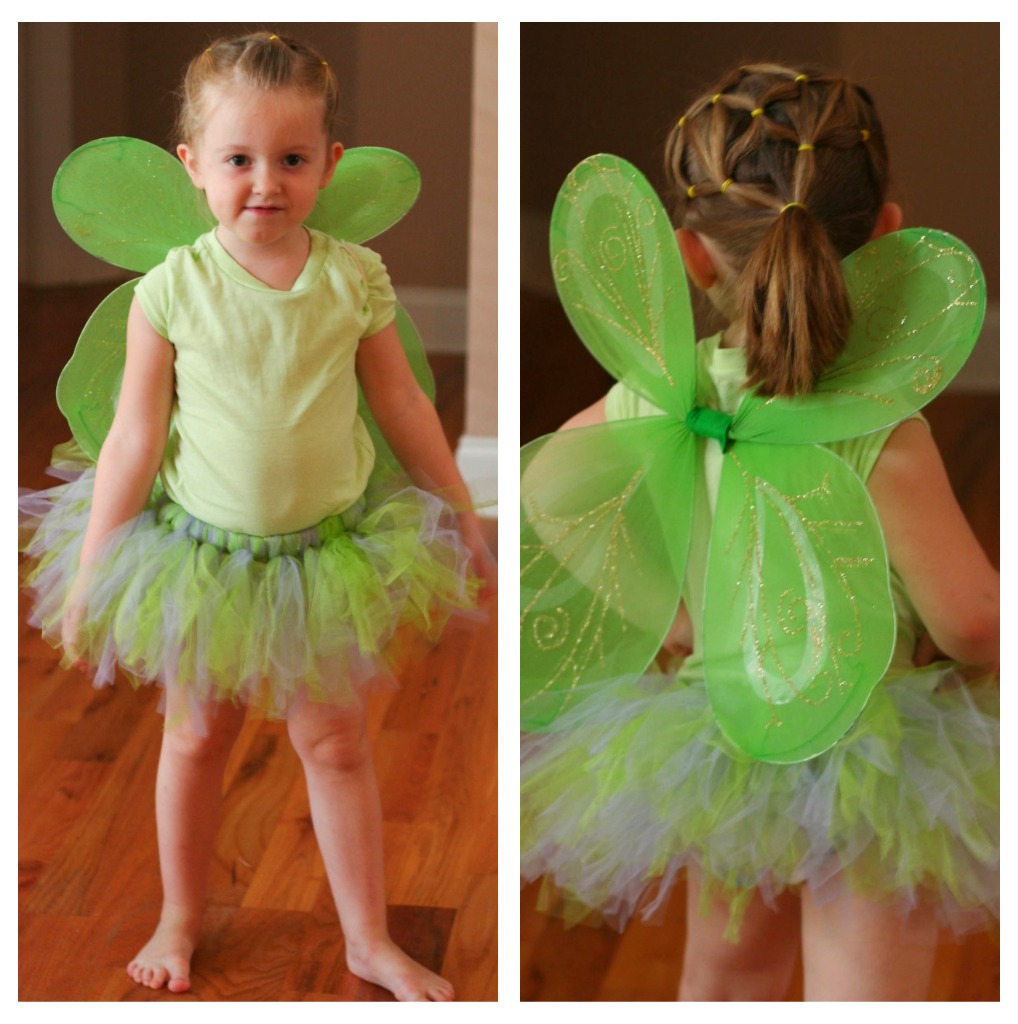
I bought her wings, fairy shoes and green tee shirt from the dollar store(as well as a glow-in-the-dark wand for fun).

I had previously started making a tutu that I never finished.
(I’m a chronic project starter.  I am not a chronic project finisher!)

And I got a pair of green shorts from a friend and made them into a skirt.

Over all, I don’t remember how much I spent on tulle and elastic, but I do remember that I got it on sale at Joann’s.
The shorts were free, and the dollar store items were…well…a dollar each.
Grand total: around $15.
Yes, I probably could have bought a Tink costume for only five more dollars, but look how cute she is!
(And really?  I only spent $4 in stuff I didn’t already have.)

For Buzz?  We happen to have about a million Buzz Lightyear items in our house and I used them as a guide.
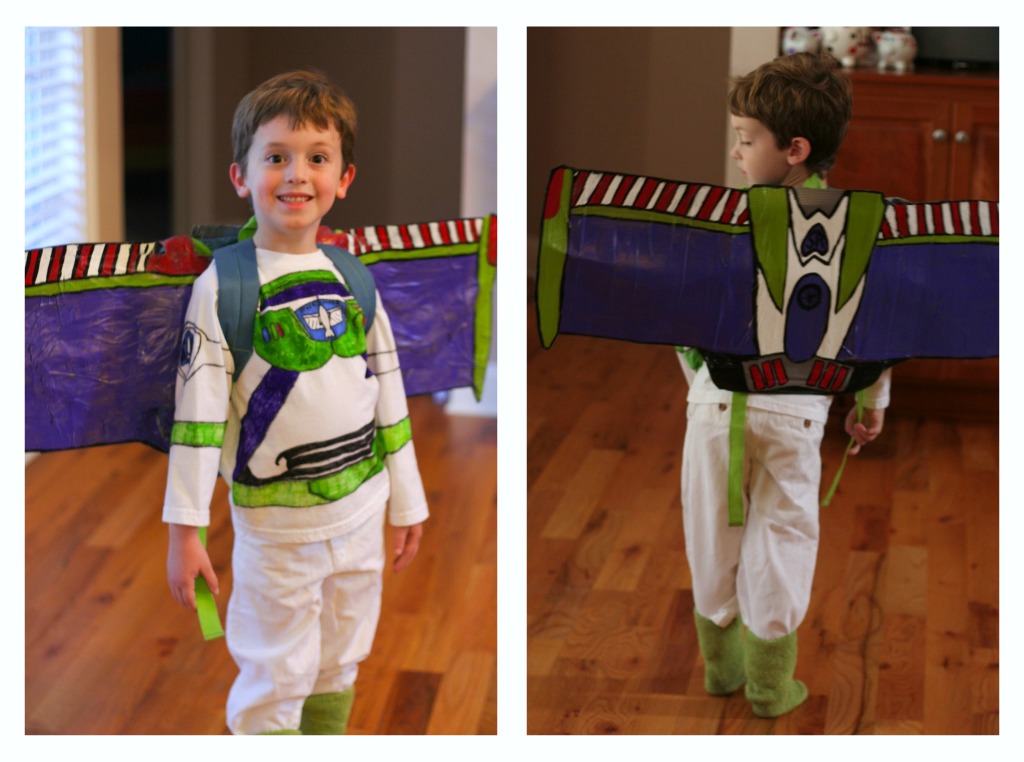
I took a plain white tee shirt($3.50 from Walmart) and hand-sketched a Buzz shirt with Sharpie.
Then we colored it in with colored Sharpies, which was fun for all of us!

Next part?  Wings!
I’d seen instructions in Family Fun on how to make fairy wings and thought I could use that same idea.
I took 2 (24pack) Diet Coke boxes and opened them up flat.
I taped them together and hand-sketched and cut out the basic shape of the wings.
I used 3 basic hangers and  bent them just a little so that none of the pointy pieces were sticking out.
Then I duct taped those suckers to the cardboard, side-to-side long ways so that they went from one end to the other.
Then I wrapped the entire thing up in duct tape.
(I love me some duct tape!)

After that I painted out the wings(with acrylic paint I already had at home) and attached then to an old backpack with…
…you guessed it!  Duct Tape.

Because the paint so easily scratched off of my beloved duct tape, I covered it in a layer of mod podge.

So…a $3.50 tee shirt, some hangers, an old backpack, two boxes, some paint and a $3 roll of duct tape got me this:

I finished it off with a white pair of pants he already had and a pair of my green socks over his shoes.

Only $6.50!  Woo-hoo!

Trick-or-treat!

There are no pictures of Asa because…honestly…he’s too little to care.  He’ll be wearing a Woody “costume” (also known as pajamas that are 2 sizes too big).

12 Crafts of Christmas {Fancy Fingerpaint Art}

Earlier this year I saw an idea that I just loved on Impress Your Kids(a fabulous site for families of faith created by the lovely OhAmanda).   Amanda is a children’s-pastor-turned-stay-at-home-mom and she has gathered a great team of writers who share tons of great ideas on how to teach your children about God, the bible, and how to live a God-centered life.  Not only are there ideas on how to effectively teach your children the importance of learning memory verses and Christian values, there are crafts and book reviews, too.

When I first “met” Amanda(online), I went back and scoured her archives.  So many great ideas!  But one of my favorite was a post about alphabet stickers and fingerpaint.  I loved the artwork that she ended up making with her kids and knew that this was a must for us!

And (grandparents, close your eyes) what grandparent doesn’t love handmade art from the kidlets?

So this weekend the kids and I had a big fingerpainting session.
And what was supposed to be a Christmas gift for someone else
turned into a we-all-love-this-so-much-we-can’t-give-it-away-so-we-should-keep-it-as-a-gift-to-ourselves gift.

Good news?  It was an inexpensive craft that even the baby could do.
And it was quick and easy!

What you need:

  • Contact paper
  • a sharpie
  • scissors

(OR stickers if you don’t want to cut out your own)

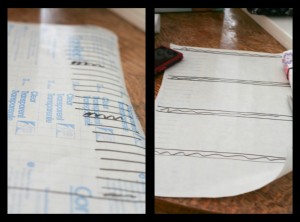
First I rough-sketched the edge of my 11×14 canvas onto the contact paper.

Then I used the lines on the back of the paper as a guide to make my own marks on the back(left)
And turned it over and drew guidelines on the front of the paper(right).
You surely don’t have to do this step, but I was looking for a somewhat uniform and straight look.

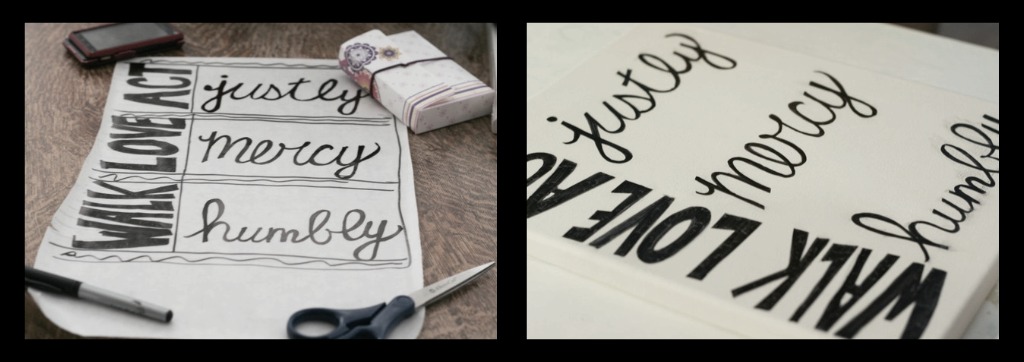
Next I hand-drew my letters and cut them out. (left)
(You could save a lot of time by purchasing pre-made alphabet stickers.)
(You could also print out letters from your printer and use them as a template,
but I don’t think you can print directly onto contact paper.)
And then I stuck them on the canvas, making sure to smooth out all the bumps! (right)

I did all of that (↑) before I ever clued the kids into the fact that we had a project.
I left the canvas sitting overnight and had to go back before we painted and make sure no bubbles had returned.

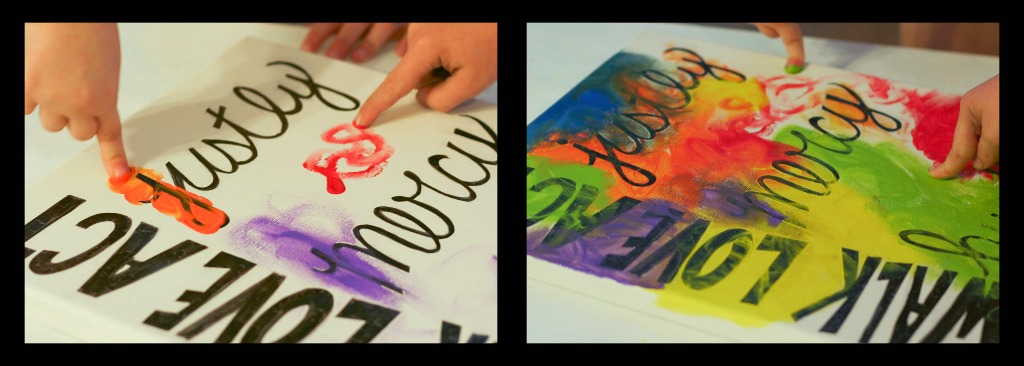
Now the fun part!
I gave them a plate with a small bit of each color paint and let them go.

And then we waited for it to dry.
(The paint wasn’t very thick, so it didn’t take long.)

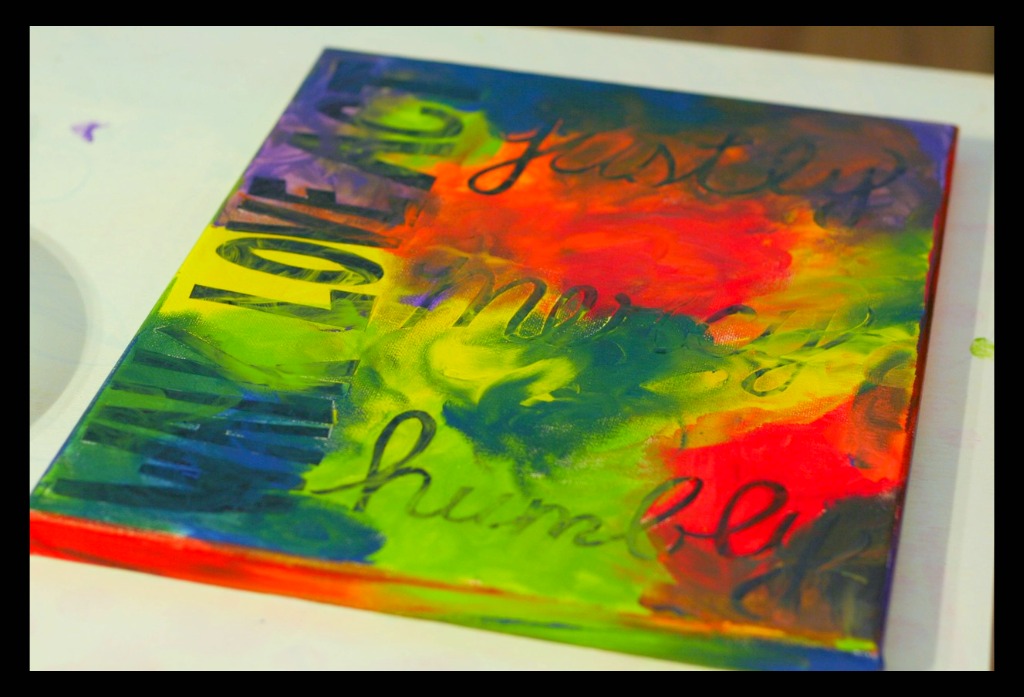
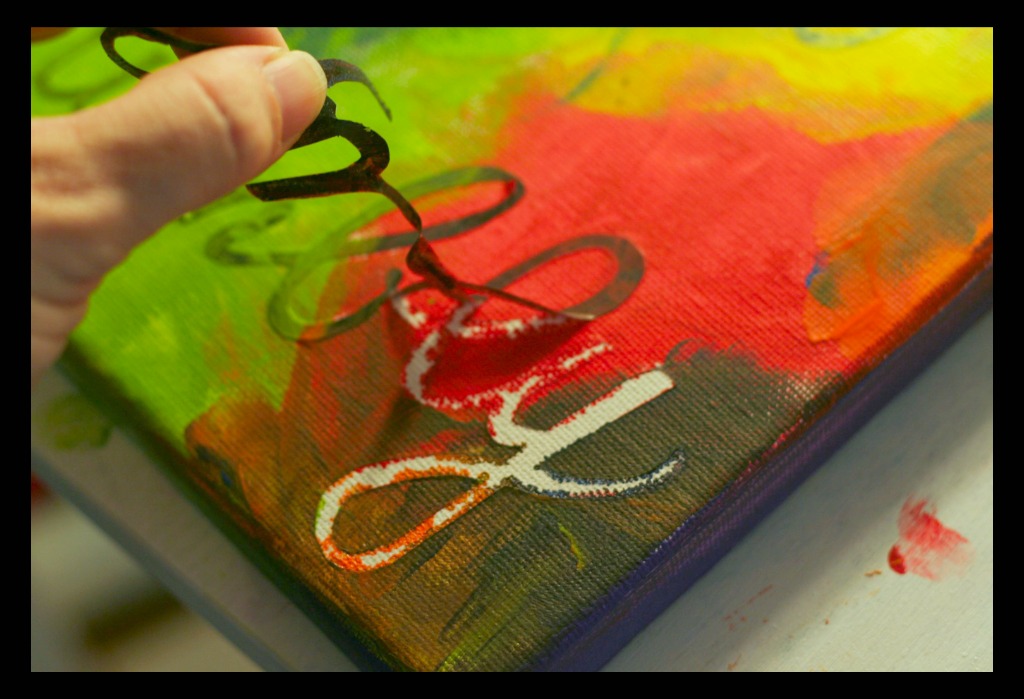
And then we sloooooowly peeled off all of the stickers.

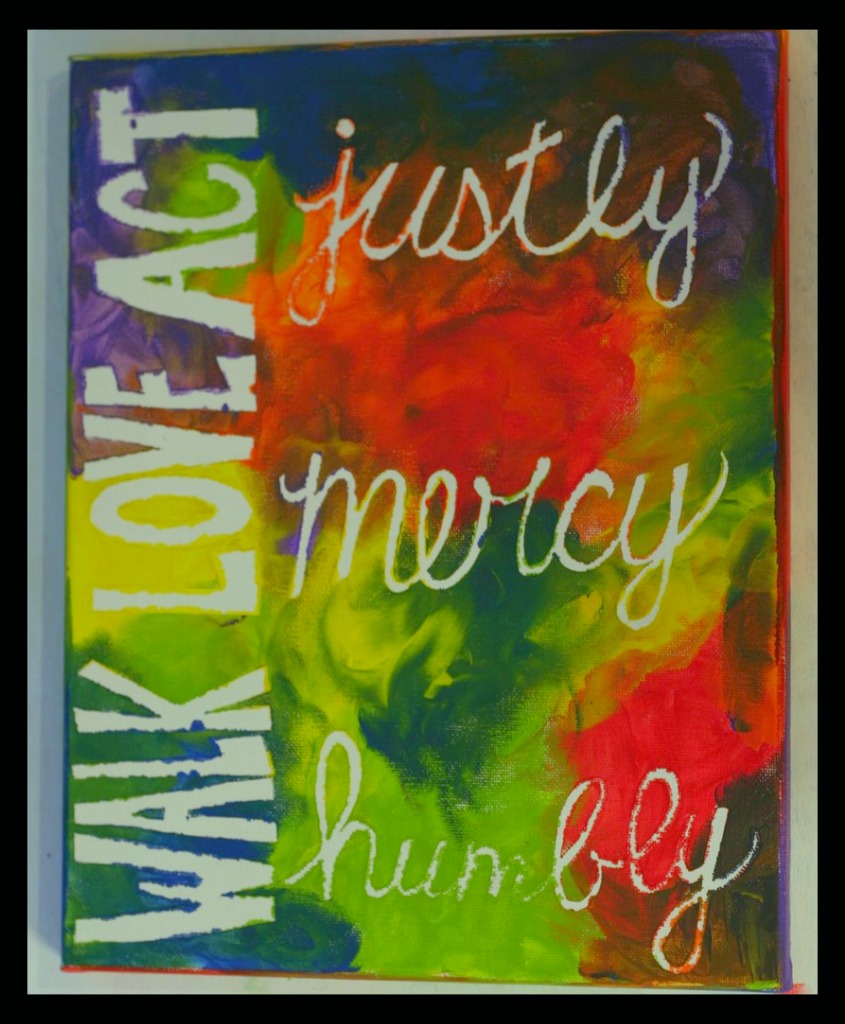
And…ta-da:

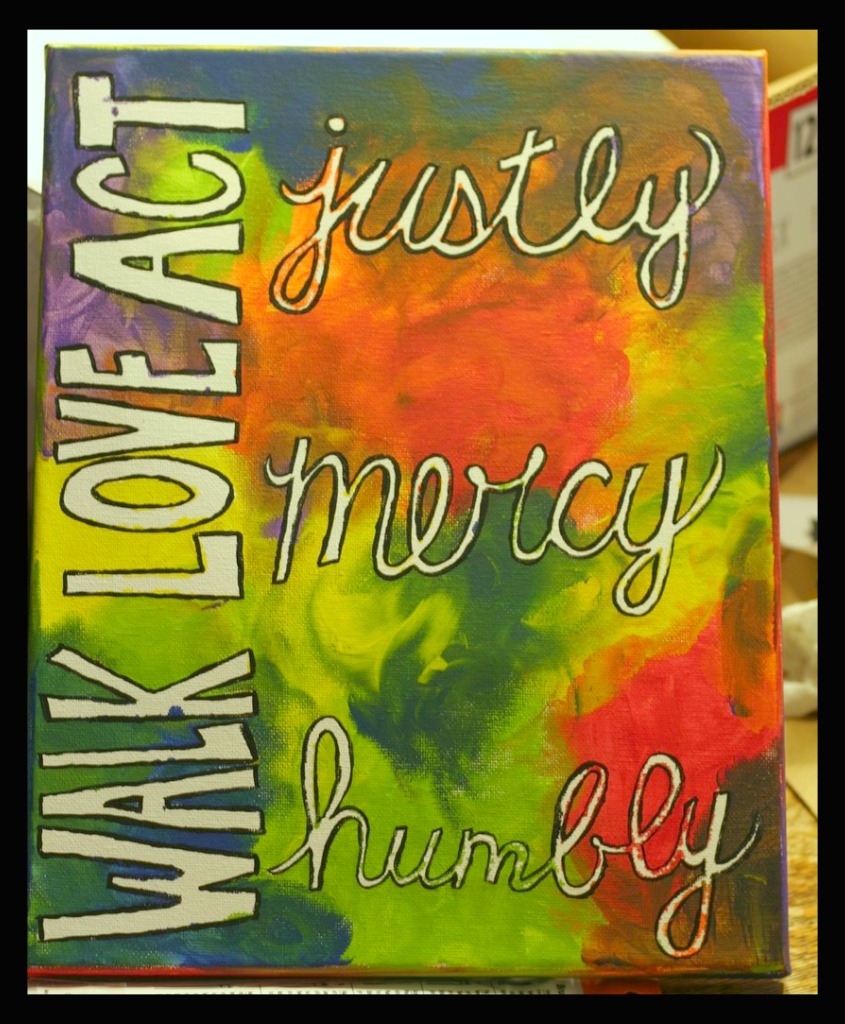
There’s no way(especially with the small lettering like the cursive seen here) to have nice perfect edges,
So I decided to make the letters pop a little more by outlining them in black.
You, of course, don’t have to do that.

He has shown you what is good.
But what does the Lord require of you?
To act justly and
To love mercy and
To walk humbly with your God.
-Micah 6:8


*******************
Want to see more of my crafty creations?

Check out the other 12 Crafts of Christmas:
Week One: Silhouettes
Week Two: Personalized Wall Clocks
Week Three: Glass Etching
Week Four: Fancy Fingerpaint Art
Week Five: Freezer Paper Stencils
Week Six:  Tie-Knot Fleece Blanket
Week Seven: Jewelry: Ribbon & Pearl Bracelet, Wool Ball Necklace, DIY Button Earrings
Week Eight: Chalkboard Paint Ideas: Glasses, Chalkboard, Candle, Love Box
Week Nine: Frugal Finds
Week Ten: Personalized Pendants
Week Eleven: Edible Edition
12 Crafts of Christmas{Glass Etching}

One of my favorite gifts from a friend was a glass pitcher with my initials etched on the side.
I always assumed that glass etching was expensive or hard.
But really?  It’s neither!
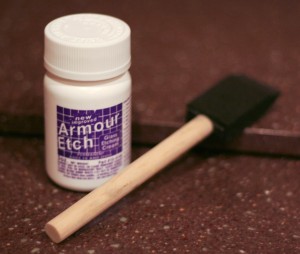
The most expensive part is buying the Armor Etching cream.
I found a small bottle at Michael’s for somewhere around $6.

For my mom’s birthday, I made a monogrammed trifle bowl.
I made a new pitcher for myself.
And although this would be significantly easier if I had a Silhouette or Cricut,
It’s still not too hard to do it all by hand.

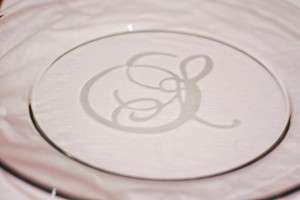
WHAT YOU NEED:  glass item(this project is a large glass serving plate), Armor Etching cream, paint brush, Con-Tact paper

First you’ll need to find a font you like and print out the thing you want to etch.
For this project, we’ll be doing just one letter in the center of a large serving plate.
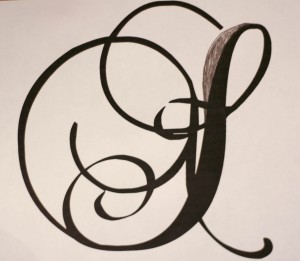
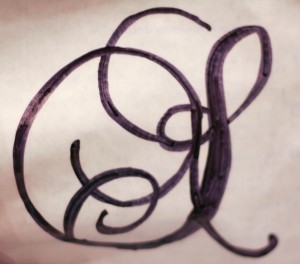
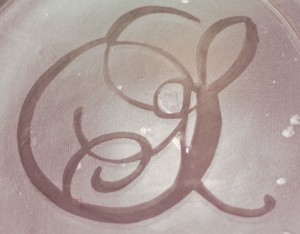
I liked this “S” but I didn’t like the one spot at the top, so I shaded it in with a pencil to make it like I wanted.

Then I traced it onto a piece of contact paper and cut it out.
Don’t forget that you are really just cutting out the black!
You’ll need to cut out and save all those little white pieces and throw away the black parts.

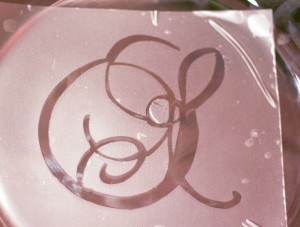
After that I cut out the stencil and carefully placed it in the center of the plate
(including all those little white pieces).

Now for the easy part.  Get out your etching cream and a paint brush.
I prefer to use the cheap foam ones.

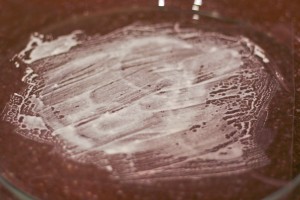
Thickly spread the etching cream over the stencil.
(Warning!  It smells like rotten eggs!)
Remember that anywhere the cream touches, it will etch.
So only get the cream on the contact paper or the stencil, but not anywhere else on the item.

After 5 minutes or so, carefully wash off the cream and dry it off.

Peel off all the piece of the stencil and enjoy your new etched glass item!

There are SO many things other than plates that you make!
Decorative edges on a mirror, glass Christmas ornaments, jars, glasses, vases…
Oooh!  You could personalize your Pyrex dishes so that it always comes home from pot-luck dinners!

*******************
Want to see more of my crafty creations?

Check out the other 12 Crafts of Christmas:
Week One: Silhouettes
Week Two: Personalized Wall Clocks
Week Three: Glass Etching
Week Four: Fancy Fingerpaint Art
Week Five: Freezer Paper Stencils
Week Six:  Tie-Knot Fleece Blanket
Week Seven: Jewelry: Ribbon & Pearl Bracelet, Wool Ball Necklace, DIY Button Earrings
Week Eight: Chalkboard Paint Ideas: Glasses, Chalkboard, Candle, Love Box
Week Nine: Frugal Finds
Week Ten: Personalized Pendants
Week Eleven: Edible Edition
12 Crafts of Christmas{Personalized Wall Clock}

**Originally posted here in November 2008.**

I originally planned on showing how to make a Photo Clock like you can order from Snapfish for almost $50, but I didn’t have a photo on hand.   So…I decided that the kids could draw a picture instead!   The whole project took about an hour from beginning to end, but that did include the 20 minutes or so my kids took coloring.

Instead of spending $50 and waiting for it to be delivered, you can spend around $5!!

So…you only need a few things: pen, scissors, a large(12×12) sheet of paper, a large photo(based on the size of your clock, you may need an 8×10 or 11×14), a tiny screw driver, and a clock.  I grabbed a cheap $4 wall clock from Walgreens today(like the one shown below), but you could use any one that has screws on the back…some of the really cheap ones are glued together.

wall-clock01

I’m going to give you a ton of pictures and a ton of directions…it’s really idiot-proof though.  I’m just trying to be really specific.

To start, unscrew all the little screws on the back in order to take the glass front off.  Be sure to set the face of the clock on something semi-soft so that it won’t get scratched.

wall-clock-02

Next is probably the hardest part:  You’ll have to take off the second, minute and hour hands.  For most clocks, you just have to pull on the second hand and pop it off.  Once you get it off, it’s really easy to get the other two.  When you’re pulling, you may think that you’re going to break it…you won’t…probably.  If you do break it, you’ve only lost four bucks!

wall-clock-03

Once you get all the hands off, it will look like this:

wall-clock-05

Next you’ll want to turn the clock over and carefully trace the edge of the clock on your 12×12 paper.  I say be careful because you’ll have the little center part sticking out.  If you break it, you’ve broken the clock.  So don’t break it!

wall-clock-06

Once you have it traced out, you will cut out the circle.  Remember that you’ll also want to trim a little bit off from what you traced because the inside of the clock is smaller than the outside.  It’s always better to make it too big than too small though…you can keep trimming it until it fits perfectly.

Once it’s all cut out and looks like it’s going to fit, you’ll turn the clock back over.  Center the circle over the clock and gently push down on the center post.  You probably won’t be able to push hard enough to puncture the paper without breaking the post.  So just make an indentation that you can punch out later.

wall-clock-08

I then used my little screwdriver I had on hand to make a hole where the indendation was, and make it all smooth.

wall-clock-10

Now you’re to the fun part!  Since I didn’t have a picture, I let the kids color on the white circle I had cut out.  If you were using a photo, you would take the circle and use it as a template for cutting your photo into a circle.  But remember to take note of where the clock hands will be once you place your picture in the clock.  You probably don’t want the hour hand sprouting out of Uncle Bob’s nose, or even worse…someone’s crotch!  (Or maybe you do…because really, that’s funny!)

wall-clock-111

You’re getting close now!  Take your photo or artwork and glue or tape it onto the clock face.  I like to use double sided tape, but you could use whatever you have available.

wall-clock-12

Then you’ll need to put the hands back on(usually in the hour, minute, second order).  Make sure that they are all flat.  If they got bent when you were trying to get them off, they won’t run smoothly.  But you can easily straighten them back out.

wall-clock-13

Now just screw the clock back together…

wall-clock-14

And you’re done!  Congrats!

wall-clock-15

************************
Want to see more of my crafty creations?

Check out the other 12 Crafts of Christmas:
Week One: Silhouettes
Week Two: Personalized Wall Clocks
Week Three: Glass Etching
Week Four: Fancy Fingerpaint Art
Week Five: Freezer Paper Stencils
Week Six:  Tie-Knot Fleece Blanket
Week Seven: Jewelry: Ribbon & Pearl Bracelet, Wool Ball Necklace, DIY Button Earrings
Week Eight: Chalkboard Paint Ideas: Glasses, Chalkboard, Candle, Love Box
Week Nine: Frugal Finds
Week Ten: Personalized Pendants
Week Eleven: Edible Edition
12 Crafts of Christmas{Silhouettes}

A few years ago I wanted to make a unique keepsake gift for my mom and mother in law(and myself).
Once I settled on making hand-cut silhouettes of my kids, I did what most people do:
I googled directions!

I found a few good websites, but I decided I was too lazy to set up a projector and trace out his shadow.
And I was too much of a perfectionist to do a hand drawn version.
So I looked at all the options and decided to try it my own way.
Here’s how I make silhouettes.

**Originally posted in December 2008**

Step One: Put your subject(kid, cat, dog, whatever) against a white or light background, and get a good profile picture.

t-sil

Step Two(if you have Photoshop): Go into Photoshop and use the “Magic Wand” tool to select and delete the background.
I turned mine black and white, so the lines would be more distinct.
Then you can print(on white cardstock for best results) the back-groundless picture and cut it out.

Step Two(if you don’t have Photoshop): Print a copy of  the picture at a local store photo lab and cut out the shape.

t-sil-bw-2

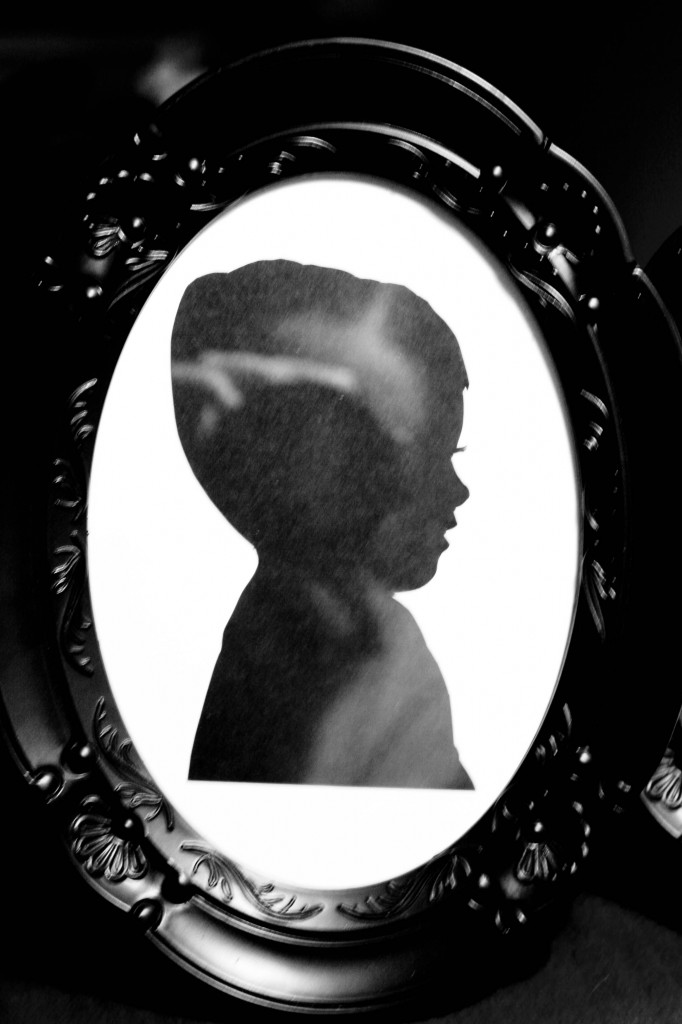
Step Three:  Use the picture/shape you cut out as a template, and cut out the silhouette onto a piece of cardstock.
I used traditional solid black.  (Eyelashes are the hardest part…I suggest using little bitty manicure scissors.)
But you could do some really fun and funky stuff with all different kinds of crafting papers!

Step Four:  Mount it on a background(once again, I used traditional white).
Frame, and  you’re ready to give this keepsake!
(The only picture I have of this finished craft is the framed one in which you see my reflection. But you get the idea!)

******************
Want to see more of my crafty creations?

Check out the other 12 Crafts of Christmas:
Week One: Silhouettes
Week Two: Personalized Wall Clocks
Week Three: Glass Etching
Week Four: Fancy Fingerpaint Art
Week Five: Freezer Paper Stencils
Week Six:  Tie-Knot Fleece Blanket
Week Seven: Jewelry: Ribbon & Pearl Bracelet, Wool Ball Necklace, DIY Button Earrings
Week Eight: Chalkboard Paint Ideas: Glasses, Chalkboard, Candle, Love Box
Week Nine: Frugal Finds
Week Ten: Personalized Pendants
Week Eleven: Edible Edition
Beautiful Bubbles

Today we had a Bubble Bash of epic proportions.
There were plenty of bubbles for everyone, bubble art and even a mega bubble.

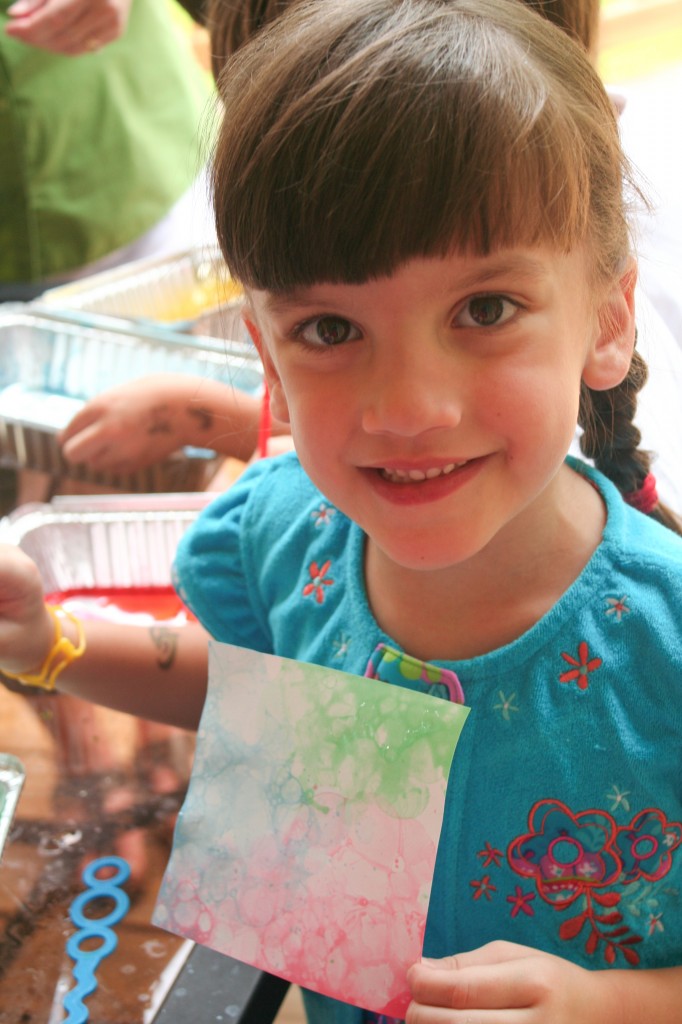
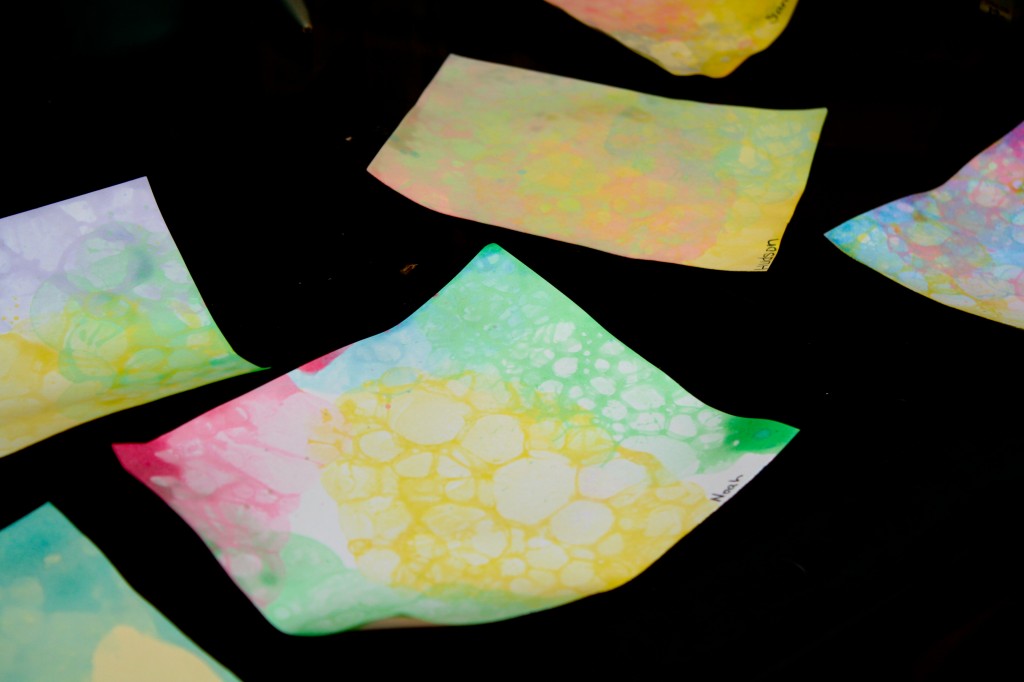
The kids had fun with all, and I loved how the bubble art turned out.
It was super easy and not quite as messy as I’d expected.
I can see us doing this again…maybe with wrapping paper or note cards or photo frame mats.

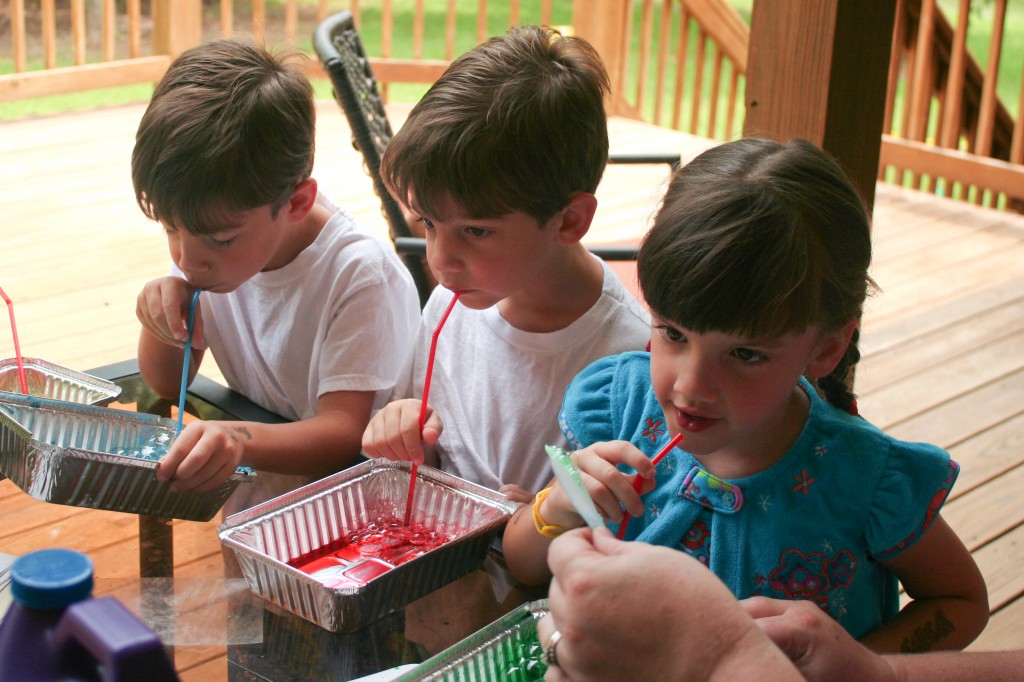
To do this project, you’ll need several shallow pans or dishes(I used aluminum baking trays), some food coloring, some bubble solution, one straw per child, and pieces of cardstock.

Pour liquid bubble mix into each pan, just barely covering the bottom.
Add a few drops of food coloring to each pan.  Obviously the more drops, the more vibrant the colors will be.
Allow the kids to blow bubbles with the straws and when the bubbles are up to the top of the side, take the paper and gently press it into the bubbles.


As the bubbles pop, they will leave a marbled look on the paper.
And some happy smiling faces.


Try all kinds of patterns and colors…and don’t forget to have fun!

****************************************************

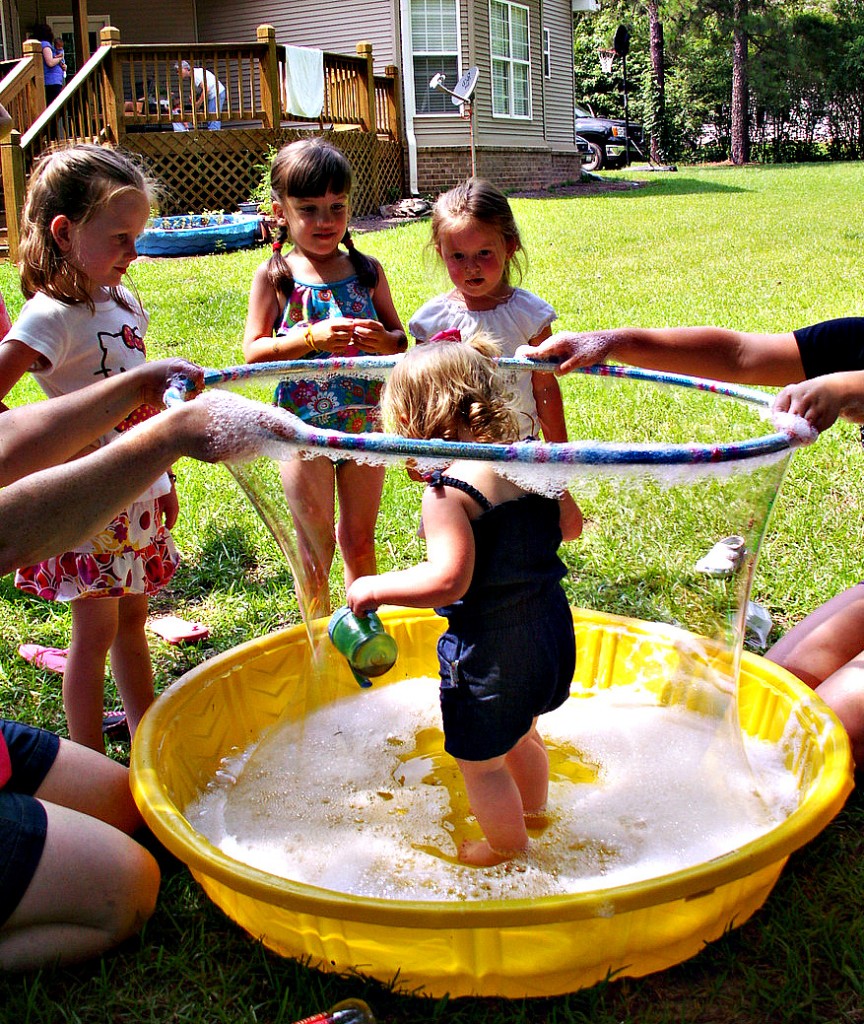
The mega bubble was a big hit with all the kids.  I kind of wish I could have had a turn in the middle of the gigantic bubble.

We’ll be doing this again sometime soon, too.

(photo by PeapodsquadMom)

What you’ll need: about 32 oz. of dish detergent, 6-12 oz. glycerin*, water, 1 wading pool, 1 hula hoop that will fit inside the wading pool.

Squirt all of the detergent and a generous amount of the glycerin in the bottom of the wading pool.  Using a water hose, add enough water to easily cover the hula hoop(or hoop-a-loop**, if you’re Agent Oso).  Swish the mixture around until the detergent and glycerin are evenly distributed in the water.  Try pulling the hula hoop out of the water.  You should be seeing a super-huge mega bubble.  If it pops quickly, try adding more glycerin.  Apparently the harder your water, the more glycerin you will need.

*I had a really hard time finding glycerin.  I finally found 6 oz. at our local pharmacy, but if you can also find it in many online stores including amazon.com. (For your information only…not an affiliate link!)  Our bubbles would have been much better, I think, if we’d had more glycerin.  Although I did some googling and used some light corn syrup as a substitute.  It was not as great, but it did work.

**Who in the world calls it a hoop-a-loop?  Is hula hoop a Southern phrase??

Praying in Color

About a year ago, I found a book called “Praying in Color” by Sybil McBeth.   I’ve mentioned it in passing a few times on my blog, but today I saw this post by Pensieve Robin, whom I met at Blissdom, and realized that I’d never really given many details about it.

I am a usually a wordy person.

However, there are times when I just don’t know what to say or how to say it.

That happens to me a lot when I pray.

A lot of stuff happens to me when I pray.

My mind wanders off to my to-do list.

I find myself using grandiose language, and then feel silly
because…really?  God don’t need big words. (Or good grammar.)

I drift off to sleep.

I say my tried-and-true rote prayers and check “Say Prayers” off my list.

I face a lot of hurdles when I try to pray,
and I’m willing to bet that you do, too.

So I did what any scholarly person would do when met with a problem: I researched.

What is the best way to pray?
How should you structure your prayers?
How do you going about setting up a prayer journal?

I read and read and read about lots of styles of prayers.
I saw what worked for other people,
And yet I struggled…
“Why isn’t this working for me?
I’m a good person.
I love God.
I want more of a relationship with the Almighty.
What’s wrong with me?
Why can’t I pray the right way?”

And it was that last question that really set me off.

Why can’t I pray the right way?

What is the “right” way to pray?

And it was then, after months of searching and seeking that I stumbled across this book.

An answer to my prayers…the ones I didn’t really know I was praying.
The answer to my months of seeking and researching and studying.

The author’s words struck me with a force that shocked me and comforted me all at once.
Her thoughts were like my thoughts:

I know about centering prayer, contemplative prayer, walking prayer, healing prayer, soaking prayer, meditation, praying in tongues-I took the workshops and read the books.  I’ve dabble in all of them.  But a short attention span and a proclivity for daydreams hamper my efforts…The words of my prayers and the words of my distractions collide in an unholy mess.  On a good day, when words flow with more ease, I become so impressed with my successful articulation that I become the center of my own worship.  It is not a reverent sight.

She goes on to talk about how “praying in color” happened to come to her.  Sitting on her back porch with a pen and paper, she began to write the name of someone on her prayer list.  She drew a shape around the name and continued to doodle and decorate, all the while focusing on that person.

In the Praying in Color Kids’ Edition, she wrote:

As she drew, she pictured each person in the presence and care of God.  She used no words.
The drawing was the prayer.

It spoke to me.

This kind of praying?
This I can do.

During my recovery from my tonsillectomy, I have been very cautious about when and how I use my words.
When you the amount you can speak is decreased, the weight of your words tends to change.
(There’s a whole post hiding in that last sentence, I’m sure!)

I am so grateful to know that now, when it even hurts to think about speaking, God doesn’t need words to hear your prayers.

Sometimes I free-hand my prayers.
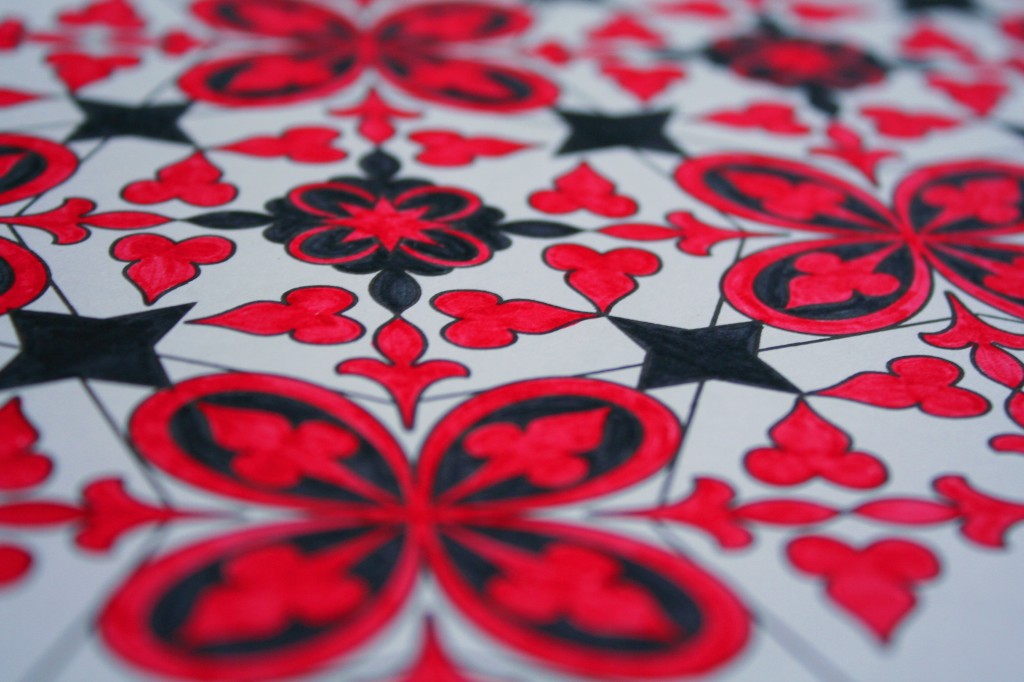
Other times I turn to printed materials, such as the geometric one seen below or mandalas like this.

I share with you my prayer:

Feb 26, 2010 - Praying in Color

Cheap Sheep

Yesterday was Lydia’s turn to be the sweetheart in her class.  When you’re the sweetheart, you get to be the line leader.  You get to bring snacks for the whole class.  You get to bring home Sally the snake.  (A plush classroom snake.)

So when I saw that Lydia was the sweetheart on “Mary Had a Little Lamb” day, I immediately emailed her teacher this:

So…um…on “Mary Had a Little Lamb” day, can I send lamb chops for snack?

Her response:

As long as you’re willing to pay for the therapy sessions all the kids will need once I explain what lamb chops are.

Since I wasn’t willing to shell out that kind of money, I came up with another idea.

See, I love a craft.  But do you know what’s better than a craft?  An edible craft!

Here you go:

Since I’m cheap and lazy, I bought refrigerated sugar cookie dough.

Roll it out and use a sheep-shaped cookie cutter to cut out the desired number of cookies.

LambCookie01 Bake and cool cookies.

Use a food coloring pen to draw an eye and a smile.

LambCookie02

Put a little frosting on top of the cookie and let your kiddo spread it around.

LambCookie03

Then add marshmellows to the top of that and…tah-dah: a cheap sheep cookie!

LambCookie04