Monthly Archives: December 2011

To Do

I wake up and start jotting down my to do list, in random order:

  • dishes
  • laundry
  • move train to Asa’s room
  • call Daddy about doll house
  • call friend who just had surgery
  • get soup in slow cooker
  • rearrange bonus room
  • more chores
  • more chores
  • etc.

And I get up and move over one load of laundry, get morning drinks and breakfast served.
Then plan to start on the list.

Instead, however, I find myself answering questions and refereeing disagreements,                                                                             changing diapers and assembling (and reassembling) the train track (again).                                                                                                    (At least I got it moved, right?)

And I find myself frustrated with them, frustrated with me.
Wanting to yell, “Can’t I just get ONE thing done?  Just ONE thing?”

But I take a deep breath, scratch the to do list and make another one:

  • Play with the doll house with Lydia
  • Read The Body book with Carter
  • Watch the train go ’round and ’round and ’round with Asa
  • Have a tea party with Anna Alden
  • Fix lunch and eat it under the table with the children
  • Put the baby down for a nap and do an art project with the bigs
  • Blow up the punching bag toy (again)
  • Watch Asa beat the snot out of it
  • Go through all the Disney apps on sale with the big two
  • Upload new apps onto their ipods
  • Get tonight’s soup in the slow cooker

Instead of frustrated, I’m happy.
Instead of crying, we’re all laughing.
Instead of clean, my house is a disaster.
(And I’m okay with that.)
(For now.)

Holiday Concert

This may be a little late, but it’s still ridiculously adorable.

Hope you all had a very merry Christmas.

Christmas Eve Eve 2011

FOUR
Your legs cross as they used to – the right foot nestled close to your left thigh.
A bottle – one of the last, I realize – is disappearing quickly.
We lock eyes and you smile behind the nipple, milk rolling down your cheek and onto my arm.
I don’t wipe it away.

THREE
Tousled hair and dirty hands.
You smell of playing – playing hard.
Arms stretching, they wrap around my neck.
Eyes squeezed tightly shut, I can see the love.
I close mine, too.

TWO
Dress-up and jewels removed, you are even more beautiful.
You believe that now, but you won’t always.
“Scratch right here,” you whisper and place my hand on your back.
With your head lying gently on my chest, you say your prayers.
I love to hear you pray.

ONE
“I love you more than a measuring tape can measure.
No.  More than all of the universe.  More than all the mulitverses.”
Your torso is nearly as long as mine.
For a moment, you let me hold you.
And then, just when I think you are going to push me away,
You put your hand on my back and rub it gently.
“I love you, Mommy.”
I love you, too.

12 Crafts of Christmas {DIY Photo Display Blocks}

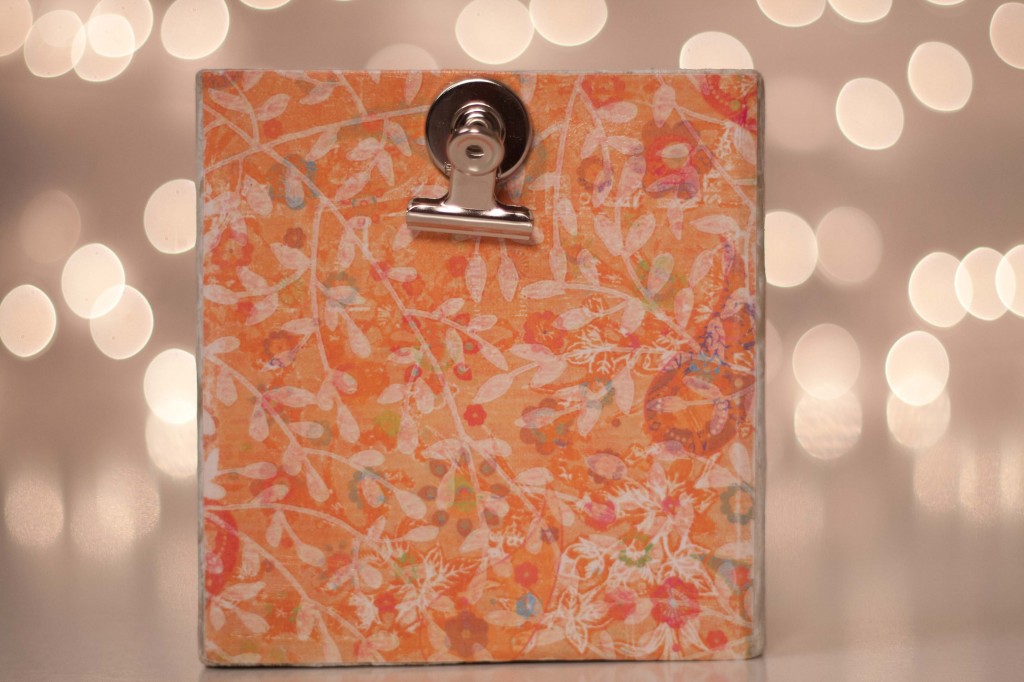
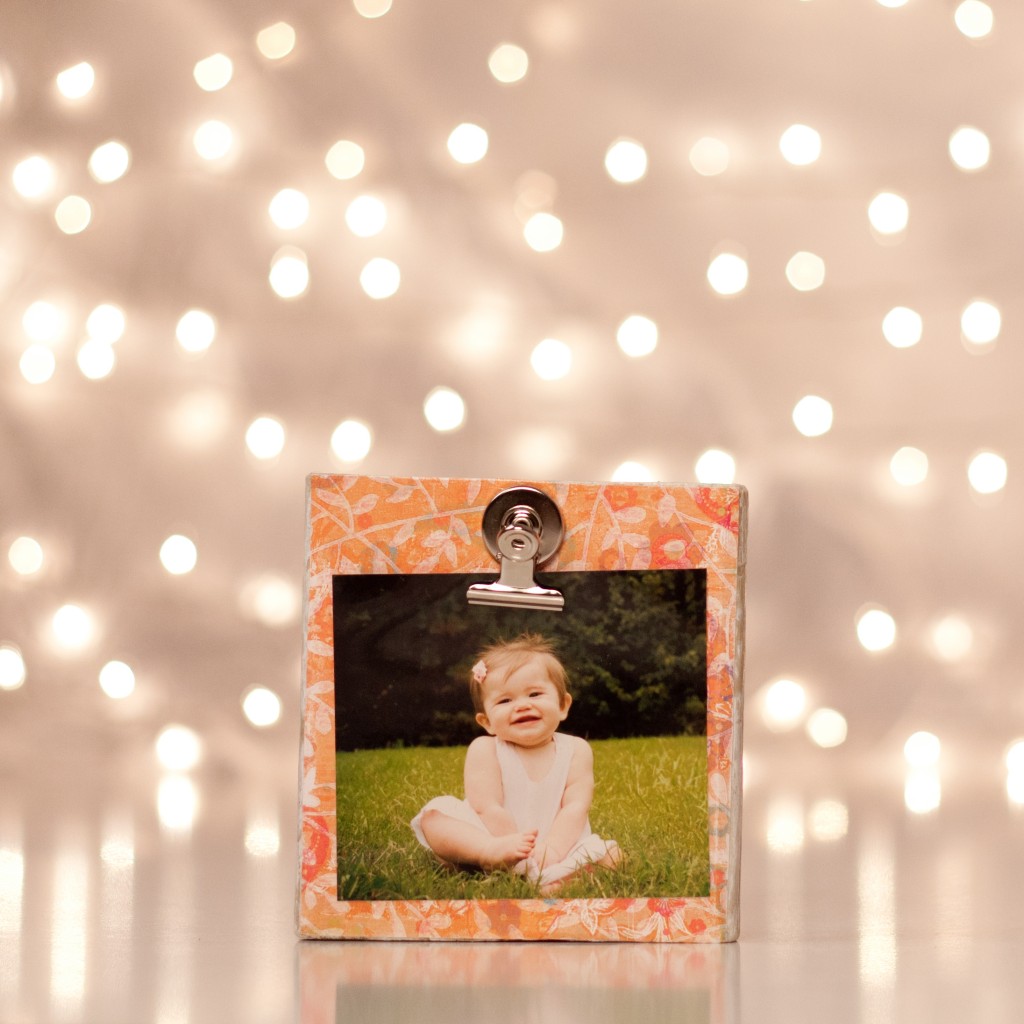
Several months ago, our friends were adding on to their house.  There was a big pile of scrap wood and I asked if I could have it.  I had no idea what I was going to do with it and I’m fairly certain that Marshall wanted to throw one of those wood blocks at my head when he saw how many I’d stuffed in the garage.

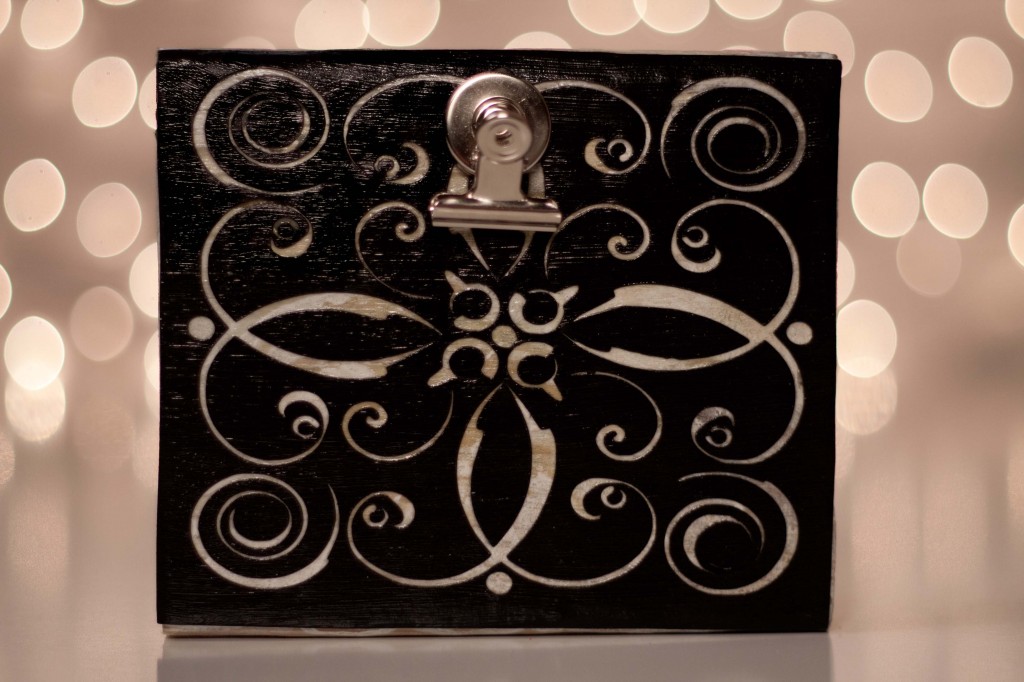
But I was thinking about inexpensive but still lovely ways to display all these pictures that  take.  I am terrible, horrible about printing out images but I want to do better.  My biggest wish was to be able to easily change the picture displayed.   I’m probably going to do another wall gallery similar to the one in Carter and Lydia’s room, but I’m not quite ready to commit to a big project right now.  I do, however, have a few more Christmas gifts to finish up!  Including drying time, these took me less than an hour to make!  And aren’t the cute, cute, cute?

This is what it looks like “nekkid”.  It’d also make a lovely note pad holder, eh?

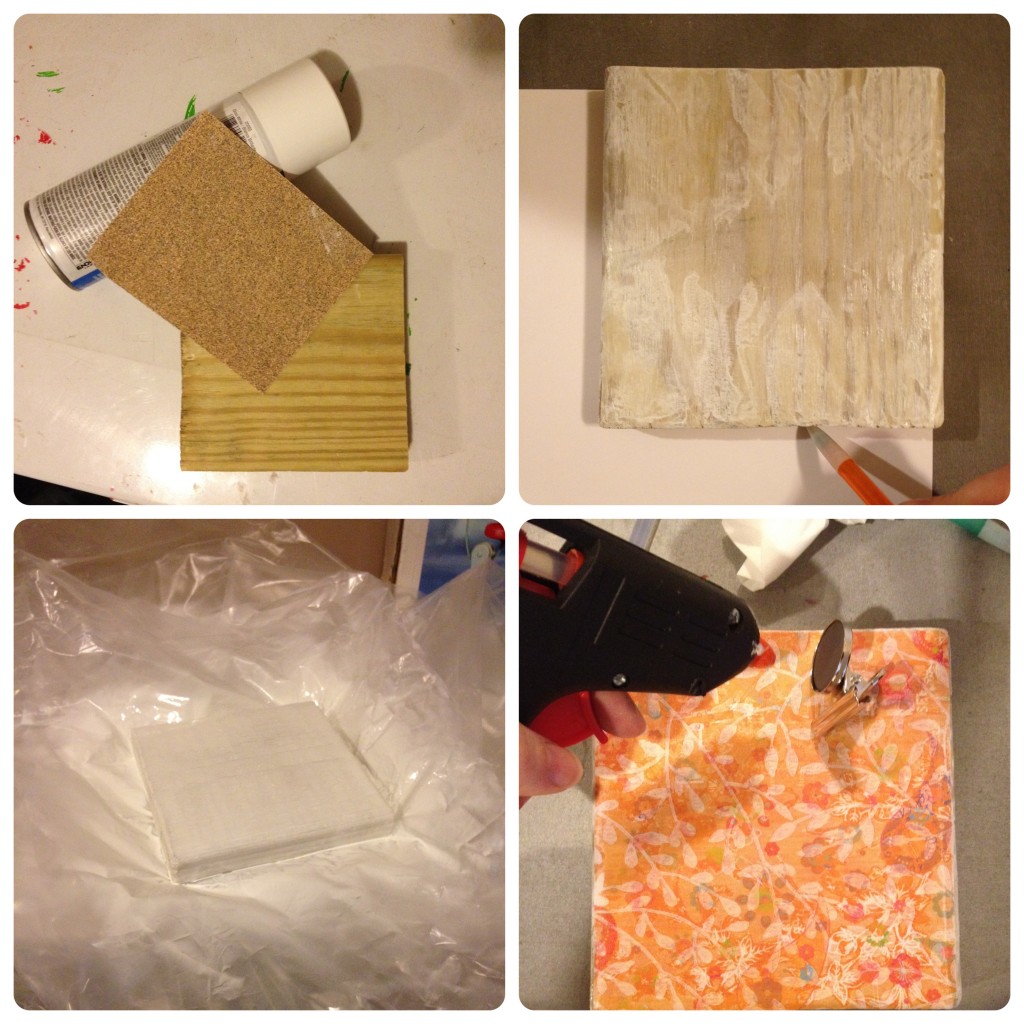
You’ll need:  a piece of wood (the ones you see here are 4x4ish and 5x6ish), some paint (I used spray paint), some scrapbook paper, Mod Podge, foam brush, a piece of sandpaper and these little round top magnetic clips*

First you’ll want to sand down your wood piece and make sure it is dust free.
Mine is scrap wood, so it’s not a straight cut.  I could have straightened it, but I kinda liked it.

Then you’ll want to lay down the front of your wood block onto the back of your scrapbook paper and trace the edges.

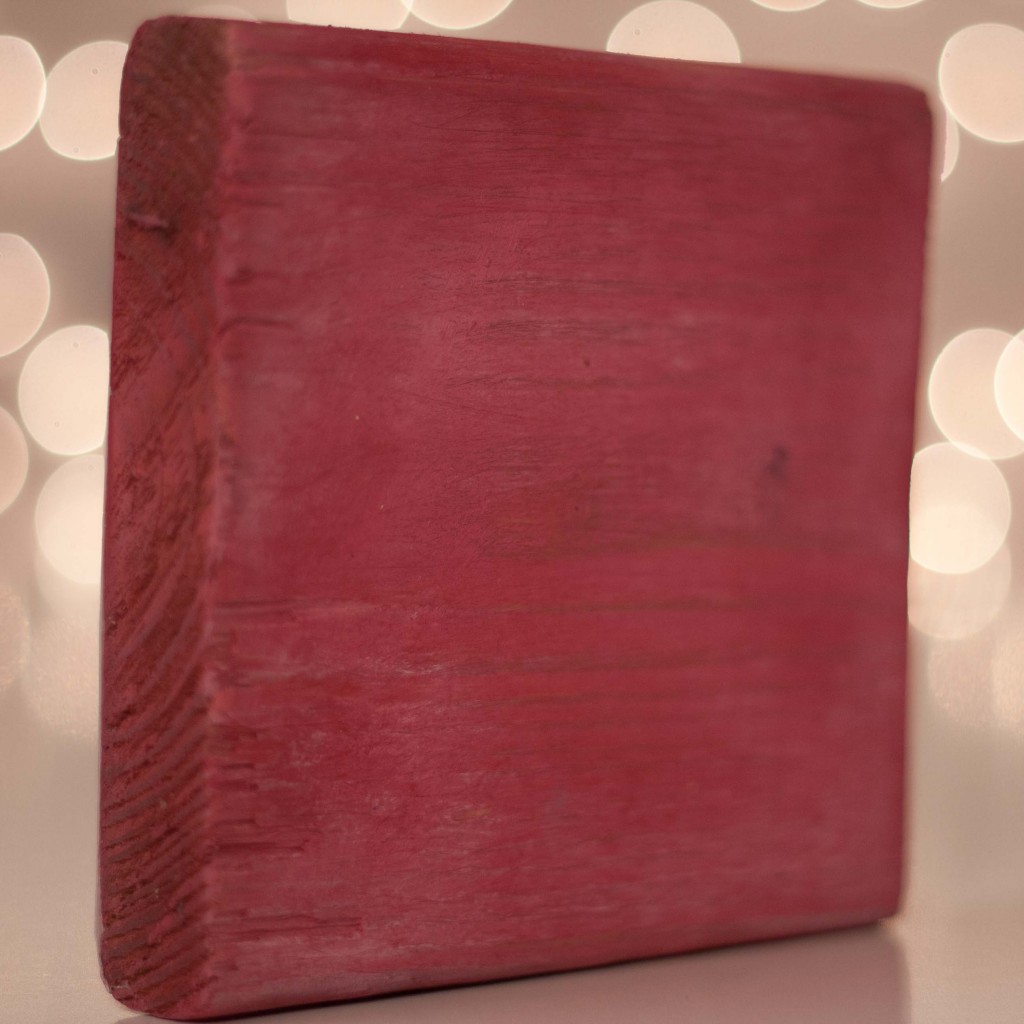
Spray paint your wood block and let it dry.

Spread a layer of Mod Podge on your wood block and put your paper on top.
Smooth it out and then spread on a layer of Mod Podge on top of the scrapbook paper.
Make sure you get out any air bubbles now.
Let it dry for 15ish minutes and repeat.

Once it is completely dry, take the clip and hot glue it onto the top (or side) of the block.
That’s it!


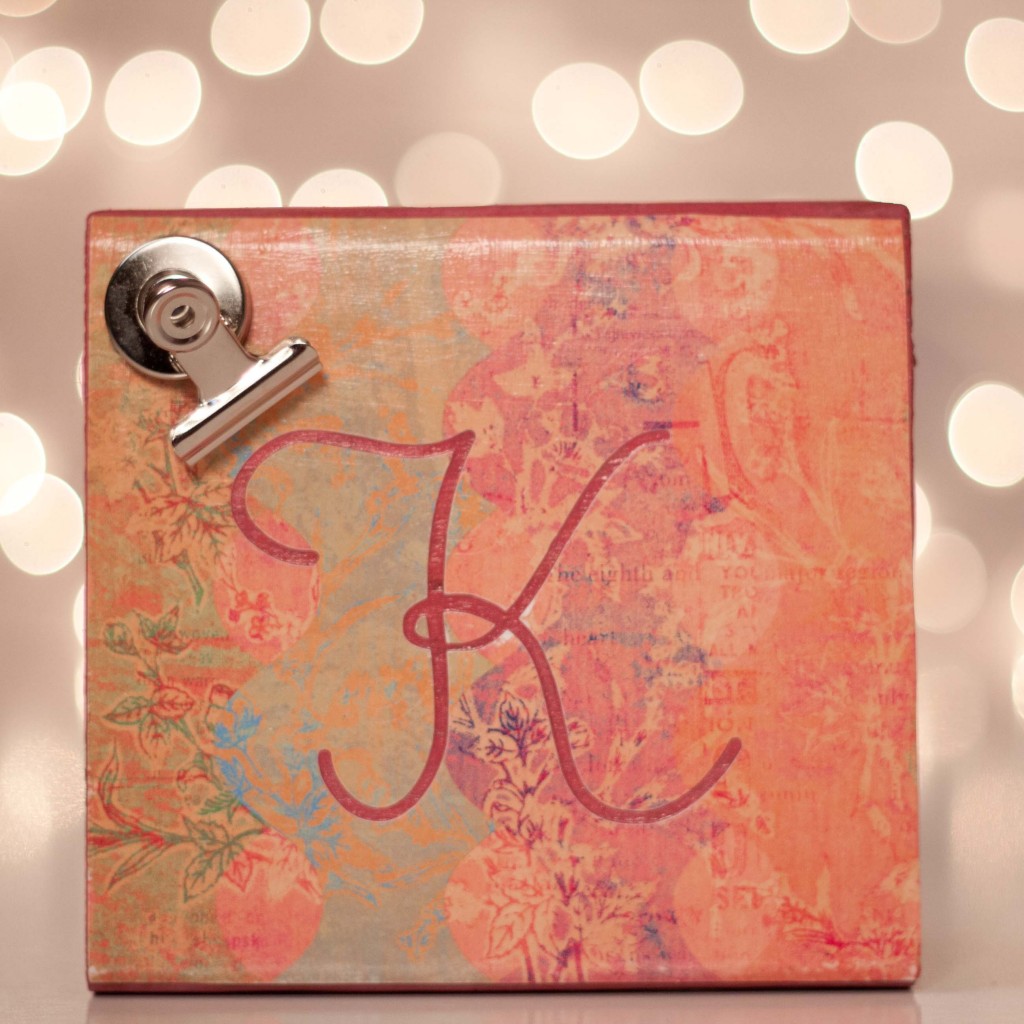
For the “K” one, I used my SilhouetteHD to cut out the K and then put the clip on the side instead of center.


For the black one, I used my SilhouetteHD to cut out the pattern from black paper and then finished as shown above.


Whew!  I finished all 12 Crafts of Christmas.

I’ll start looking for new crafts for 2012 on January 1!
Let me know if you think of something fabulous!

Merry Christmas, y’all!

*******

12 Crafts of Christmas 2011
1. Personalized Necklaces
2. Button and Lego Wall Art
3. Personalized ClipBoards
4. Fabric Covered Wire(Wall Art) 
5. Stationary
6. You & Me Books
7. Personalized Welcome Mat
8. Personalized Dessert Carrier
9. Kid’s Artwork Cup
10. Ornaments
11. Sewing Tutorials

12. Photo Display Block

*Yep, that’s an affiliate link.  If you click it and buy them, I’ll make one one-hundredth of a penny.

12 Crafts of Christmas {Sewing Tutorials Roundup}

I’ve been kick-my-butt-and-knock-me-down sick today and this weekend was insanely busy, so I didn’t make anything.
I’d wanted to try these all out before posting, but here are links to several tutorials that I either have used or plan on using.
The first 2 things are ones that I’ll be making before the week’s end.  (I hope.)
The last one is one that I made this summer.

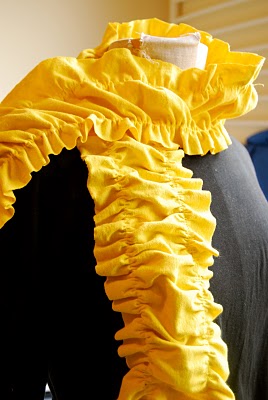
Ruffle Scarf from Vermillion Rules


Super Cool Wallet from CraftBits
(Lydia has – just today – added this to her Christmas wish list, so I’ll try to get it made in time!)


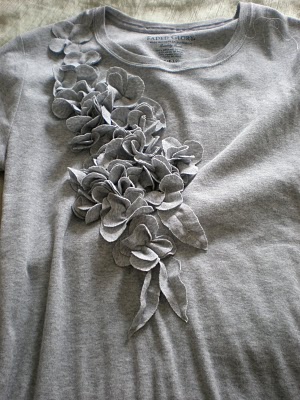
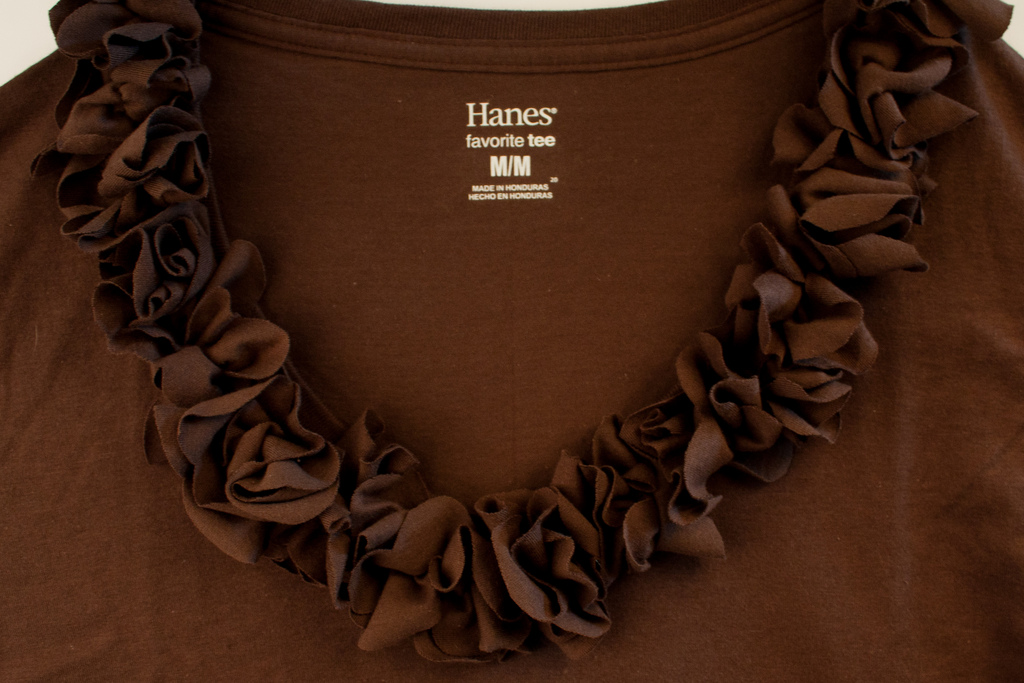
Fancy Tee (Garnet Hill Knock Off) from Blue Cricket Design
The one on the left is from the tutorial linked above.
The shirt on the right is one that I made using this tutorial.
(For people with large chests it seemed to work better focusing on the neckline.)


*******
12 Crafts of Christmas 2011
1. Personalized Necklaces
2. Button and Lego Wall Art
3. Personalized ClipBoards
4. Fabric Covered Wire(Wall Art) 
5. Stationary
6. You & Me Books
7. Personalized Welcome Mat
8. Personalized Dessert Carrier
9. Kid’s Artwork Cup
10. Ornaments
11. Sewing Tutorials
12. Photo Display Block

12 Crafts of Christmas {DIY Ornaments}

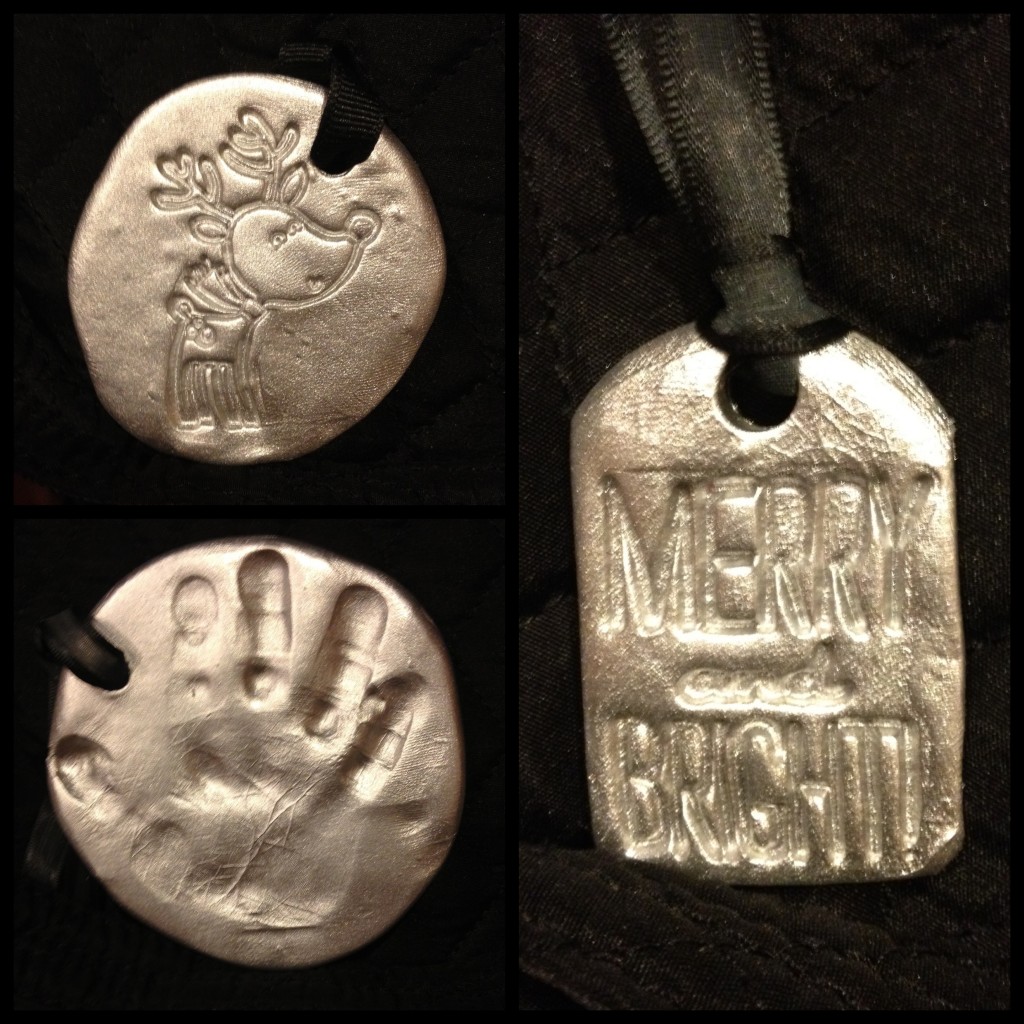
Remember those old handprint ornaments that you could make with Plaster of Paris?
I love those, but they’re so heavy that they make the tree branch bend down low.
And you can make salt-dough ornaments, which aren’t quite as heavy, but I’ve never liked the texture of them.
But I found Sculpey Oven-Bake Clay which is super pliable until you bake it.
And?  Best part (when you have little kids in the house) … it’s not very breakable!

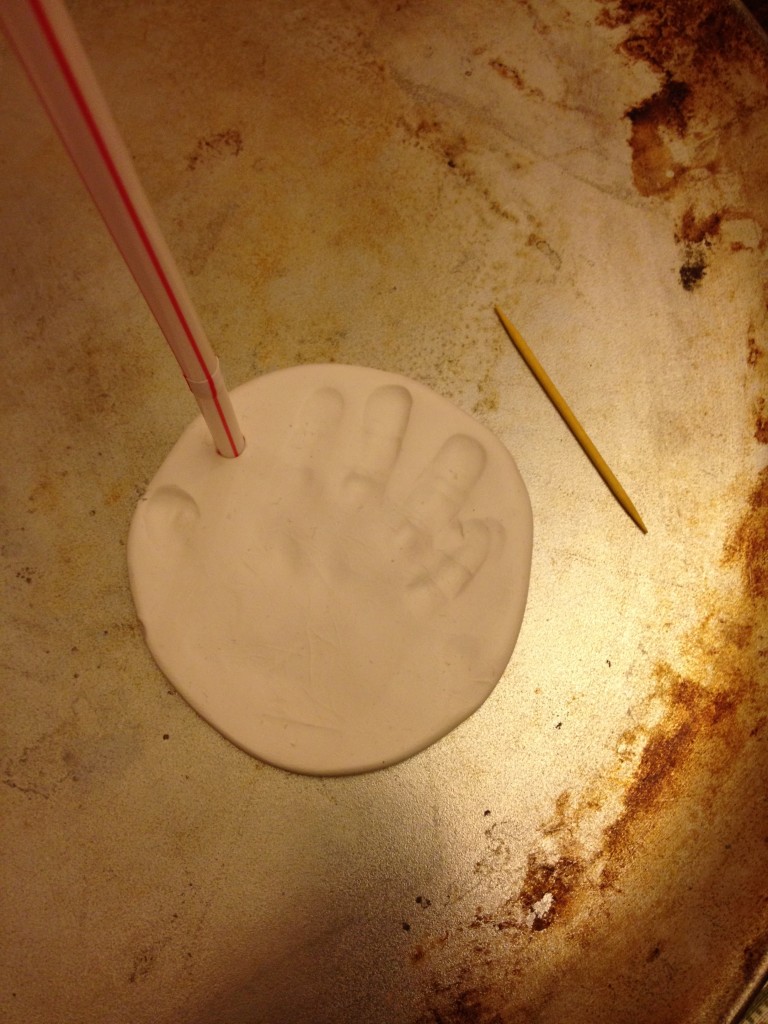
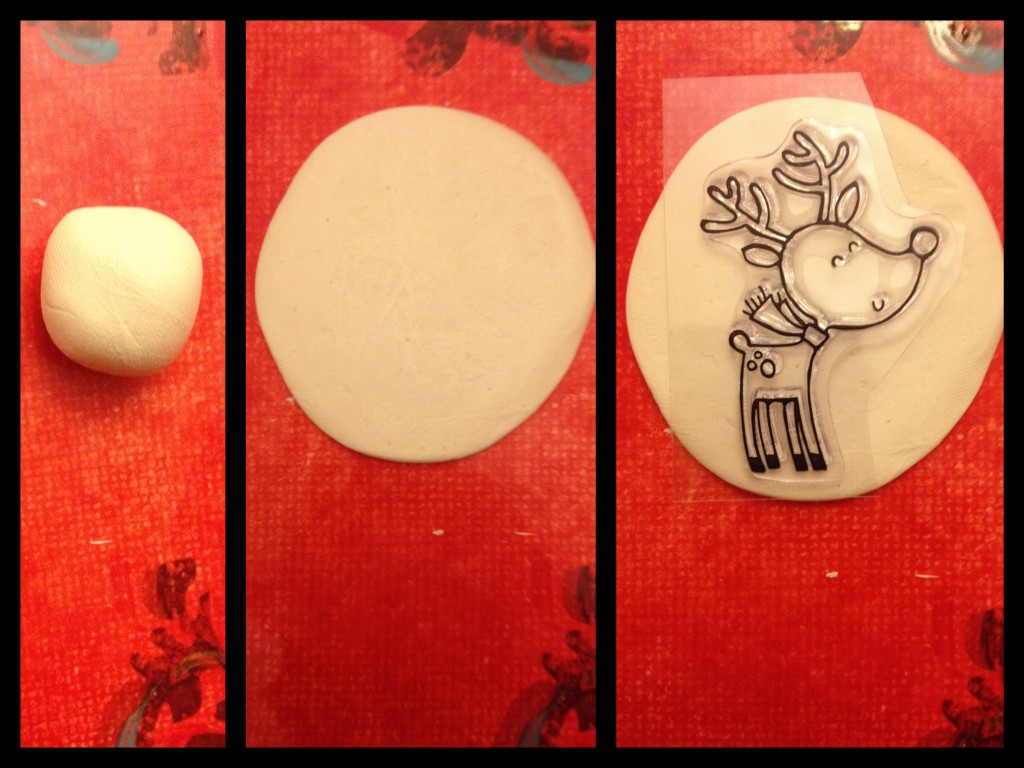
So I rolled up a ball of Sculpey and rolled it out flat with a rolling pin.
(I have a ‘junk pan’ – aka an old cookie sheet that’s seen better days – that I use to bake my craft stuff on.
I rolled it out on there so I wouldn’t have to transfer it from one surface to another before it was heat set.)

I squished Anna Alden’s hand into it and the little stinker reeeeeally dug her fingers in.
So I rolled it back up and tried again.
Success!

I used a drinking straw to make a hole in the top.

And while I was making that, I decided to try using stamps.
(I also tried writing with a toothpick.  It’s possible, but not easy.)

When you bake them, they stay the same color.
But I wanted some sparkle.
(Really…who doesn’t?)
So I grabbed some Metallic Krylon Spray paint, painted the back, let it dry, turn it over, paint front, dry.
Finito!

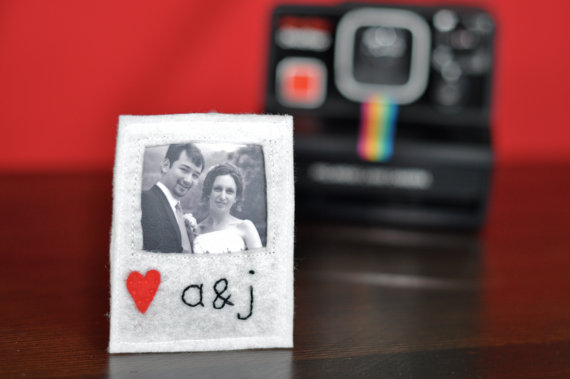
Another super cute idea?  Polaroid Ornaments!

For only $5, you can get enough materials to make 2.
For $10, you can get a kit to make 5.

*******
12 Crafts of Christmas 2011
1. Personalized Necklaces
2. Button and Lego Wall Art
3. Personalized ClipBoards
4. Fabric Covered Wire(Wall Art) 
5. Stationary
6. You & Me Books
7. Personalized Welcome Mat
8. Personalized Dessert Carrier
9. Kid’s Artwork Cup
10. Ornaments
11. Sewing Tutorials
12. Photo Display Block

I’m late! I’m late for a very important date!

I don’t have today’s craft ready.
I know…you’re heartbroken, aren’t you?
You’ve been sitting there hitting refresh over and over until something new showed up.

I just simply didn’t get it done in time.
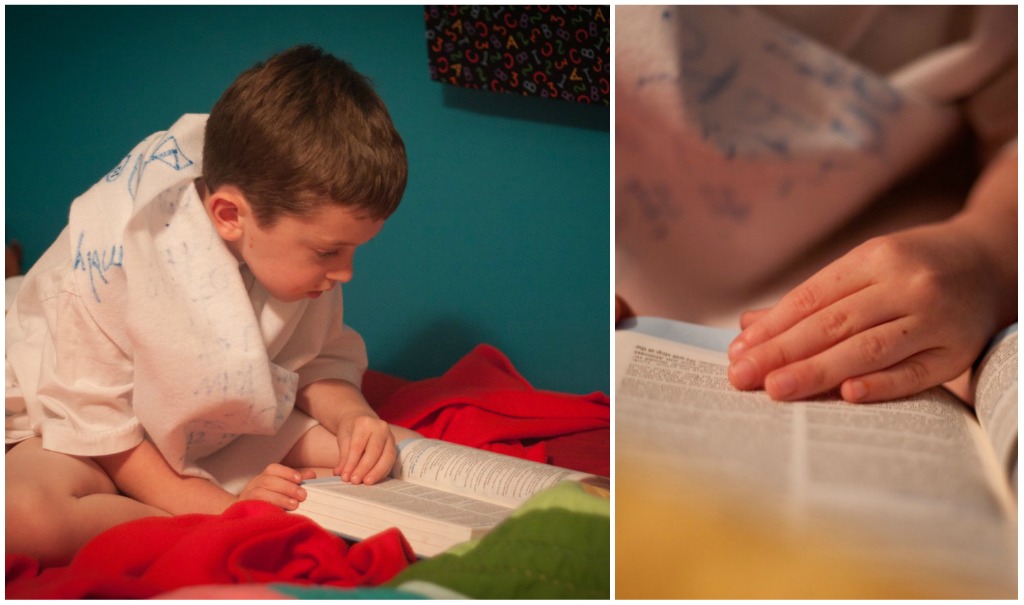
But I did take time to sit and listen to my oldest read the bible out loud –
Which is infinitely more important than a craft.

I walked into his room to find him wrapped in his “prayer mantle” and reading quietly.

Be still and know that I am G-d.

Words That Hold Me (Back)

“It’s about being, not doing,”
I mumble to myself and glance up at all there is to do.
So much stuff to do.
So many places to go.
So many things to finish.

The to-do list taps me on one shoulder
And laughs when I look over the other.

I stop what I’m doing to read with the children,
to play with them,
to go places
and see things
and do things
and just be all there.
And it is good.
Oh.so.good.
And I am happy.
Oh.so.happy.

But when I get back, it’s all still there – waiting. waiting.  waiting.

I start a project and get distracted by another.

I don’t have time to read, to write.
I need to read, to write, to create.
I tend to lose myself without my words to define me.

But then I wonder…is that so bad after all?
To just be – with no words there to remind you of all you do.
With no definitions to smother you with all that you already are.
With no notions to hold you back from being, just being.

I write for me.
I write to remember.
I write to absolve my soul.
I write to heal my heart and make sense of it all.

But those same words that heal me and hold me together also hold me back.

It’s about being, not doing.  (Or writing.)


-Written as part of Just Write.

12 Crafts of Christmas {DIY Kid’s Artwork Cups}

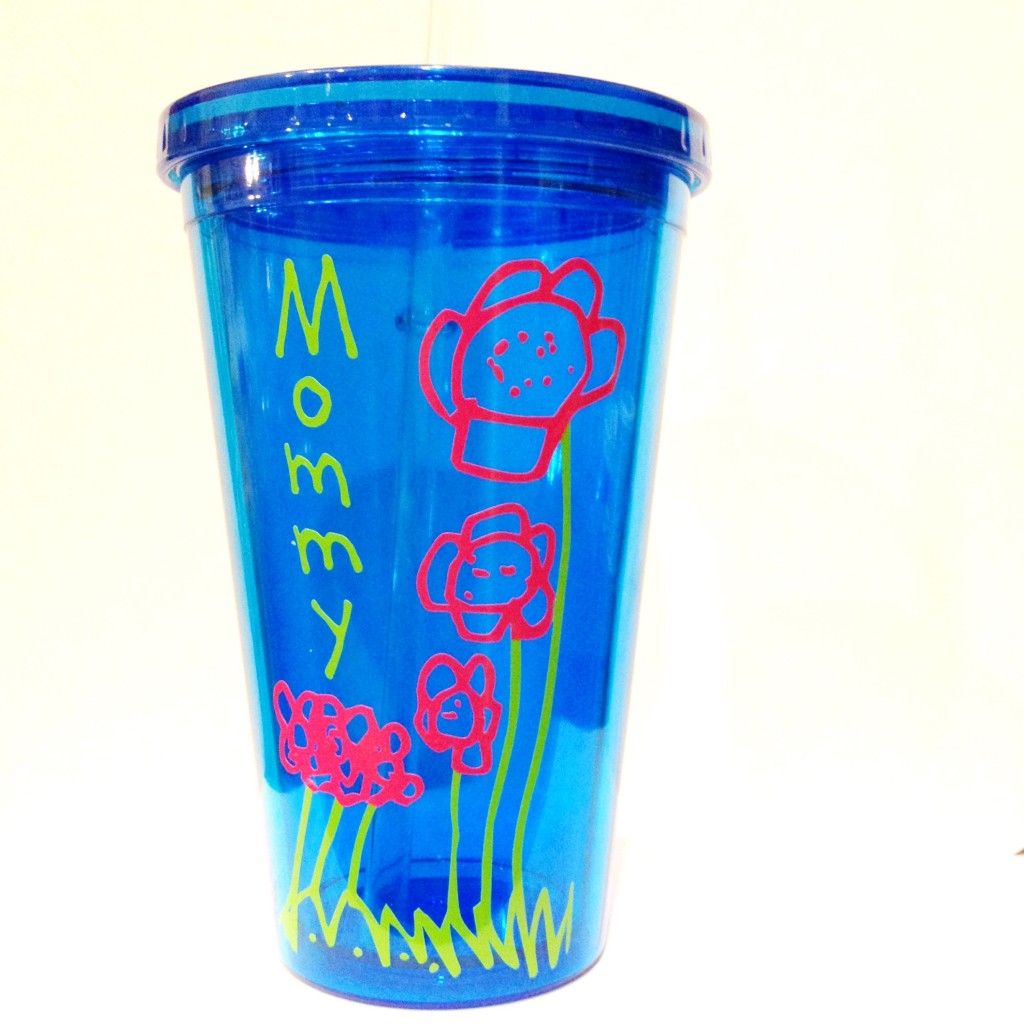
Ok, so this post is for people who have a Silhouette machine. (Or for people who know someone with a Silhouette machine*.) (Or for someone who has time to hand cut it like I did last year.) But it is fab.u.lous.

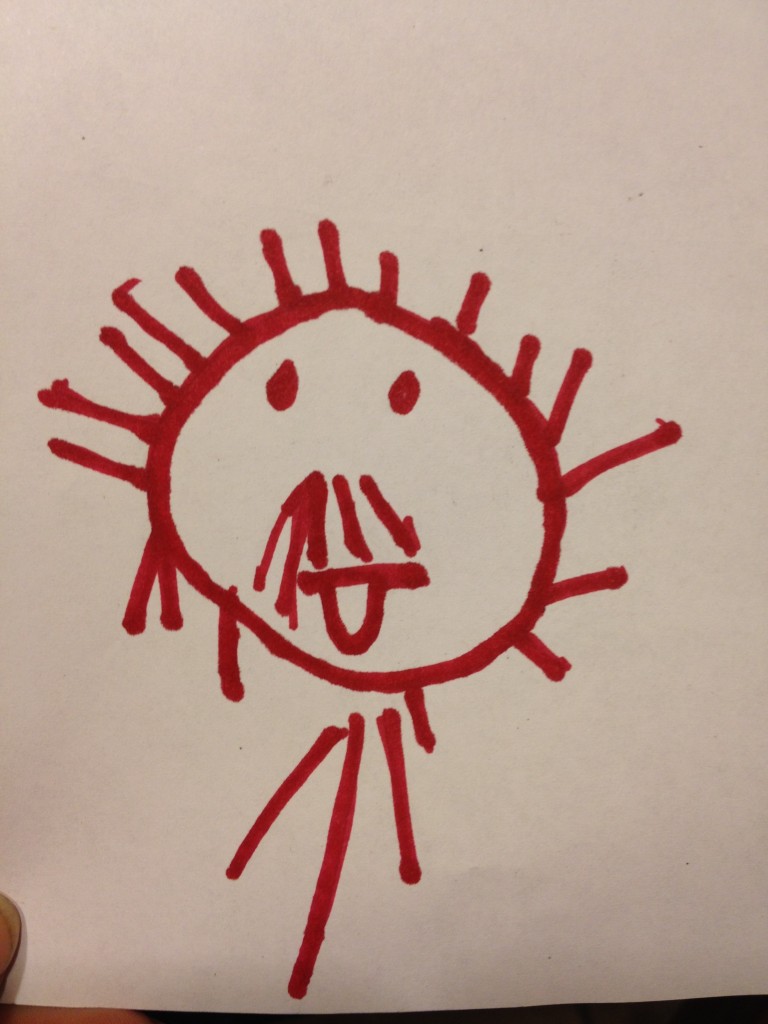
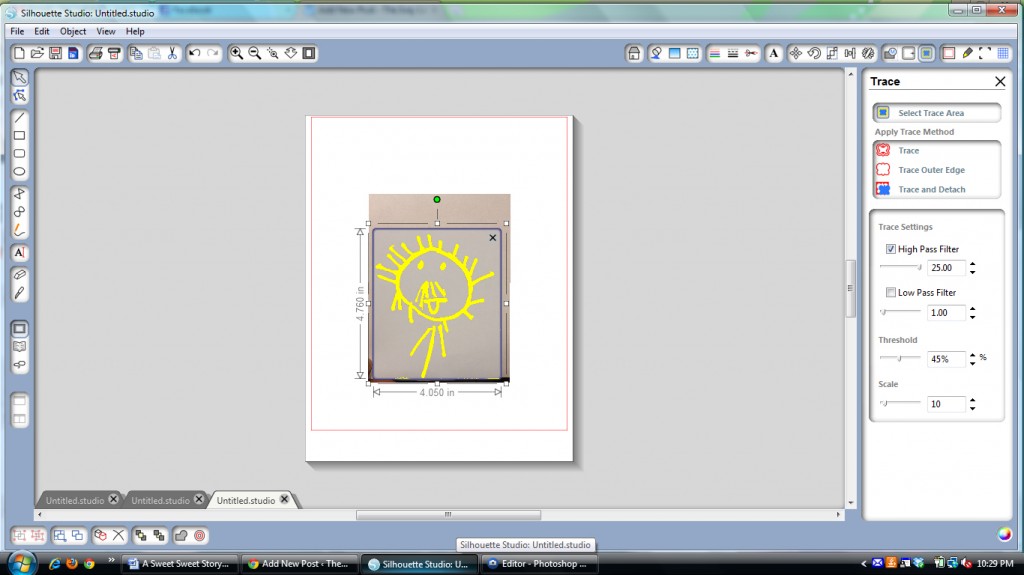
Have your child draw a simple line artpicture. Take a picture of that picture and upload it into your Silhouette software’s library.

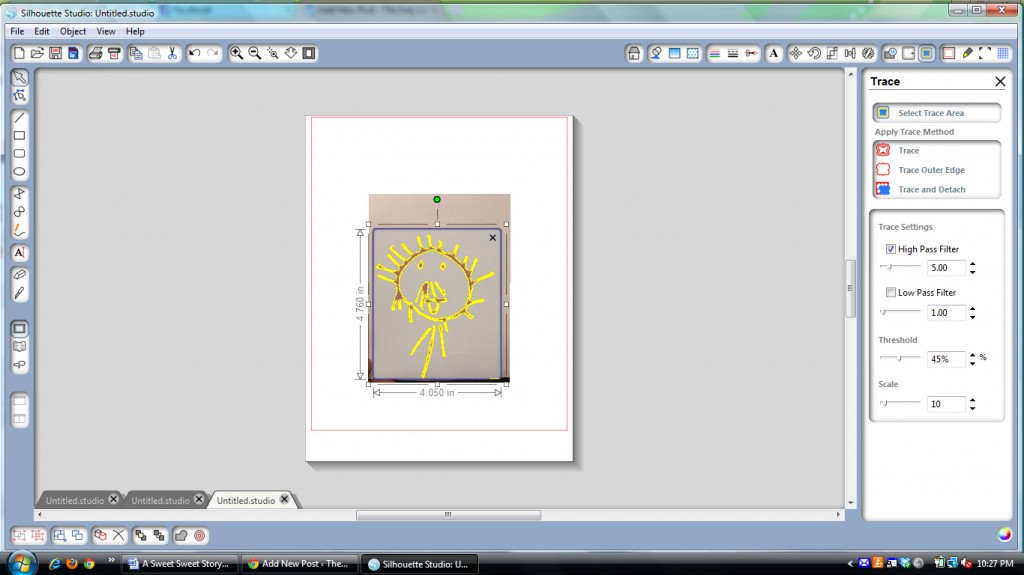
Once you have the image opened up in Silhouette Studio, you’ll want to go into Trace and “Select Trace Area” and put a box around the part you want to use.  I didn’t want my thumb to show, so I was careful to not include it in the square area. (Click on image to enlarge.)

Once you have your ‘trace’ area selected, you’ll want to click on High Pass Filter and pull it up as high as it will go to make the lines as completely yellow as possible.

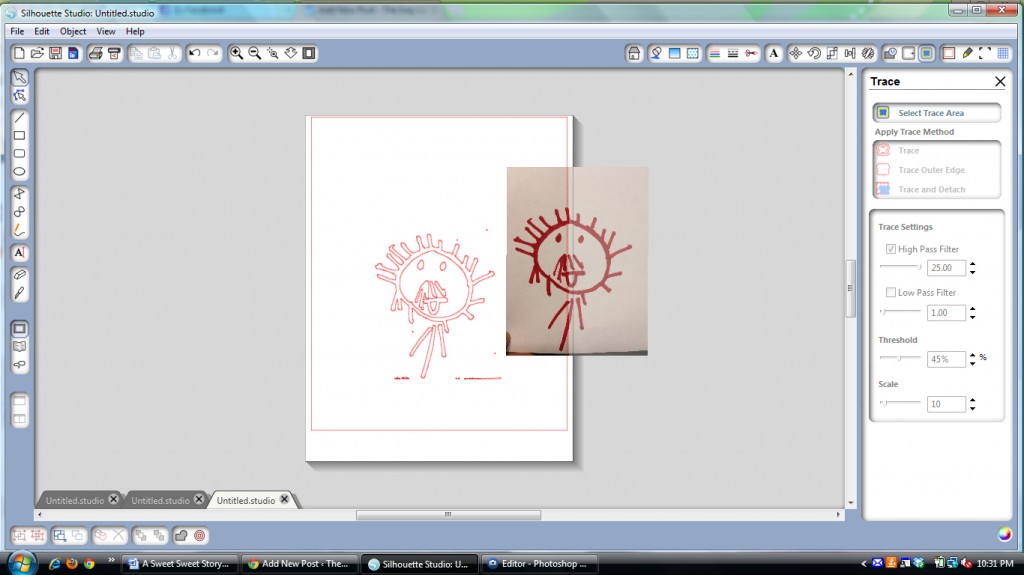
Next you will choose “Trace” as your trace method. Then click on the original background image you imported and pull it out of the way. (I usually just delete it, but I left it here so that you can see it.)

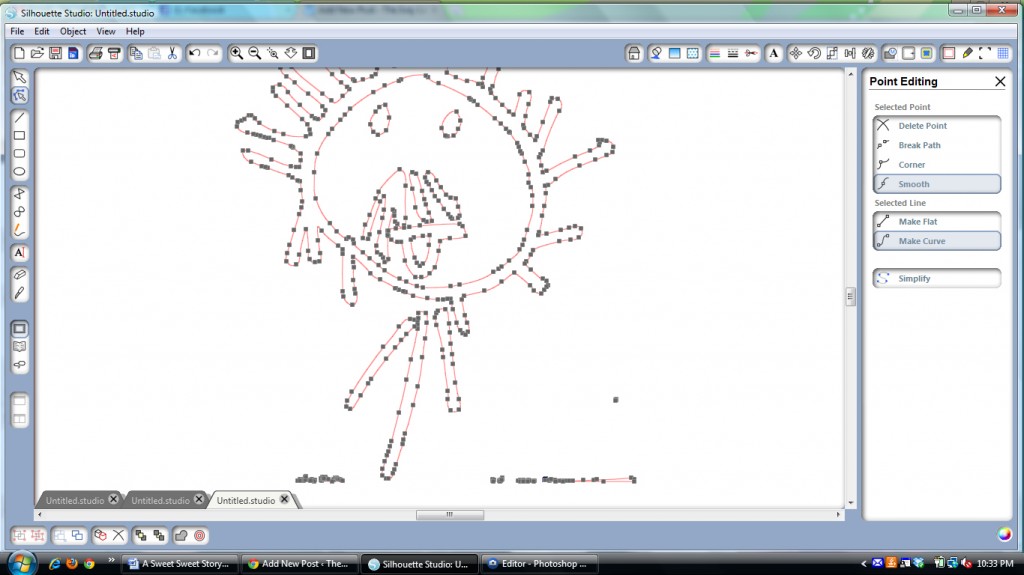
Now there are a couple of extraneous little dots that I don’t want in my picture, so I zoom in, click on them and delete them. To do that, you’ll need to click on a point (which will get you into Point Editing) and then use the Delete Point option until all that you want to remove is gone.  (Do not use the delete button on your keyboard.  That won’t work!)

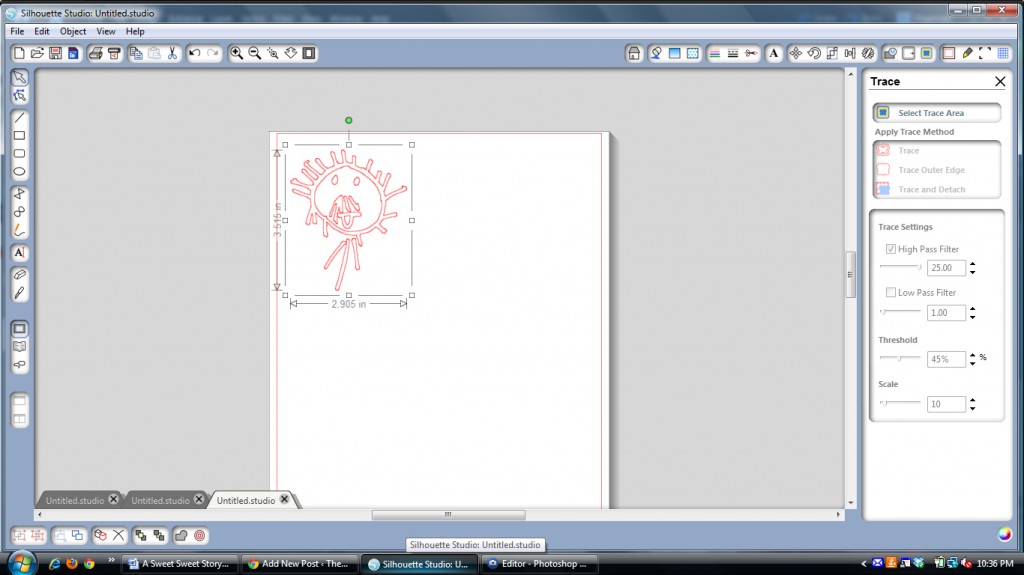
Now you’ll want to resize your image to fit the side of your cup, send it through the Silhouette as a vinyl cut and apply as normal.

Aaaaaand you’re done!

This is one that I made for me!  (Drawing and writing by Lydia!)

*Don’t have a Silhouette machine, but still want a decal of your child’s artwork? I can make you one for only $15! Email me at IveyLeagueMama(at)gmail(dot)com for details.

*******
12 Crafts of Christmas 2011
1. Personalized Necklaces
2. Button and Lego Wall Art
3. Personalized ClipBoards
4. Fabric Covered Wire(Wall Art) 
5. Stationary
6. You & Me Books
7. Personalized Welcome Mat
8. Personalized Dessert Carrier
9. Kid’s Artwork Cup
10. Ornaments
11. Sewing Tutorials
12. Photo Display Block

12 Crafts of Christmas {DIY Personalized Dessert Carrier}

A few weeks ago, I found this pie container at my local Walmart.
(If I’m not mistaken, it was a little cheaper at the store.)
It’s perfect because it has these little trays that come with it that hold deviled eggs or cupcakes.

But I’m constantly taking food places and leaving my dish behind.
(And just by looking at the lost-and-found table at church, I’m not the only one.)

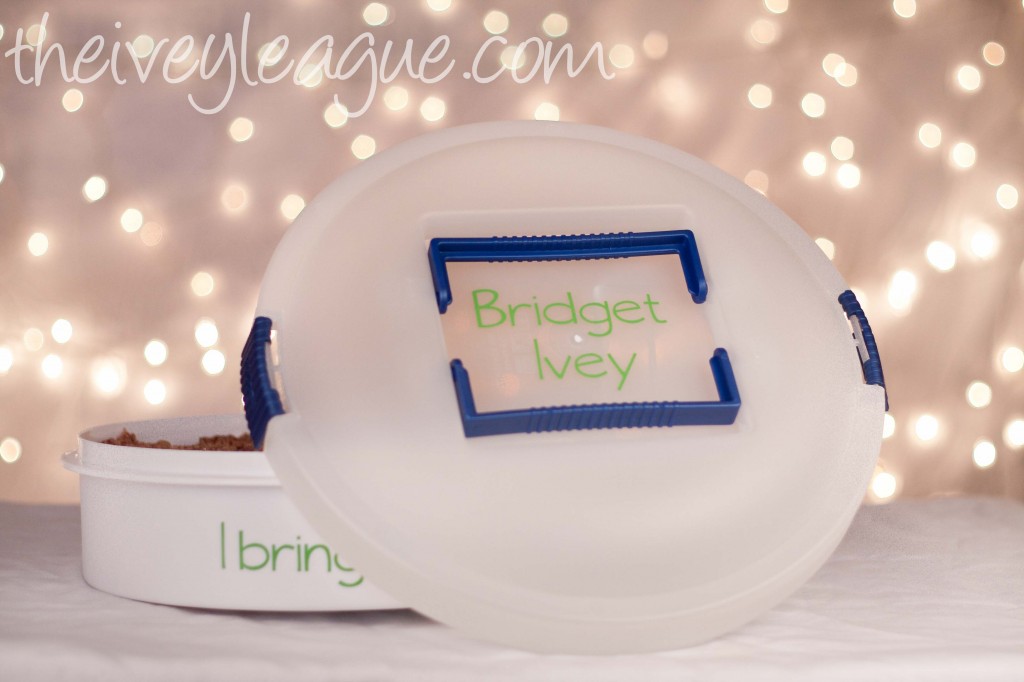
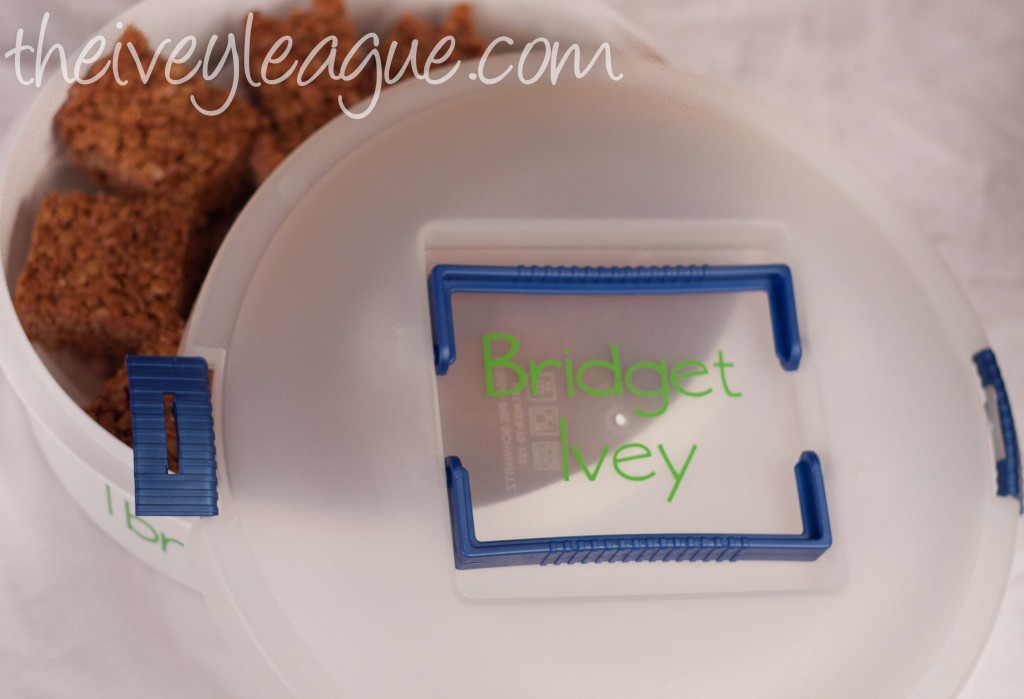
So one of these with my name on it?  Perfect!
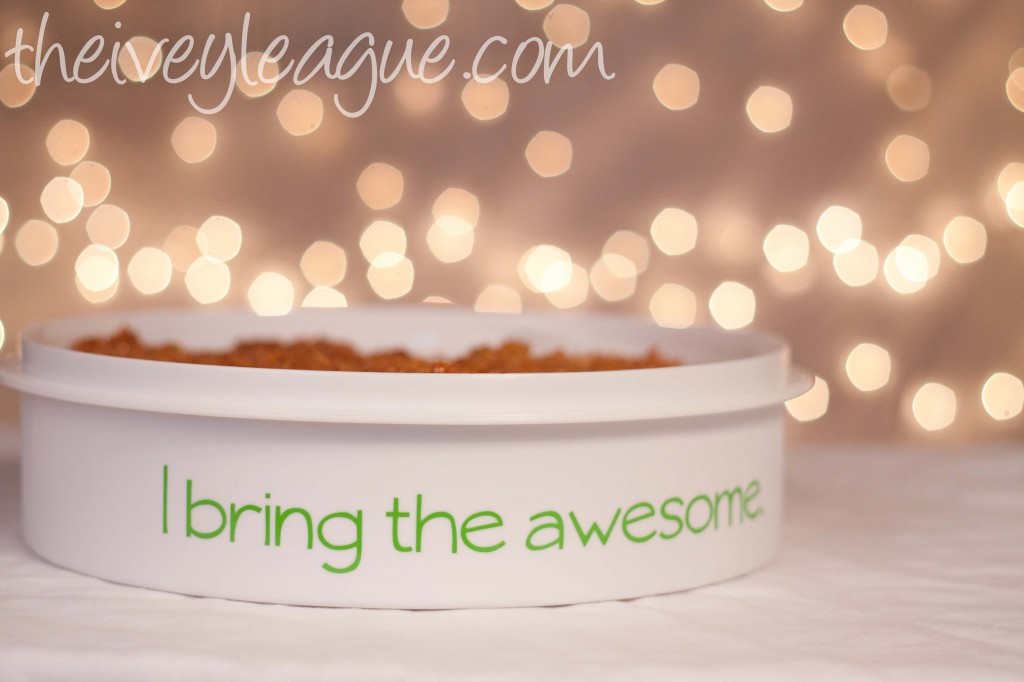
I used my Silhouette to cut out the vinyl letters, but you could easily use a paint pen on this kind of surface.

I didn’t want just a name, so I decided to add a little something to the side.  (I amuse me.)

 If you plan on giving it as a gift, you could add goodies like this or this!
*******
12 Crafts of Christmas 2011
1. Personalized Necklaces
2. Button and Lego Wall Art
3. Personalized ClipBoards
4. Fabric Covered Wire(Wall Art) 
5. Stationary
6. You & Me Books
7. Personalized Welcome Mat
8. Personalized Dessert Carrier
9. Kid’s Artwork Cup
10. Ornaments
11. Sewing Tutorials
12. Photo Display Block