Monthly Archives: October 2010

Eyeore vs. Pooh

Lately I’ve been feeling bleh.

I am not looking forward to SAD season(which, dammit, gets me every year).
(I am especially not looking forward to SAD season plus pregnancy hormones.)

I’ve been in a major shutter slump.
The pictures I take have been ok,
but I’m just not picking up the camera.

I haven’t been able to focus.
And my patience?
Well, it’s virtually non-existent.

I find myself fussing at the children for stupid stuff.
And being annoyed with Marshall over really insignificant crap.

I know it, and yet I can’t seem to stop it.
And I really, really hate that.

As I was talking to a friend recently, I listened to myself…
And I realized I’m sounding a bit Eyeore-ish.
Bleh.
Bleh. Bleh. Bleh.
Nobody wants to hang out with Eyeore.

And so I’m trying, really trying to be more like Pooh.
Oh, who doesn’t love Pooh Bear?

All he needs is a little honey and some time with friends and he’s happy.

Even when he’s a little black rain cloud, he’s happy.
Even when he messes up and gets everything wrong,
Or (more accurately) doesn’t get everything right,
He’s still singing a happy tune.

So Daylight Savings, you can…well…you can (fill in the blank with obscenities).
Nobody likes a 6pm sunset.

And SAD?
I don’t want you.
I don’t need you.
You aren’t welcome here.

Homemade Buzz Lightyear and Tinkerbell

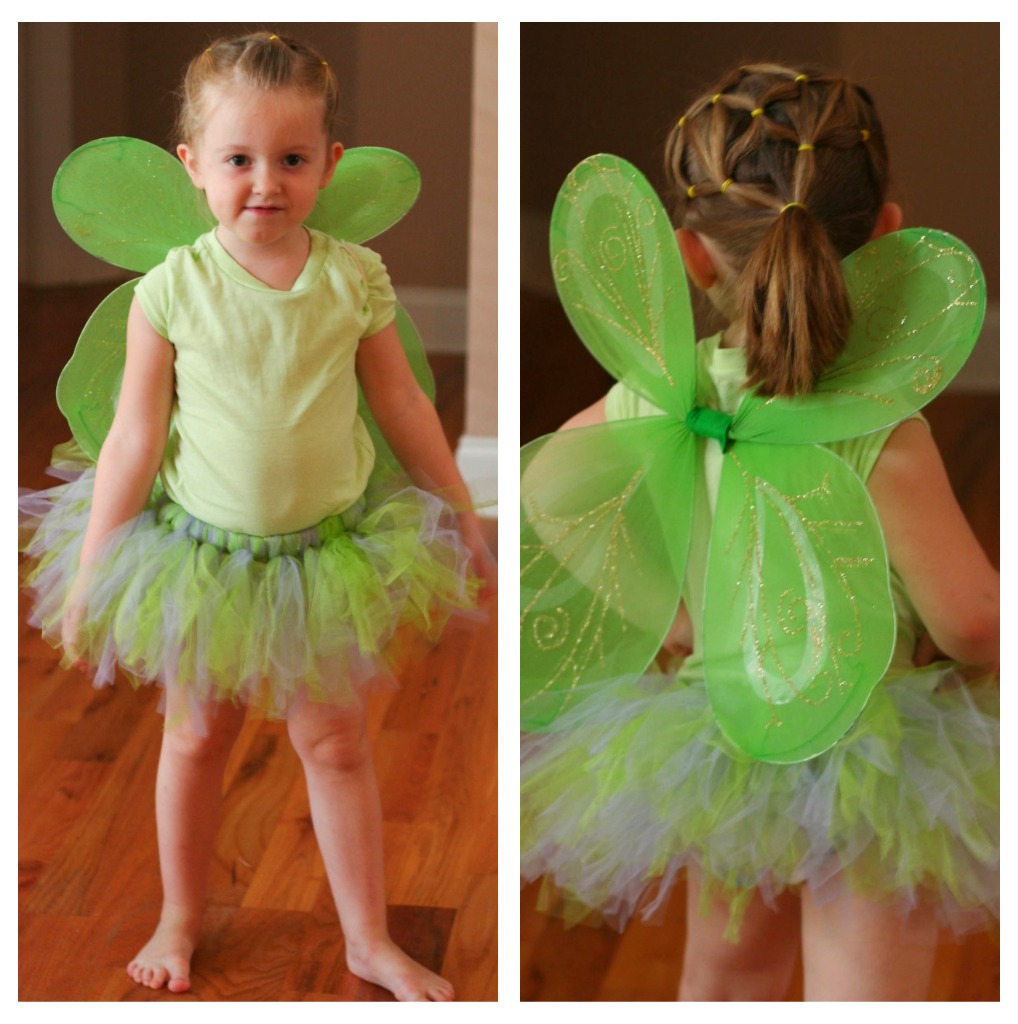
For Halloween my kids wanted to be Buzz Lightyear and Tinkerbell.

Because I am cheap frugal, I cannot force myself to pay full price for costumes/dress-up.

I usually score a few dress-up items after Halloween that my kids destroy enjoy from one year to the next,
but those store-bought costumes aren’t the highest of quality and rarely make it to the next year.

So when Carter said he wanted to be Buzz, I thought, “I can do this!”
Then Lydia decided that she wanted to be Tink.

(Sorry I didn’t take pictures as I was making these.  I hadn’t initially planned on blogging it!)

Off to the dollar store.
I bought her wings, fairy shoes and green tee shirt from the dollar store(as well as a glow-in-the-dark wand for fun).

I had previously started making a tutu that I never finished.
(I’m a chronic project starter.  I am not a chronic project finisher!)

And I got a pair of green shorts from a friend and made them into a skirt.

Over all, I don’t remember how much I spent on tulle and elastic, but I do remember that I got it on sale at Joann’s.
The shorts were free, and the dollar store items were…well…a dollar each.
Grand total: around $15.
Yes, I probably could have bought a Tink costume for only five more dollars, but look how cute she is!
(And really?  I only spent $4 in stuff I didn’t already have.)

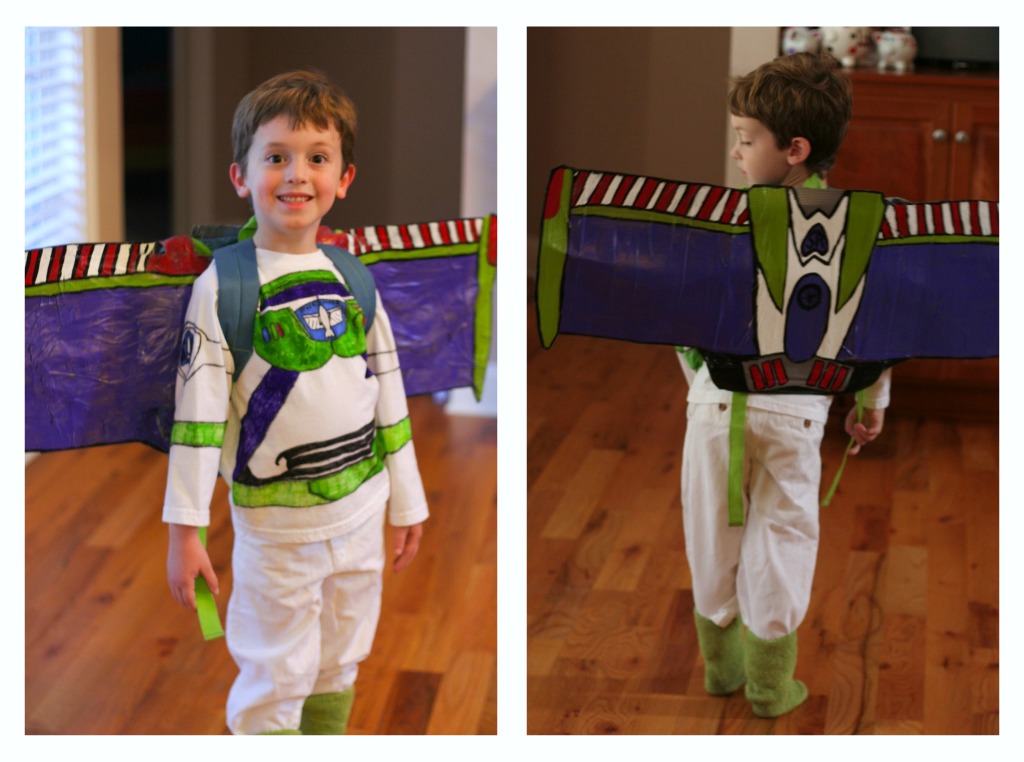
For Buzz?  We happen to have about a million Buzz Lightyear items in our house and I used them as a guide.
I took a plain white tee shirt($3.50 from Walmart) and hand-sketched a Buzz shirt with Sharpie.
Then we colored it in with colored Sharpies, which was fun for all of us!

Next part?  Wings!
I’d seen instructions in Family Fun on how to make fairy wings and thought I could use that same idea.
I took 2 (24pack) Diet Coke boxes and opened them up flat.
I taped them together and hand-sketched and cut out the basic shape of the wings.
I used 3 basic hangers and  bent them just a little so that none of the pointy pieces were sticking out.
Then I duct taped those suckers to the cardboard, side-to-side long ways so that they went from one end to the other.
Then I wrapped the entire thing up in duct tape.
(I love me some duct tape!)

After that I painted out the wings(with acrylic paint I already had at home) and attached then to an old backpack with…
…you guessed it!  Duct Tape.

Because the paint so easily scratched off of my beloved duct tape, I covered it in a layer of mod podge.

So…a $3.50 tee shirt, some hangers, an old backpack, two boxes, some paint and a $3 roll of duct tape got me this:

I finished it off with a white pair of pants he already had and a pair of my green socks over his shoes.

Only $6.50!  Woo-hoo!

Trick-or-treat!

There are no pictures of Asa because…honestly…he’s too little to care.  He’ll be wearing a Woody “costume” (also known as pajamas that are 2 sizes too big).

Ho-ho-holidays are on the way! (REALLY??)

Earlier this week I complained to a friend that a local store already had Christmas decorations out.
Not a few, mind you, but a full-on-garland-covered-house-with-bows-and-jingle-bells.

And then I realized that HELLO?  I started doing my Christmas craft series before they put up the decorations.
What can I say?  I’m constantly contradicting myself.  Con-stant-ly.  Oh, well.

And then I went to another store and right next to the Halloween candy were Reece’s Cup Christmas Trees
(which, for the record, are the best and most perfectly ratio-ed holiday shaped Reece’s available).
I fussed to Marshall about the absurdity of Halloween not even being here before Christmas candy was put out…
and then I ate one.

See?  Just one contradiction after another.

And now, before I’ve even taken pictures of my kids all dolled up in their Halloween costumes,
I’m thinking about Christmas cards.
But you can thank Shutterfly for that!
I was excited (and pretty inspired) to get the ball rolling when I found out I could get 50 free holiday cards.
(If you have a blog, you may be eligible as well!  Click here for more info.)

Once upon a time, when Marshall was in med school and I spent most of my time at home watching TV or reading,
I made our Christmas cards by hand.

And then Carter came a long and I did those long skinny photo cards that a lot of folks use.

I’ve also done newsletters with a single photo stashed inside the envelope.

But then I discovered the joy of Shutterfly, and I haven’t looked back since.
They really have tons of great choices and fantastic prices!

So, a few days before Halloween I’m contradicting myself again and posting about Christmas…
I’m seriously hoping to get pictures done this weekend(now that Lydia’s face has almost completely cleared up).

I never show my picture until I’ve sent out my cards, but if my kids cooperate?
This could be the cutest picture EVAH.

And (hint, hint) this card would look perfect with it:

Although I’m seriously in love with this one:

And this one:

Aaaaand this one(Look at the inside!  Bonus!!):

Oh!  And this one(just in case I have to resort to getting separate pictures of each child!):

And if you still can’t find that perfect card, did you know that you can create your own?
The design junkie in me loves that you can design your own layout and have Shutterfly print it for you!

Just a note:  By writing this post about Shutterfly’s Holiday Cards, I received a coupon code for 50 free holiday cards.  But the opinions in this post are 100% mine and 100% true.  Great product + great prices = product I love and want to share with you!

Blissful Photography

Hey, guys! I’m over at Blissfully Domestic today talking about one of my favorite things: taking self portraits!

Tomorrow I’ll be posting my last minute Buzz Lightyear costume idea, which only cost me about $7 and some time! Homemade Tinkerbell may also make a quick appearance!

Dear Diva,

You are a hoppin’, skippin’, bouncin’ little baby tonight!

When I was pregnant with your big brother(Carter), I wrote lots of letters to him.
I wrote to him almost every month after he was born, too.

I did the same for Lydia, just not as often.

Poor Asa…well, let’s just say I haven’t written to him as often as I did the others.

And you?  You’ve gotten a few measly blog posts and that’s about it.
(Sorry in advance.)

But knowing that you are (probably) the last baby I’ll ever have dancing around in my belly,
You have a special place in my heart already.

I find myself treasuring, savoring more.
I stop and watch my belly roll with your moves.
I press my hand against you and grab your dad’s hand.
“Feel this!’

(Just as a side note, I’d like for some other people to see and feel you move, too…
So if you could change your sleeping habits a little, that’d be great.
I’m not around many people at 11pm every night.)

In Jeremiah 1:5, God says to Jeremiah that before he was even formed in his mother’s womb…God knew him.
Before he was even born, God set him apart and put his plan into motion.

And I believe that God did that not just for Jeremiah, but does that for all children.

God knows and loves us all…from beginning to end, from top to bottom, from the inside and out.
And as a mother carrying a child, I feel like I have the special joy of being able to begin to relate with how God must feel.

I feel you.  I know you.
Before you are even born, I know you-
In such an intimate and amazing way.

I am so very thankful that I have this time with you.
Just you and me…as close as we’ll ever be.
And time after time, I find myself breathing deeply…
Hand on my belly, feeling you kick and squirm…
And I pray for you.

I pray that you are developing as you should be.
I pray that you will join our family and feel the love that we share.
I pray that you will grow to be a woman of great character.
I pray that you will grow to love God, love others and love yourself.

I pray that I will love you well.
I pray that I will teach you well.
And I pray that I will have the chance to see you fulfill dreams that are beyond my imagination.

And no matter how old you are…
Or how many things you achieve…
I will always be grateful for these moments:
Just you and me in the darkness,
kicking and dreaming.

I love you, my little Diva.
And I thank God for you every day…
Before you are even born.

Love, Mommy


I almost didn’t publish this post.  I have many, many friends who have children who were carried in their hearts but not their body.  I am a big advocate for adoption and I think that is a special and amazing gift from God as well.  I do not believe that the relationship I have with my children or my God are bigger, better or more special just because I had this opportunity.

12 Crafts of Christmas {Fancy Fingerpaint Art}

Earlier this year I saw an idea that I just loved on Impress Your Kids(a fabulous site for families of faith created by the lovely OhAmanda).   Amanda is a children’s-pastor-turned-stay-at-home-mom and she has gathered a great team of writers who share tons of great ideas on how to teach your children about God, the bible, and how to live a God-centered life.  Not only are there ideas on how to effectively teach your children the importance of learning memory verses and Christian values, there are crafts and book reviews, too.

When I first “met” Amanda(online), I went back and scoured her archives.  So many great ideas!  But one of my favorite was a post about alphabet stickers and fingerpaint.  I loved the artwork that she ended up making with her kids and knew that this was a must for us!

And (grandparents, close your eyes) what grandparent doesn’t love handmade art from the kidlets?

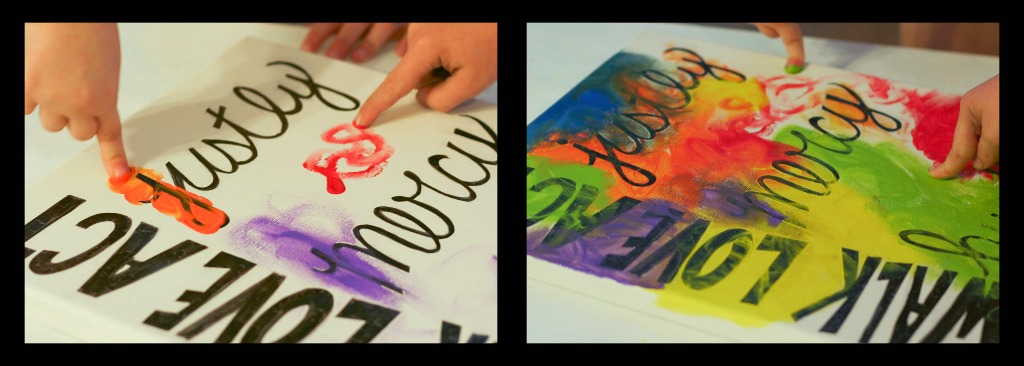
So this weekend the kids and I had a big fingerpainting session.
And what was supposed to be a Christmas gift for someone else
turned into a we-all-love-this-so-much-we-can’t-give-it-away-so-we-should-keep-it-as-a-gift-to-ourselves gift.

Good news?  It was an inexpensive craft that even the baby could do.
And it was quick and easy!

What you need:

  • Contact paper
  • a sharpie
  • scissors

(OR stickers if you don’t want to cut out your own)

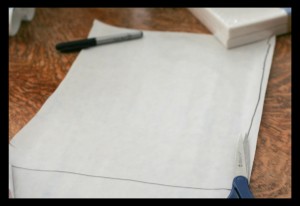
First I rough-sketched the edge of my 11×14 canvas onto the contact paper.

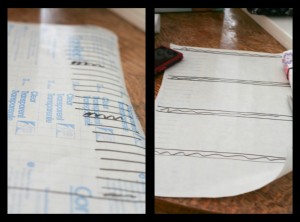
Then I used the lines on the back of the paper as a guide to make my own marks on the back(left)
And turned it over and drew guidelines on the front of the paper(right).
You surely don’t have to do this step, but I was looking for a somewhat uniform and straight look.

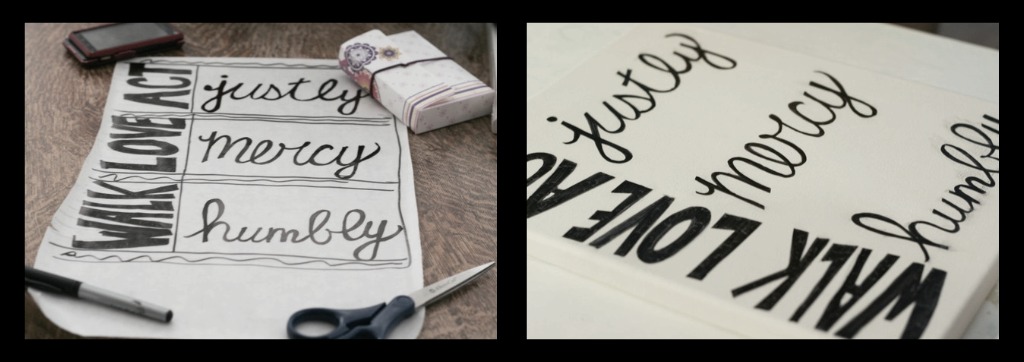
Next I hand-drew my letters and cut them out. (left)
(You could save a lot of time by purchasing pre-made alphabet stickers.)
(You could also print out letters from your printer and use them as a template,
but I don’t think you can print directly onto contact paper.)
And then I stuck them on the canvas, making sure to smooth out all the bumps! (right)

I did all of that (↑) before I ever clued the kids into the fact that we had a project.
I left the canvas sitting overnight and had to go back before we painted and make sure no bubbles had returned.

Now the fun part!
I gave them a plate with a small bit of each color paint and let them go.

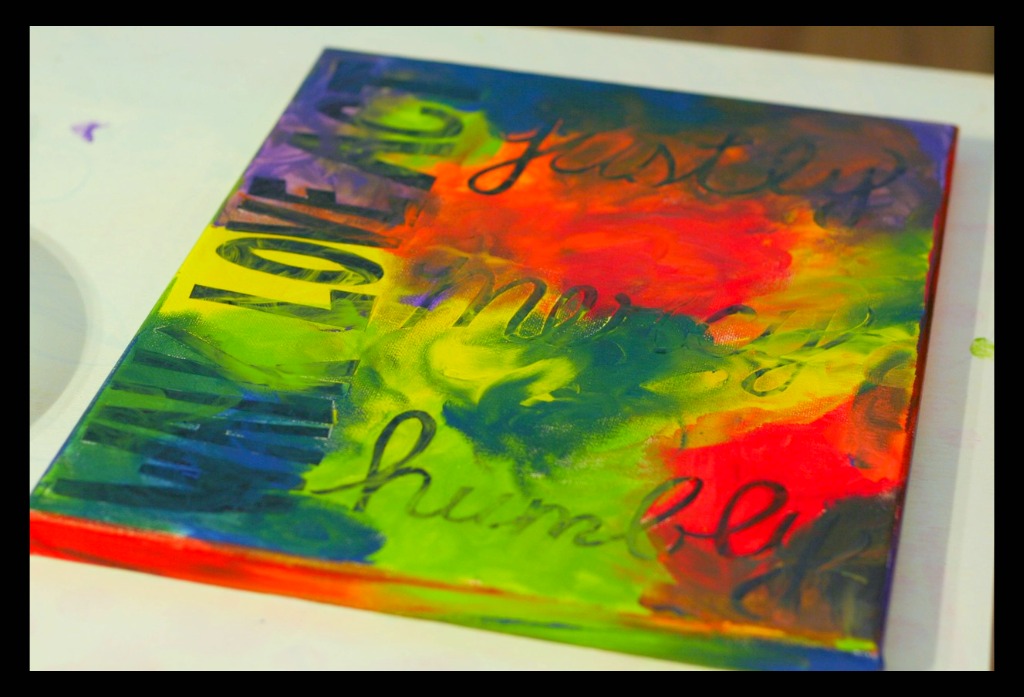
And then we waited for it to dry.
(The paint wasn’t very thick, so it didn’t take long.)

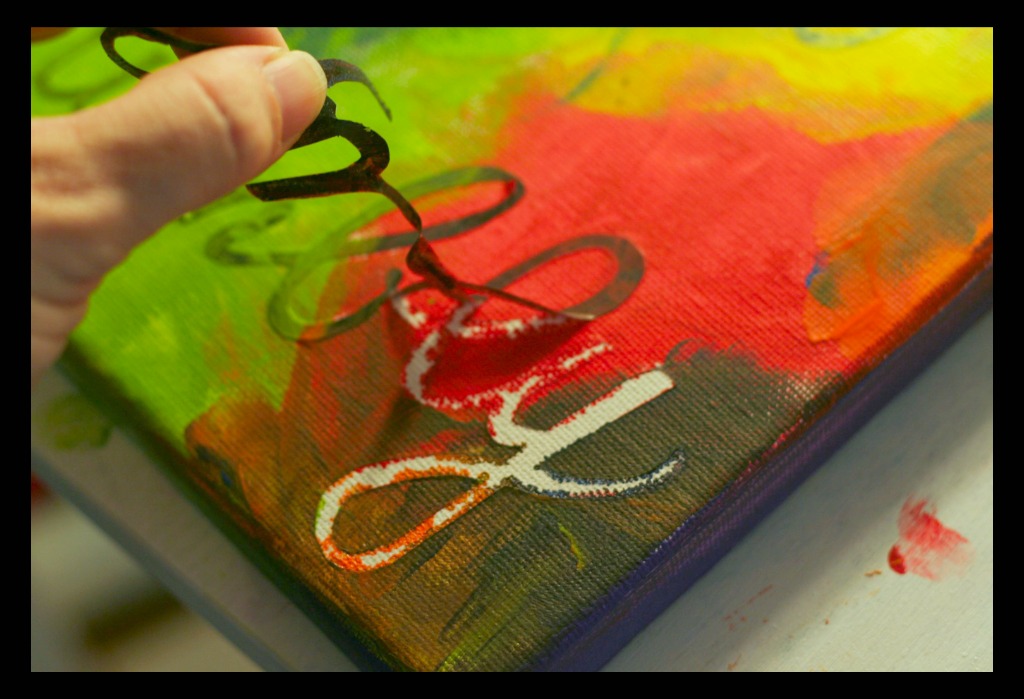
And then we sloooooowly peeled off all of the stickers.

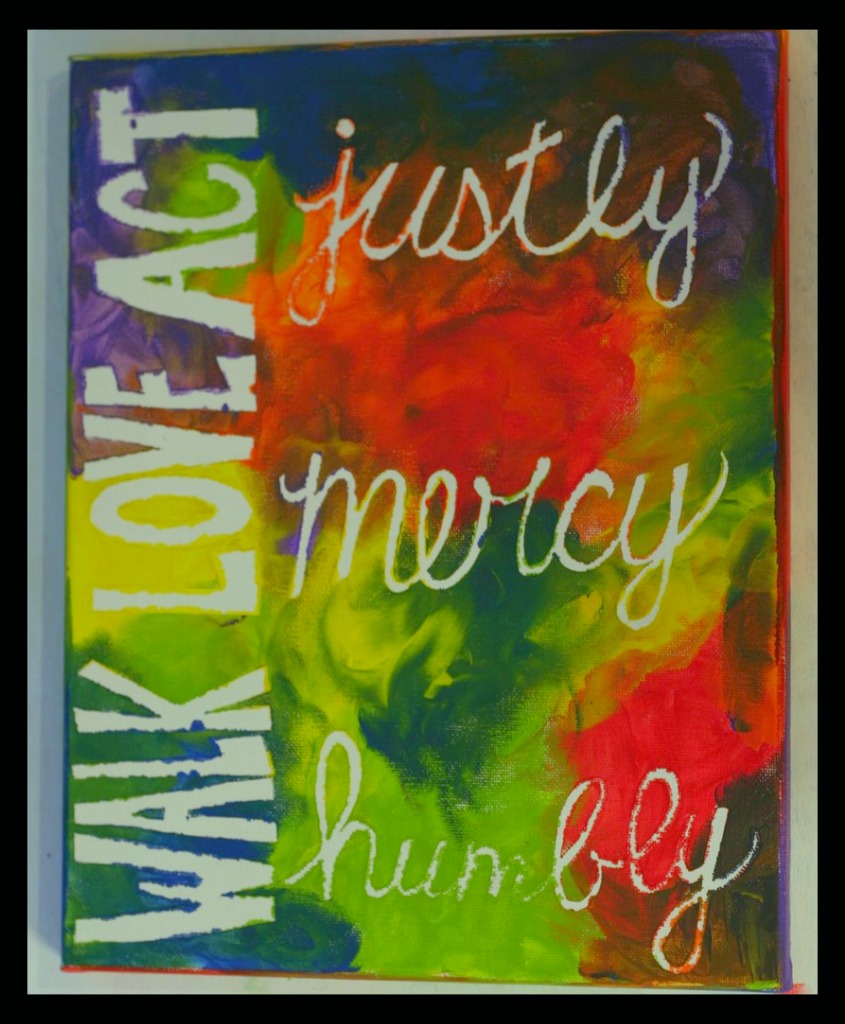
And…ta-da:

There’s no way(especially with the small lettering like the cursive seen here) to have nice perfect edges,
So I decided to make the letters pop a little more by outlining them in black.
You, of course, don’t have to do that.

He has shown you what is good.
But what does the Lord require of you?
To act justly and
To love mercy and
To walk humbly with your God.
-Micah 6:8


*******************
Want to see more of my crafty creations?

Check out the other 12 Crafts of Christmas:
Week One: Silhouettes
Week Two: Personalized Wall Clocks
Week Three: Glass Etching
Week Four: Fancy Fingerpaint Art
Week Five: Freezer Paper Stencils
Week Six:  Tie-Knot Fleece Blanket
Week Seven: Jewelry: Ribbon & Pearl Bracelet, Wool Ball Necklace, DIY Button Earrings
Week Eight: Chalkboard Paint Ideas: Glasses, Chalkboard, Candle, Love Box
Week Nine: Frugal Finds
Week Ten: Personalized Pendants
Week Eleven: Edible Edition

Teaching Your Child to Break the Rules

In general, my kids are fairly good about following rules.
(Well, not really my rules, but your basic run-of-the-mill rules.)
Both of the big kids tend to get upset when they are even slightly chastised by a teacher.
(Once again, not so much when I chastise them, but you get the point.)

A few weeks into school, Lydia started having potty issues.
My child who potty trained easily and early.
The one who very rarely had accidents.
She would go down for nap time
And then empty the entire contents of her bladder while lying there wide awake on her cot.
And I do mean every single drop.
(The teacher had to move furniture and bring in the big mop and bucket.)

This happened several times within a matter of a few weeks.
I was baffled.

We asked her what was wrong.
We tried making her go potty at every available moment.
Her teacher was so wonderful about helping us figure out what the problem was.

In the end, we figured out that she was afraid to speak up.
They are told not to get up or talk during nap.
So, in her mind, she wasn’t even allowed to get up and ask to go potty.
Both her teacher and I tried over and over again to point out that if you need to go potty,
then you can get up and you can talk to the teacher!

We went over and over this until it finally sunk in.

Or so we thought.

{Fast-forward to today.}

Nap time is very near the end of school.
They have naps, then snacks and then pack up for home.

It was after they packed up and the bus riders left the room that the teacher noticed this:

“Lydia!  What happened to your face, babe?
Are those bug bites or what?
Come let me take a look at that.”

She crawled up into Mrs. H’s lap as Mrs. H investigated the mystery splotches.
Lydia confessed that Matthew* had pinched her multiple times during naptime.
(And obviously he pinched her pretty damn hard.)

(As a side note, Mrs. H felt horrible that she didn’t see it earlier
And that she didn’t have the opportunity to discuss it with Matthew, who was already on the bus.)

I feel so bad for my sweet girl.
She just lay there, getting the fool pinched out of her face without making a noise.
She didn’t get up.
She didn’t tell her teacher.
She didn’t even tell Matthew to stop.

My little rule follower.
My poor little rule follower.

It’s so hard to explain to her that there are exceptions to every rule.
When is it ok to break the rules?
When is is not ok to break the rules?

I think(at least I hope) we’ve covered all our bases for during naptime.
You must rest quietly unless you have to potty…
Or someone is hurting you in anyway…
Or if there is an emergency.

But I can’t come up with every scenario for every rule and go over it with her.
I can’t say that it’s never ok to go outside without telling me unless the house is on fire…
Or there is a stranger in the house…
Or something happens to Mommy and she needs help…

I cannot possibly imagine all the rules and all the exceptions to all the rules.
I cannot possibly even begin to explain all of this to her.
So how do I do it?
How do I teach my child when it’s ok to break the rules?
Somebody help me-
Before something worse than a few pinches on the face happens
And she silently lays there, following the rules.

*Not his real name

Siblings Sharing Spaces

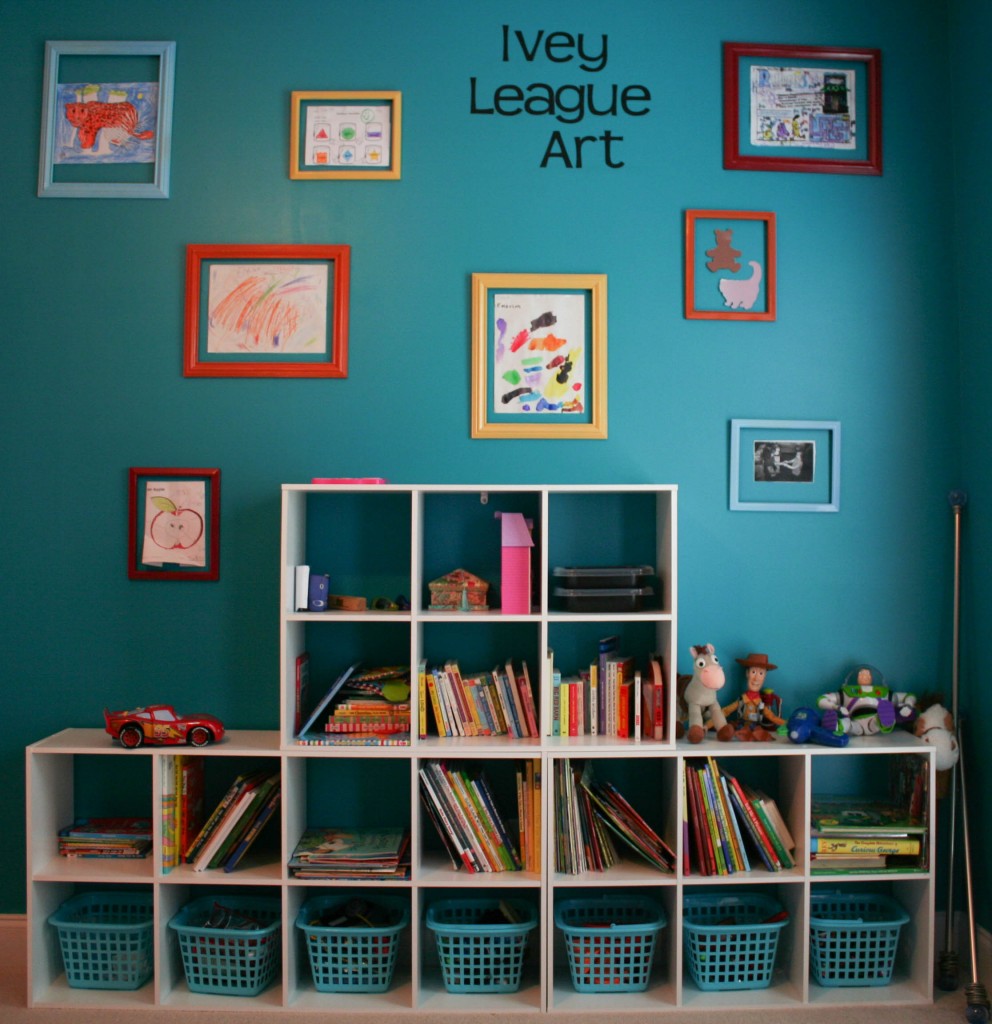
For roughly two weeks I have been working on a room re-do for the big kids. Carter and Lydia are now sharing a room.
Asa moved to Carter’s old room and Lydia’s empty room is waiting on a new occupant(arriving 2011).

To prep for the swap-a-roo, we took all the toys in the entire house and put them all in the living room.
Oh my holy mole, what a crap-load of toys!
Each kid got to pick his/her 10 favorite toys.
The rest were either sold at consignment or donated.
(And yet I still feel like I have toys coming out of my ears!)

We shipped the kids off to my in-laws during their fall break and my dad and I busted some major butt getting stuff done around here. I painted the bedroom and bathroom(not shown).

I assembled shelves for the massive amount of books we seem to have accumulated(and continue to accumulate).
And Marshall spray painted frames used for our own personal little art gallery.

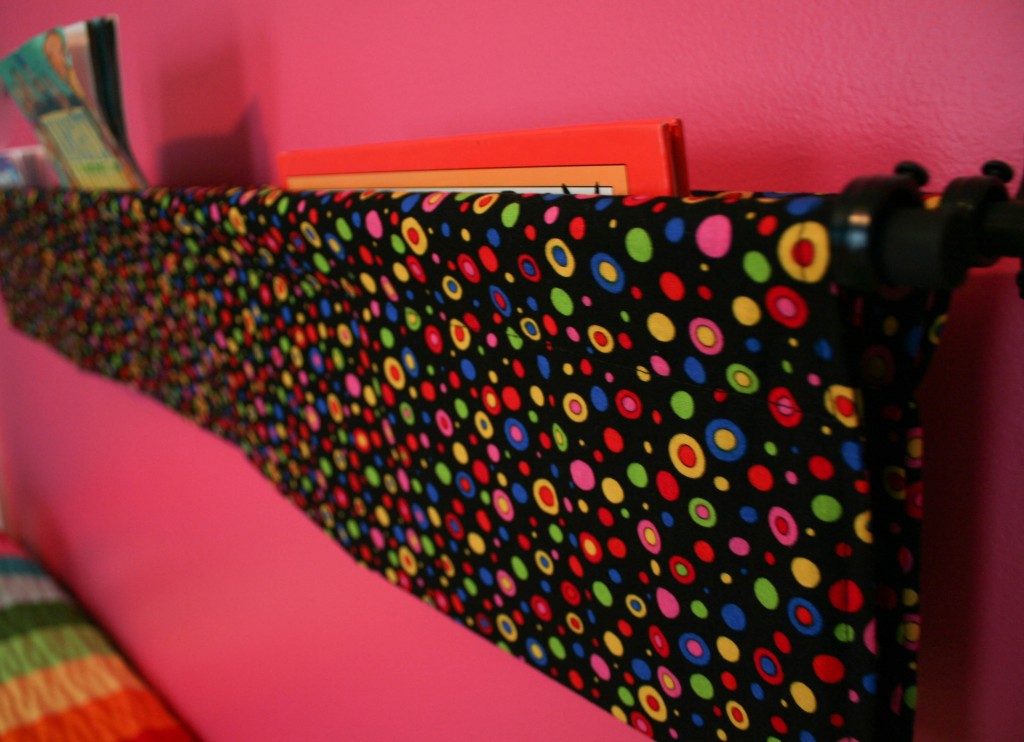
I made book slings for each of them and my own fabric wall art(you’ll be seeing more of this craft soon!)

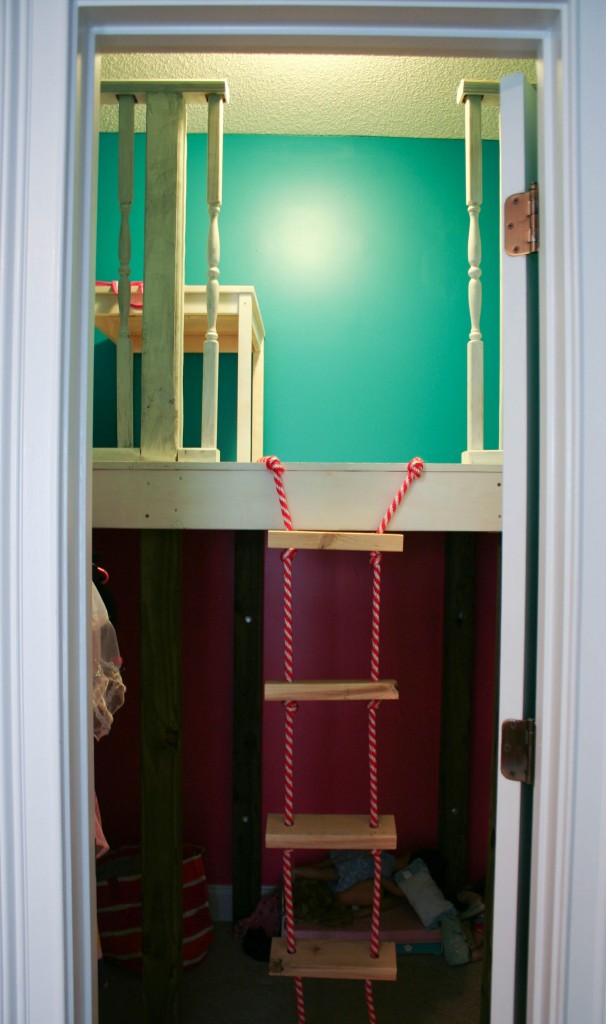
But the pièce de résistance is the play closet!

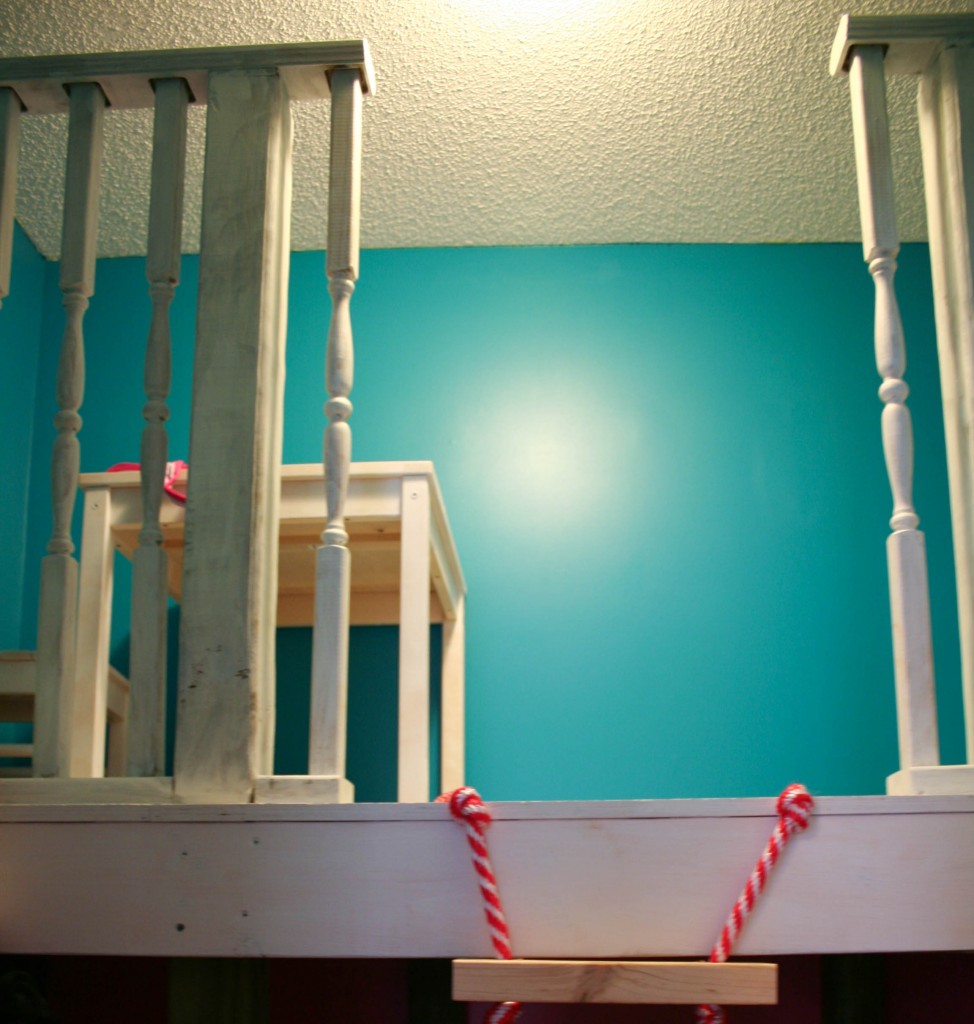
My dad spent countless hours designing and building a loft in there, complete with a rope ladder entry!
It is SO cool!
We originally planned on the top being a reading loft,
but after thinking about not wanting the baby up there(hence the rope ladder),
we decided to make it the art loft.
I’m currently in the process of moving all their art supplies up there.
They can create when they please without having to worry about spilling paint on the carpet or keeping Asa out of the way!

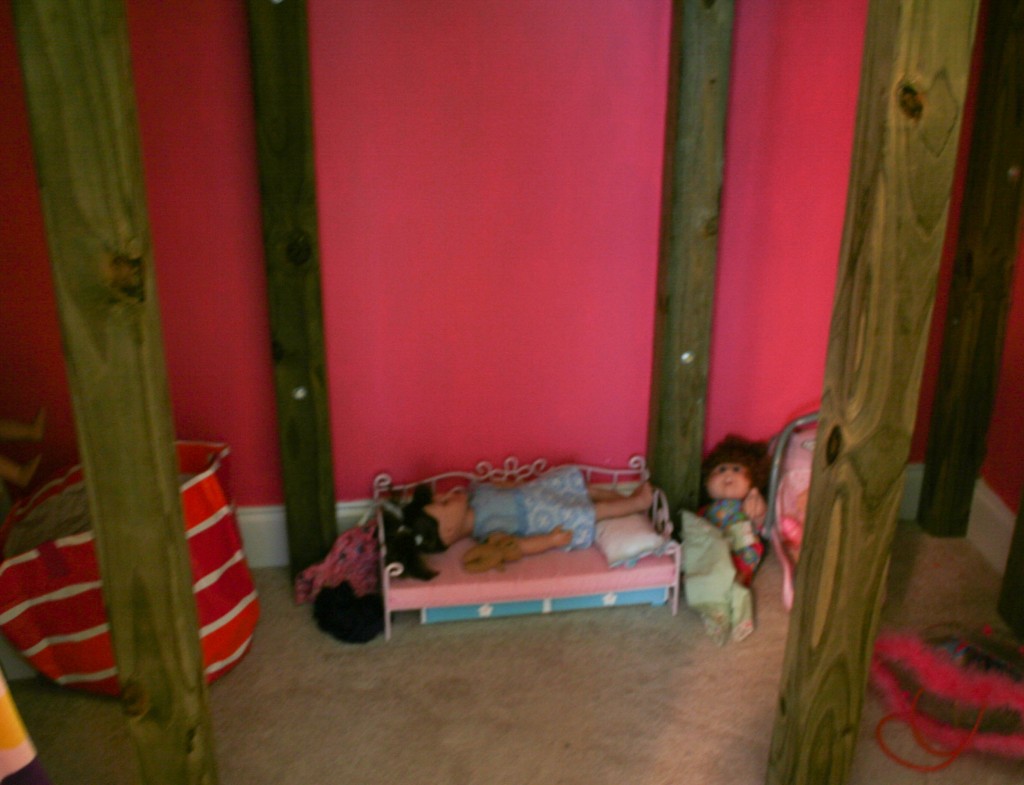
The “floor level” underneath the loft is a doll house with all of Lydia’s doll and doll accessories.

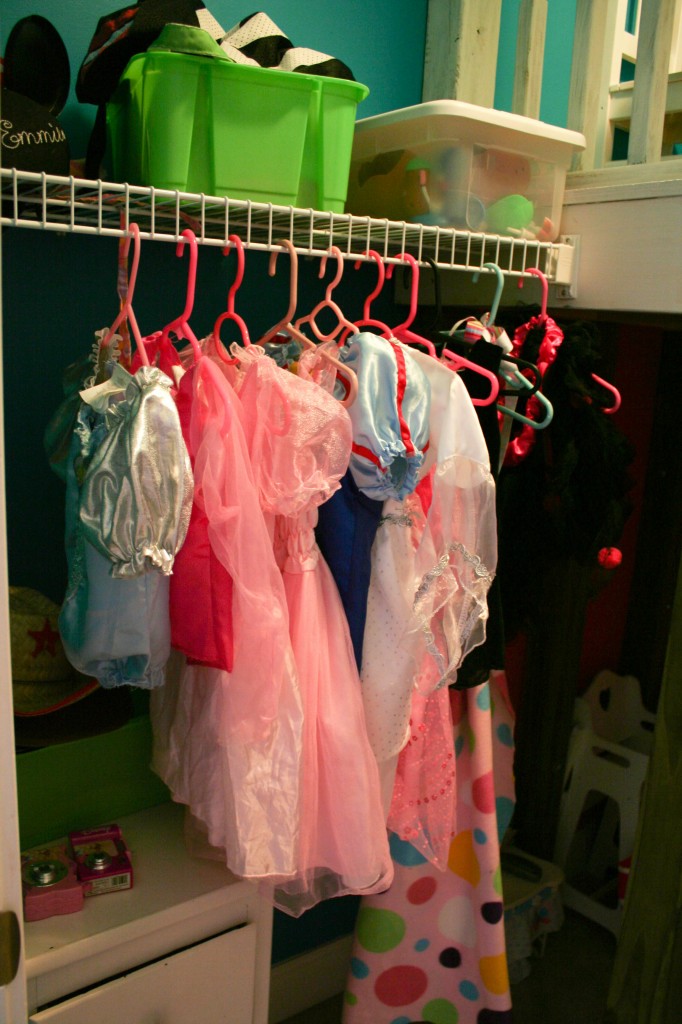
And hanging to the side are all of the dress-up clothes and accessories.
Carter has out-grown all the boy-ish ones, but still enjoys being a princess occasionally.
(Note to self: get more costumes at the post-Halloween sales!)

The kids are happy.
I am happy.
And I am shocked that we haven’t had more trouble getting them to go to sleep each night.
(They used to be really, really horrible about talking after lights out and that was my biggest fear about them sharing a room.)

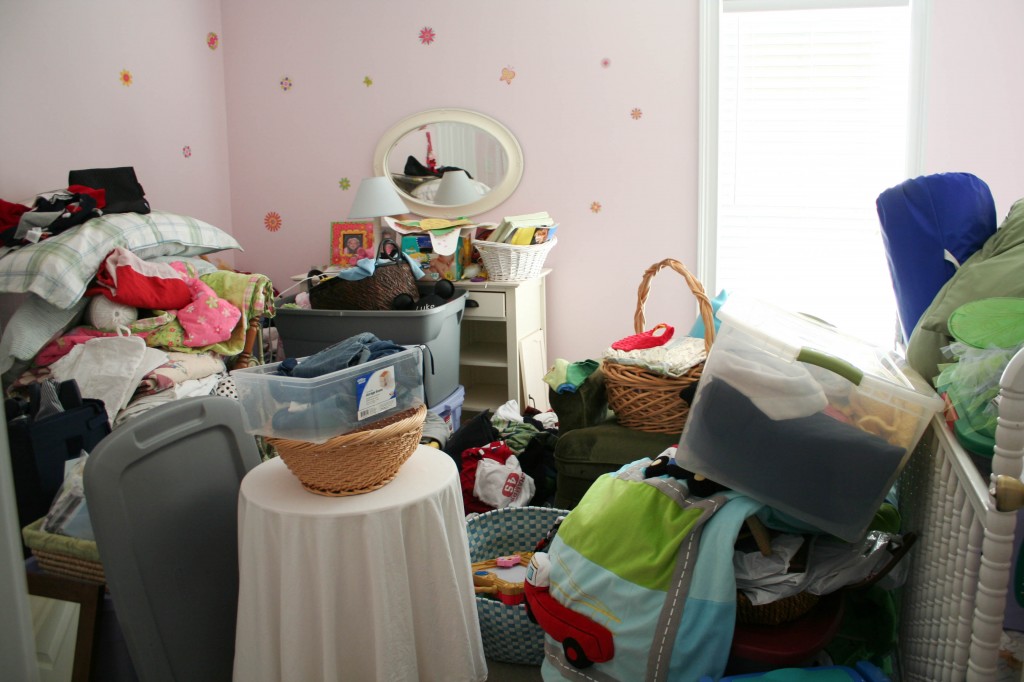
But now I’m exhausted and there are a billion things to get the new baby’s room done.

At least I don’t have to re-paint it!
But I guess I do have to at least clean out the crib!

KT Tunstall’s Tiger Suit{Review Post}

Have you ever picked up a book and read a chapter or two and just not gotten into it…
Then weeks later you sit down, read the same few chapters and then devoured the whole book in one sitting?

Have you ever watched a new show on TV and not instantly fallen in love with it…
But when you watched it again, you were sad to see the episode end?
(I was like that with both HIMYM and Glee!)

Well…KT Tunstall‘s new release Tiger Suit was like that for me.
I blame it on pregnancy hormones (but more than likely I’m just fickle).

The first time I popped the CD in, I wasn’t blown away.
But I was busy and my dad and I were working hard on the new room redo.
(Pictures of that tomorrow!!)

Later I moved the CD to my car and what a difference a day can make.
It happened to be one of those rare moments when I was child-free,
and I ended up doing that embarrassing full-body dance-n-drive thing.

This is definitely a dance-in-your-undies kind of album.
I simply cannot force myself to be still when I have it on.
(I have the head-bob-toe-tap thing going on right now, actually.)

A very eclectic sound, this album has a little flavor of every genre.
I couldn’t help but constantly relate it to some of my favorite CDs: The Grey’s Anatomy Soundtracks.

“Fade Like a Shadow” quickly became my favorite song on the album, but I was equally intrigued by “(Still A) Weirdo”.
And there are 9 other songs that you can’t help but enjoy.

1. Uummannaq Song
2. Glamour Puss
3. Push That Knot Away
4. Difficulty
5. Fade Like A Shadow
6. Lost
7. Golden Frames
8. Come On, Get In
9. (Still A) Weirdo
10. Madame Trudeaux
11. The Entertainer

Find KT on Twitter or Facebook or check out her videos on Youtube!


Note to readers and the FTC: I was provided with a free copy of KT Tunstall’s CD via the One 2 One Network, but all opinions are my own-unbiased and true.

12 Crafts of Christmas{Glass Etching}

One of my favorite gifts from a friend was a glass pitcher with my initials etched on the side.
I always assumed that glass etching was expensive or hard.
But really?  It’s neither!
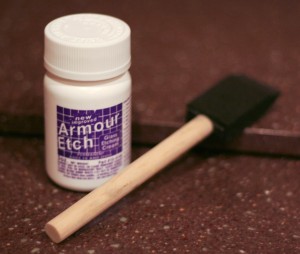
The most expensive part is buying the Armor Etching cream.
I found a small bottle at Michael’s for somewhere around $6.

For my mom’s birthday, I made a monogrammed trifle bowl.
I made a new pitcher for myself.
And although this would be significantly easier if I had a Silhouette or Cricut,
It’s still not too hard to do it all by hand.

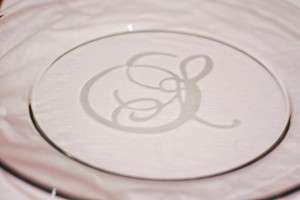
WHAT YOU NEED:  glass item(this project is a large glass serving plate), Armor Etching cream, paint brush, Con-Tact paper

First you’ll need to find a font you like and print out the thing you want to etch.
For this project, we’ll be doing just one letter in the center of a large serving plate.
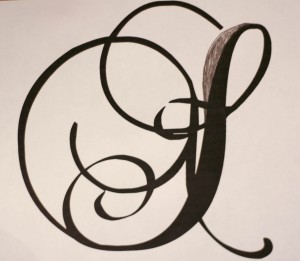
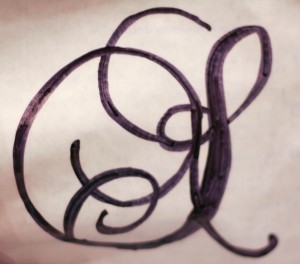
I liked this “S” but I didn’t like the one spot at the top, so I shaded it in with a pencil to make it like I wanted.

Then I traced it onto a piece of contact paper and cut it out.
Don’t forget that you are really just cutting out the black!
You’ll need to cut out and save all those little white pieces and throw away the black parts.

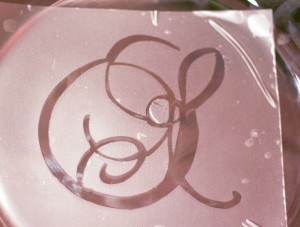
After that I cut out the stencil and carefully placed it in the center of the plate
(including all those little white pieces).

Now for the easy part.  Get out your etching cream and a paint brush.
I prefer to use the cheap foam ones.

Thickly spread the etching cream over the stencil.
(Warning!  It smells like rotten eggs!)
Remember that anywhere the cream touches, it will etch.
So only get the cream on the contact paper or the stencil, but not anywhere else on the item.

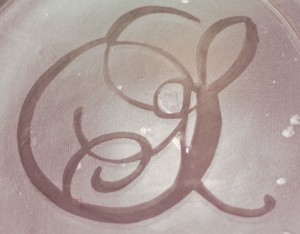
After 5 minutes or so, carefully wash off the cream and dry it off.

Peel off all the piece of the stencil and enjoy your new etched glass item!

There are SO many things other than plates that you make!
Decorative edges on a mirror, glass Christmas ornaments, jars, glasses, vases…
Oooh!  You could personalize your Pyrex dishes so that it always comes home from pot-luck dinners!

*******************
Want to see more of my crafty creations?

Check out the other 12 Crafts of Christmas:
Week One: Silhouettes
Week Two: Personalized Wall Clocks
Week Three: Glass Etching
Week Four: Fancy Fingerpaint Art
Week Five: Freezer Paper Stencils
Week Six:  Tie-Knot Fleece Blanket
Week Seven: Jewelry: Ribbon & Pearl Bracelet, Wool Ball Necklace, DIY Button Earrings
Week Eight: Chalkboard Paint Ideas: Glasses, Chalkboard, Candle, Love Box
Week Nine: Frugal Finds
Week Ten: Personalized Pendants
Week Eleven: Edible Edition